Pumpkin Scones with Spiced Pumpkin Glaze

This post may contain affiliate links. Read my full disclosure policy.
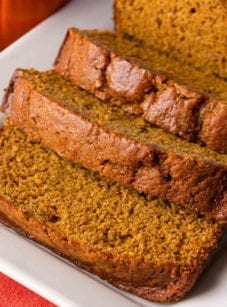
Inspired by Starbucks’ famous pumpkin scones, these breakfast treats are packed with pumpkin flavor.
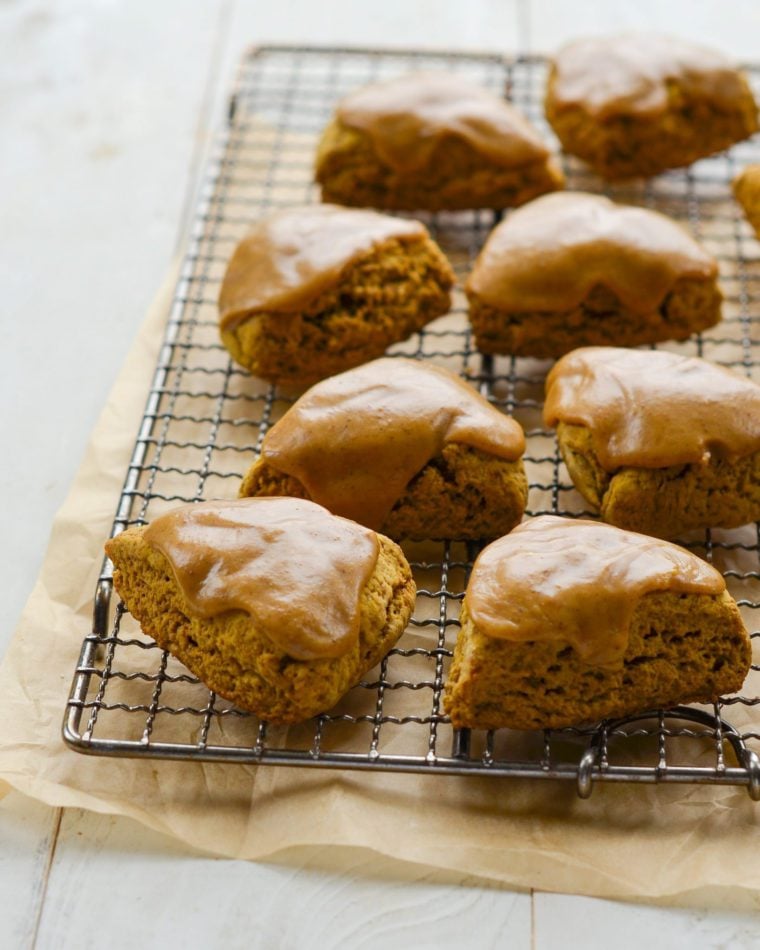
Inspired by Starbucks’ famous pumpkin scones (but better, if you ask me), this pumpkin scones recipe is packed with pumpkin flavor and perfectly spiced with cinnamon, ginger, cloves, and nutmeg. The addition of molasses and pumpkin makes them more tender than your typical cream scones—almost like pumpkin bread in scone form.
The spiced pumpkin glaze adds just the right amount of sweetness, complementing the lightly sweet scones and really enhancing the pumpkin flavor. Don’t be intimidated by the long ingredient list; it’s mostly spices, and many ingredients do double duty in the scones and the glaze.
If you love scones, check out my blueberry scones and butterscotch pecan scones for more flavors!
Table of Contents
“These are even better than Starbucks! The scones have amazing pumpkin pie flavor and are so light in texture!”
What You’ll Need To Make Pumpkin Scones
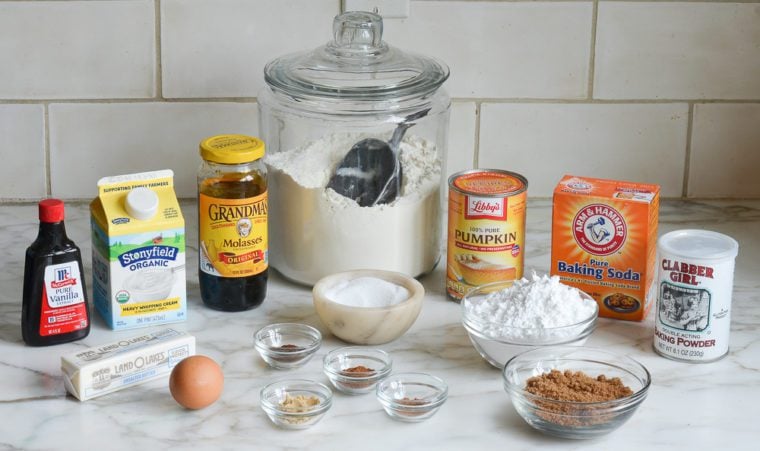
- Canned Pumpkin Purée: Provides moisture and pumpkin flavor. Make sure to purchase 100% pure pumpkin puree– not pumpkin pie filling.
- Egg: Adds richness and helps bind the scone ingredients together.
- Heavy Cream: Enhances moisture and the fat in heavy cream ensures a tender texture.
- Molasses: Adds depth and richness to the flavor profile. Avoid blackstrap molasses as it will add a bitter flavor to the scones.
- Vanilla Extract: Enhances the overall flavor.
- All-Purpose Flour: Provides structure to the scones. Measure it by spooning it into the measuring cup and leveling it off to ensure accuracy.
- Dark Brown Sugar: Adds sweetness and contributes to a moist texture.
- Baking Powder and Baking Soda: Act as leavening agents for rise and fluffiness.
- Spices: Ground cinnamon, ground ginger, ground cloves, and ground nutmeg add warm, spicy flavor notes characteristic of pumpkin spice treats. It’s fine to replace the spices in the scones and glaze with pumpkin pie spice, if you like.
- Confectioners’ Sugar: Provides sweetness and adds thickness to the glaze that tops the scones.
- Jump to the printable recipe for precise measurements
Step-by-Step Instructions
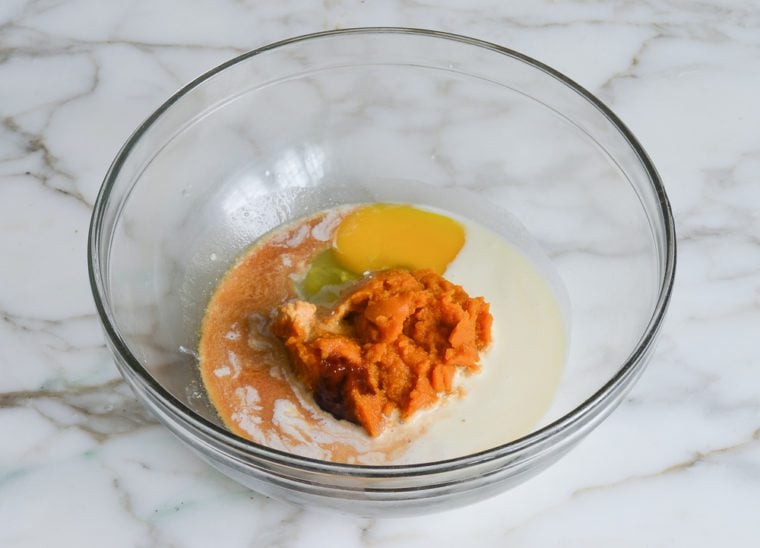
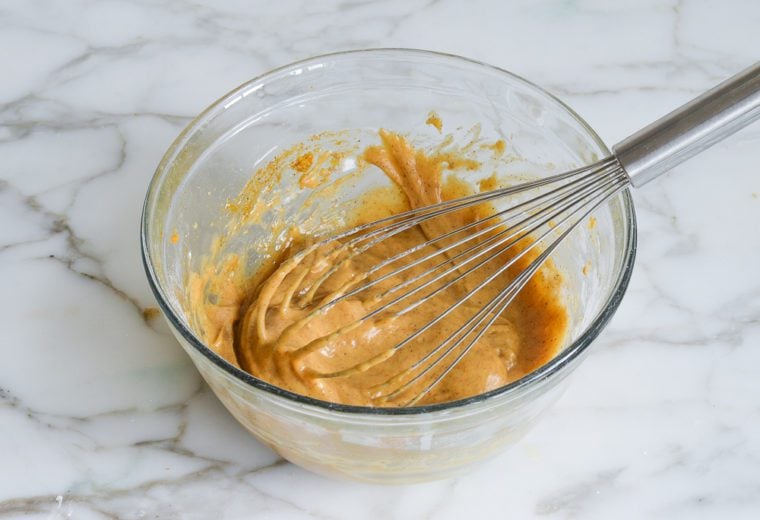
To begin, combine the pumpkin, heavy cream, egg, molasses, and vanilla in a medium bowl.
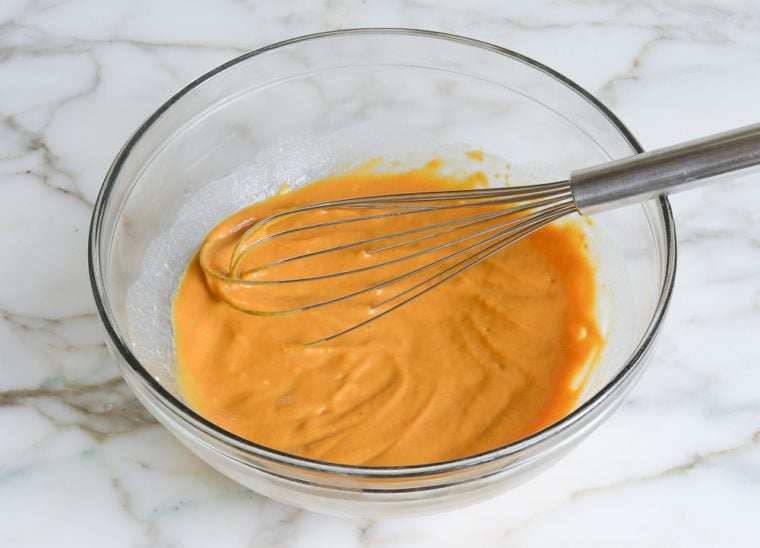
Whisk to combine and set aside.
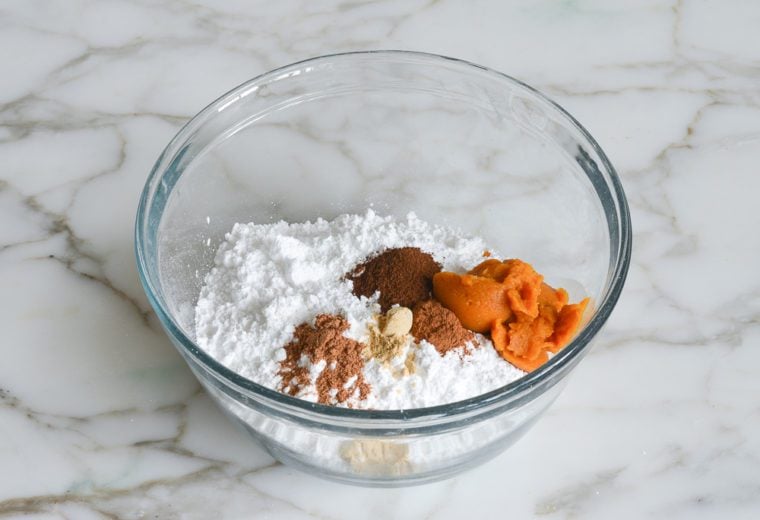
Combine the flour, brown sugar, baking powder, baking soda, salt and spices in the bowl of a food processor.
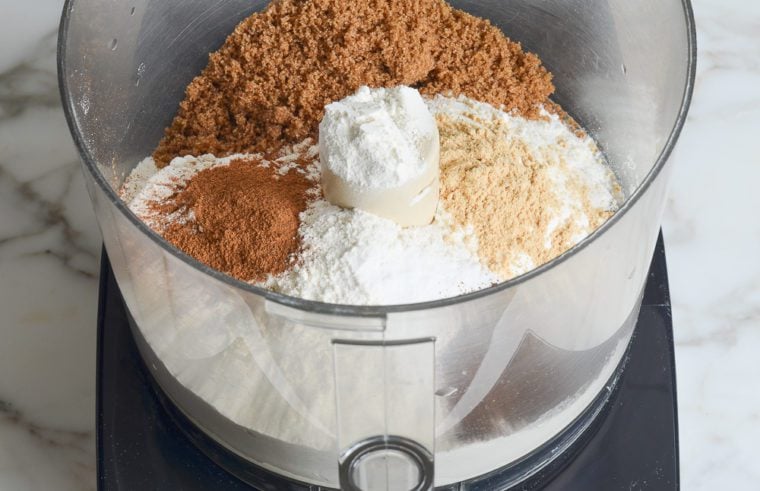
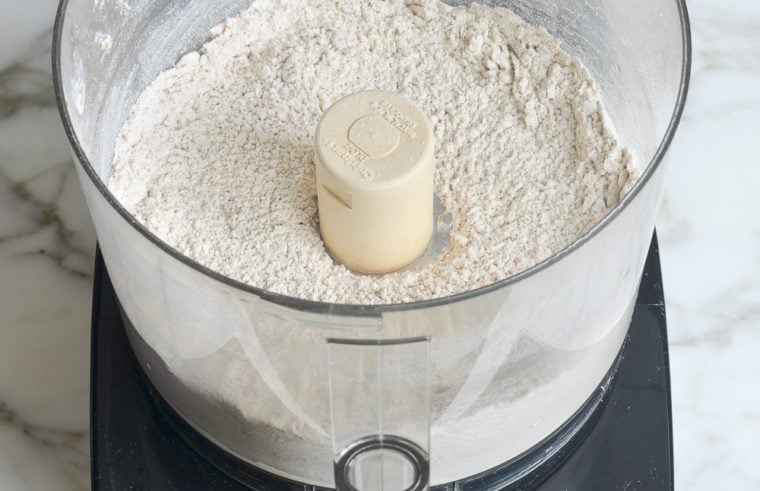
Pulse until evenly combined.
Add the small cubes of cold butter.
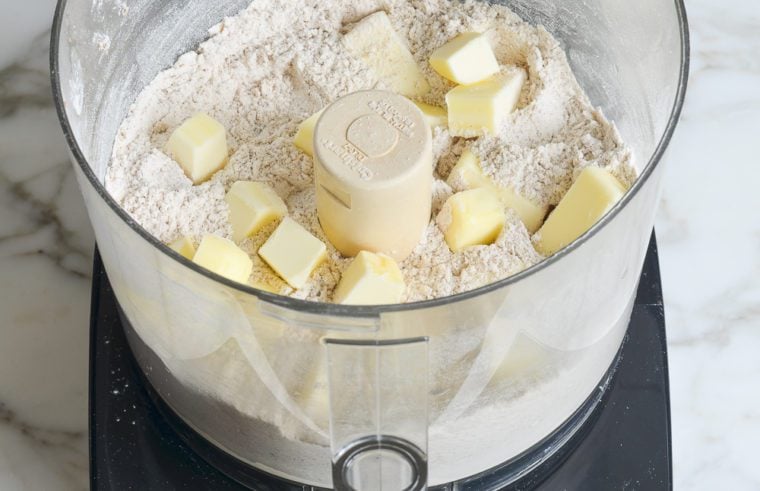
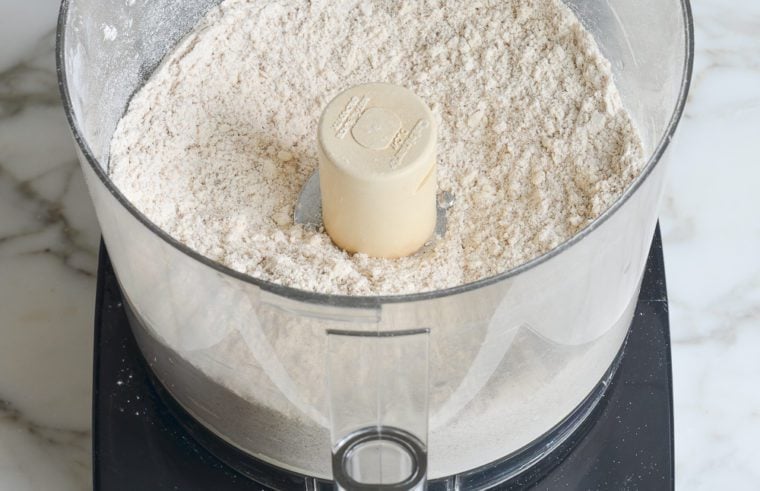
Pulse until the mixture resembles coarse meal with some pea-sized chunks of butter within. Those little chunks of butter are important and will render light and flaky scones.
Add the pumpkin mixture.
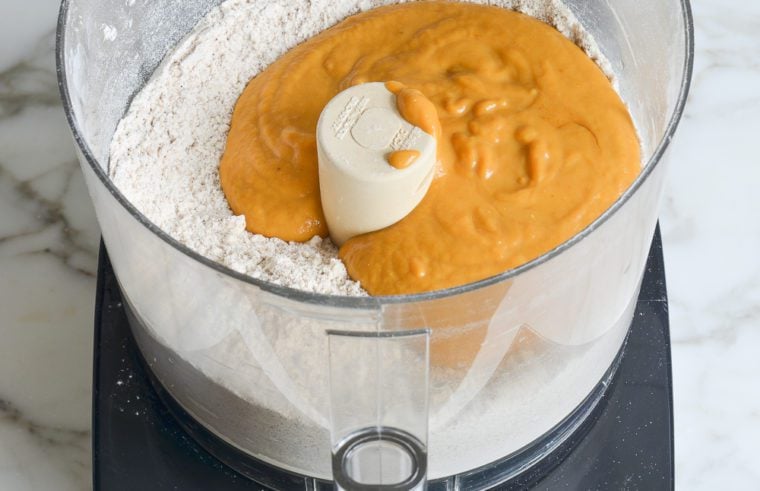
And pulse until the dough comes together. It will be sticky, and you should still be able to see some chunks of butter.
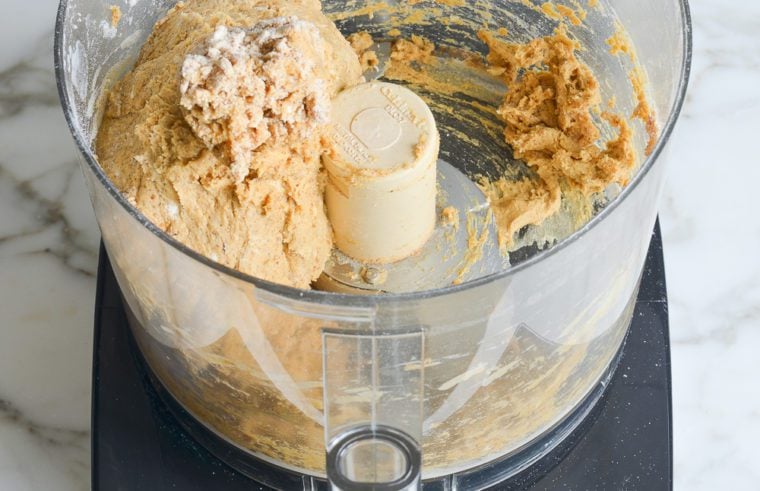
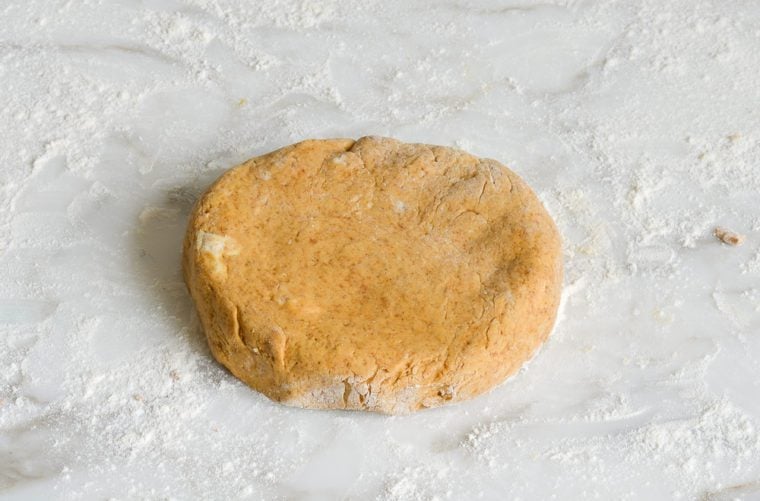
Dump the dough onto a lightly floured work surface, then dust the top of the dough with flour.
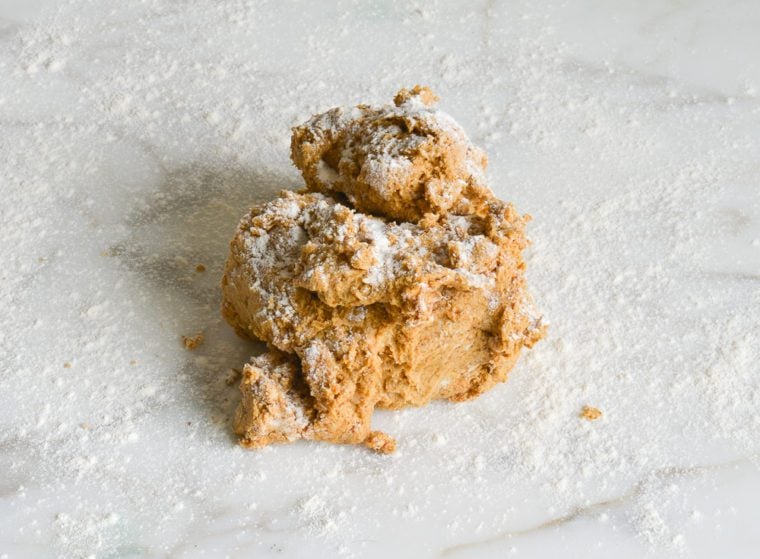
Gently knead the dough into a smooth ball, then divide in half.
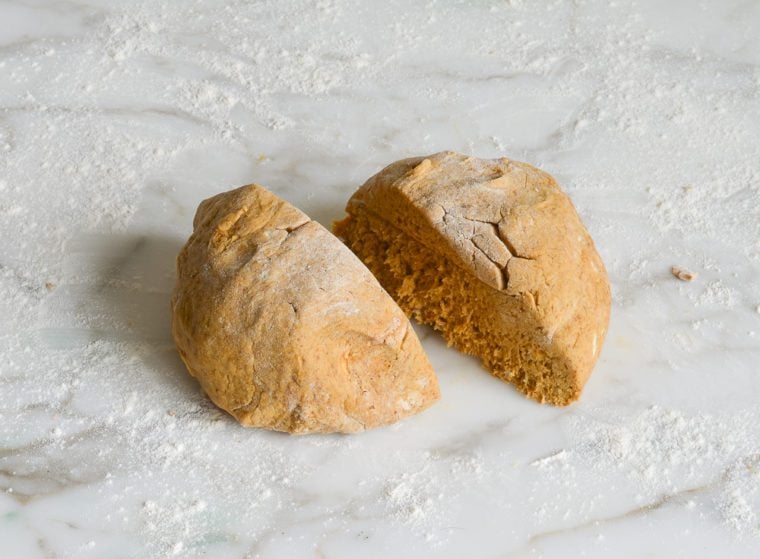
Form each half into 5-inch circles, about 3/4-inch thick.
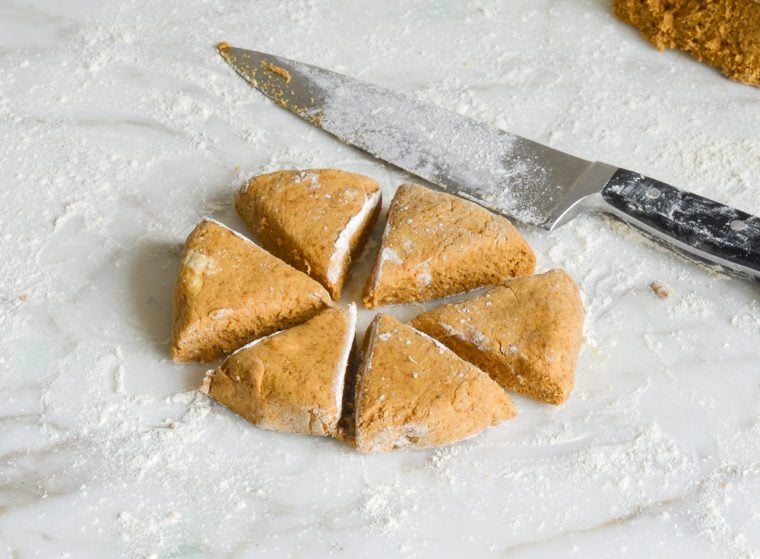
Cut each circle into six wedges.
Place the scones on a baking sheet lined with parchment paper.
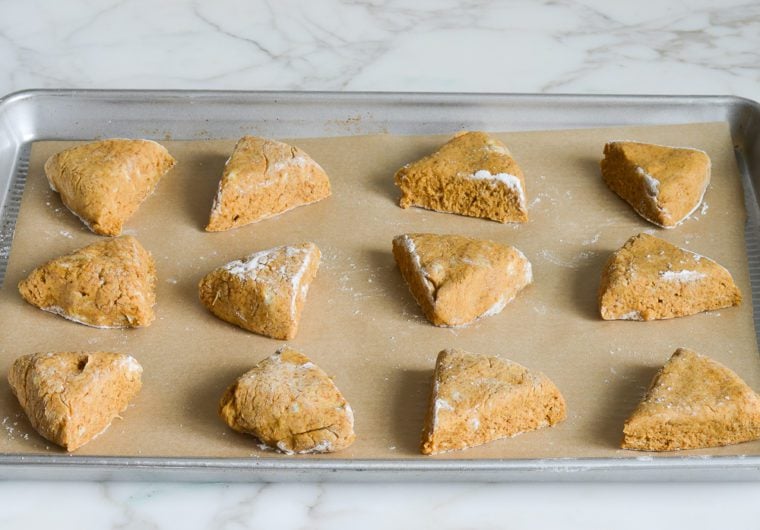
Bake for 12 to 15 minutes, or until golden.
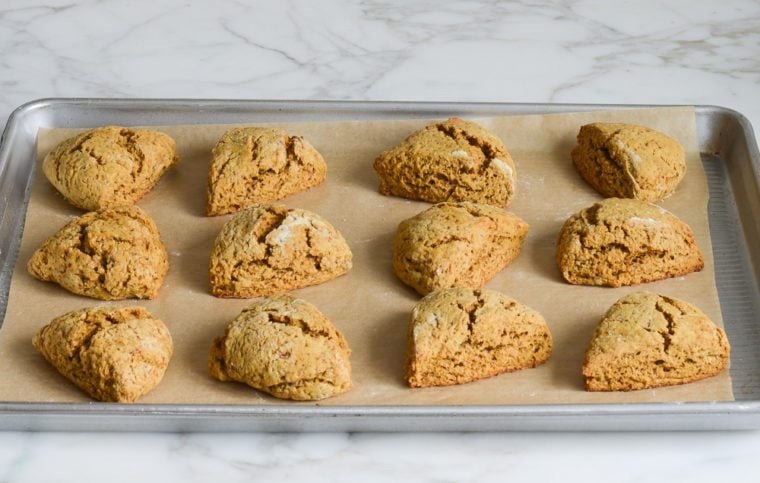
Remove from the oven and let cool for about 15 minutes on the baking sheet. Meanwhile, make the glaze: combine the confectioners’ sugar, pumpkin purée, water, and spices in a medium bowl.
Whisk until the glaze is smooth. It should be thick.
Spoon the glaze over top of the scones, letting it drip a bit down the sides.
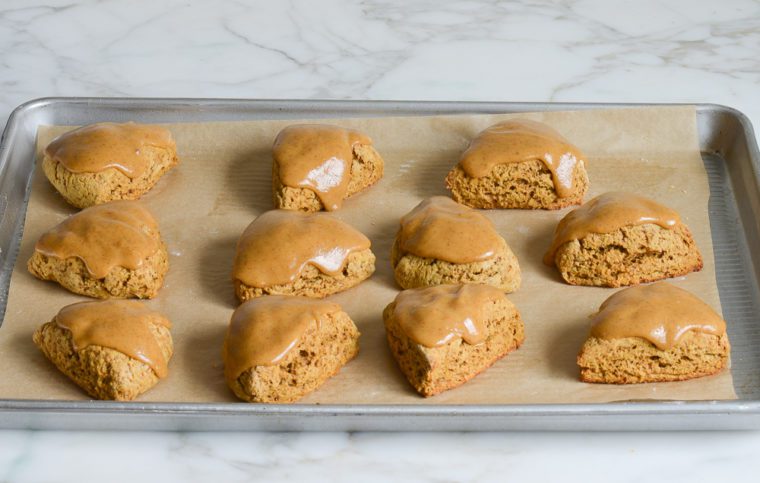
Let sit for about 30 minutes for the glaze to set, then serve.
Make-Ahead/Freezer-Friendly Instructions
Pumpkin scones are best served fresh on the day they are made but will keep well in a covered container for two days. The dough and the baked scones can also be frozen for up to 3 months. If freezing the dough, put the dough wedges on a baking sheet, let set in the freezer, then place in a sealable bag and press out as much air as possible. Bake as needed directly from the freezer, allowing a few extra minutes in the oven. To freeze them after baking, let the scones cool completely and store in an airtight container, separating layers with parchment paper or aluminum foil. Before serving, remove the scones from the container, let them come to room temperature, and glaze after defrosting. If you have the option to freeze the scones before or after baking them, you will get the best results if you freeze them before baking.
Frequently Asked Questions
Sure, although the mixture of spices in pumpkin pie spice is not an exact match (pumpkin pie spice sometimes includes allspice), it’s fine to replace the spices in the scones and glaze with pumpkin pie spice. Just replace the individual spices with an equal amount of pumpkin pie spice, so in this case, you’ll need 1 tablespoon for the scones and 1 teaspoon for the glaze.
Definitely! If canned pumpkin isn’t available where you live, or you’d just prefer to use fresh, that’s not a problem. For baking, the most flavorful pumpkins are smaller than those typically associated with Jack-O-Lanterns. They’re usually in the 4 to 8-pound range and are referred to as sugar, cooking, or pie pumpkins. This detailed piece from King Arthur Flour provides guidance on how to convert a whole pumpkin into purée that can be used in any of my pumpkin baked goods, pumpkin butter, or pumpkin soup.
Note: This scone portion of this recipe is based on a popular copycat recipe for Starbucks’ pumpkin scones that’s all over the Internet, but I’ve changed the method and recipe a bit. The Starbucks’ version has two thin glazes: plain and pumpkin. This version has a single thick pumpkin glaze, which is easier to make and packs much more pumpkin flavor.
You May Also Like
Pumpkin Scones with Spiced Pumpkin Glaze
Inspired by Starbucks’ famous pumpkin scones, these breakfast treats are packed with pumpkin flavor.
Ingredients
For the Scones
- ½ cup canned pumpkin purée (I use Libby's)
- 1 large egg
- 3 tablespoons heavy cream
- 1 tablespoon molasses, such as Grandma's Original
- 2 teaspoons vanilla extract
- 2 cups all purpose flour, spooned into measuring cup and leveled-off with knife, plus more for dusting
- ¼ cup plus 2 tablespoons dark brown sugar
- 1 teaspoon baking powder
- ½ teaspoon baking soda
- ½ teaspoon salt
- 1 teaspoon ground cinnamon
- ¾ teaspoon ground ginger
- ¾ teaspoon ground cloves
- ½ teaspoon ground nutmeg
- 1 stick (½ cup) cold unsalted butter
For the Glaze
- 1½ cups Confectioners' sugar
- 3 tablespoons canned pumpkin purée
- 1 tablespoon water
- ¼ teaspoon ground cinnamon
- ¼ teaspoon ground ginger
- ¼ teaspoon ground cloves
- ¼ teaspoon ground nutmeg
Instructions
- Preheat the oven to 400°F. Line a baking sheet with parchment paper.
- In a medium bowl, whisk together the pumpkin, egg, heavy cream, molasses, and vanilla. Set aside.
- In the bowl of a food processor fitted with the blade attachment, combine the flour, brown sugar, baking powder, baking soda, salt, and spices. Process for about 20 seconds to combine; be sure no lumps of brown sugar remain.
- Cut the cold butter into ½-inch chunks. Add to the food processor and pulse until the mixture resembles coarse meal – it should look unevenly crumbly with some pea-size chunks of butter within. Add the pumpkin mixture and pulse just until the mixture comes together. The dough will be very sticky, and you should still be able to see some pea-size clumps of butter.
- Lightly flour a countertop or work surface. Dump the sticky scone dough onto the floured surface and dust the top lightly with more flour. Using your hands, gently knead the dough until it comes together into a smooth ball. Divide the dough in half. Dust your work surface with flour again and form each half into a 5-inch circle, about ¾-inch thick. Using a sharp knife dusted with flour, slice each circle into 6 even wedges (cut each circle in half, then cut each half into thirds). If the dough starts to stick to the knife, dust the knife with more flour. Place the wedges on the prepared baking sheet.
- Bake the scones for 12 to 15 minutes. To see if they are done, peek at the bottoms; they should be slightly browned. Let the scones cool on the baking sheet for about 15 minutes.
- Meanwhile, make the glaze: In a medium bowl, whisk together the Confectioners' sugar, pumpkin, water, cinnamon, ginger, cloves, and nutmeg until smooth. The glaze should be thick.
- Spoon about 1 tablespoon of the glaze over each scone, letting it drip a bit down the sides. Wait about 30 minutes for the glaze to set, then serve.
- Note: The scones are best served fresh on the day they are made but will keep well in a covered container for two days.
- Freezer-Friendly Instructions: The dough can be frozen for up to 3 months. Put the dough wedges on a baking sheet, let set in the freezer, then place in a sealable bag and press out as much air as possible. Bake as needed directly from the freezer. (Allow 1 to 2 minutes longer in the oven.) To freeze after baking, let the scones cool completely and store in an airtight container, separating layers with parchment paper or aluminum foil. Before serving, remove the scones from the container and let them come to room temperature. (For best results, glaze after defrosting.) **If you have the option to freeze the scones before or after baking them, you will get the best results if you freeze them before baking.
Nutrition Information
Powered by ![]()
- Serving size: 1 scone
- Calories: 261
- Fat: 10g
- Saturated fat: 6g
- Carbohydrates: 41g
- Sugar: 23g
- Fiber: 1g
- Protein: 3g
- Sodium: 193mg
- Cholesterol: 41mg
This website is written and produced for informational purposes only. I am not a certified nutritionist and the nutritional data on this site has not been evaluated or approved by a nutritionist or the Food and Drug Administration. Nutritional information is offered as a courtesy and should not be construed as a guarantee. The data is calculated through an online nutritional calculator, Edamam.com. Although I do my best to provide accurate nutritional information, these figures should be considered estimates only. Varying factors such as product types or brands purchased, natural fluctuations in fresh produce, and the way ingredients are processed change the effective nutritional information in any given recipe. Furthermore, different online calculators provide different results depending on their own nutrition fact sources and algorithms. To obtain the most accurate nutritional information in a given recipe, you should calculate the nutritional information with the actual ingredients used in your recipe, using your preferred nutrition calculator.
Absolutely amazing and sooo easy! My family loved them, even picky kids! I’m super pleased with this reciepe. Definitely a keeper 🙂
Hi Jenn,
These are delicious and I have made them twice already. I have several gluten free friends and would like to make a batch that is gluten free for them. Would almond flour be ok or would you recommend something else. You can tell I am not gluten free….I need advice from the expert!
thanks so much.
Hi Peggy, Glad you like them! I wouldn’t recommend almond flour here, but a gluten-free flour should work. A number of readers have commented that they have good luck with King Arthur gluten-free flour. Please LMK how they turn out if you try it!
These look amazing. Would making them with homemade pumpkin purée work? What’s the best way to make pumpkin purée for baked goods? I live in Australia and it’s almost impossible to find canned pumpkin purée. Thank you
Hi Minka, Many readers have commented that they’ve used fresh pumpkin here successfully. You’ll need 1-3/4 cups. Just make sure to drain it of excess water so that the consistency is similar to that of canned pumpkin. Here’s some guidance on how to make pumpkin puree. Hope that helps!
I’ve made these scones probably 10+ times now. They’re amazing!! It’s October again, so I’m hopping on here for another go around with these. Thanks for this go-to recipe!!
My husband made me these for my birthday and they were delicious! He made the glaze a little runny but we just used it as dip like “au jus.” The taste reminded me a bit of gingerbread. I ate a LOT of them! 🙂 Saving these for future birthdays!
Delicious! Second time making scones, and they came out perfect. Many of my family said that this was the best scone they ever had. Thank you!
I don’t have a food processor will a kitchen aid mixer work? any tips?
Also, I love the new cookbook. I have enjoyed about 10 recipes so far. I love the ziti!
Do you have any scone recipes that are savory? Could I use your basic scone recipe and add chives and Gruyere, basil and Parmesan, tomato and basil??? Have a great day!! gmawelsh@gmail.com
Hi Laurie, So glad you’re enjoying the cookbook! I wouldn’t recommend a mixer for the scones. You can make the dough by hand though; mix the dry ingredients with your fingers (be sure there are no lumps of brown sugar), use a pastry cutter or two butter knives to “cut in” the butter, then stir in the wet ingredients with a spoon.
And I do have a savory scone recipe on page 234 of my first cookbook. If you don’t have the book, let me know — I’d be happy to email you the recipe. 🙂
Can I make these with a bread maker machine? I also have a vitamix blender but I do not have a food processor. I also have a KitchenAid with a dough hook.
Hi Chase, I wouldn’t recommend a bread maker, blender, or mixer, you can make the dough by hand. Mix the dry ingredients with your fingers (be sure there are no lumps of brown sugar), use a pastry cutter or two butter knives to “cut in” the butter, then stir in the wet ingredients with a spoon. Hope you enjoy!
Hi Jenn!
I’ve never made a recipe that was absolutely perfect, until now! I’m a huge fan of Starbucks Pumpkin Scones and yours are better! I agree that your glaze elevates the flavor. Just 13 mins in the oven resulted in delightful, moist and delicious scones, even without the glaze. But with the glaze, they are absolute heaven! Can’t wait to try some of your other recipes and THANK YOU! They were exactly what I was craving and everyone I shared them with thought they were “To Die For” good!
Hi Jenn,
I am planning on making these for a school breakfast event. Would these still be good if I made them a day ahead? And each one would have to be wrapped individually. Will the glaze dry overnight so that they can be put in a cellophane or paper bag without ruining the glaze?
Thanks!
Hi Faith, these are best the day they are baked but they will last nicely for a day or two. And the glaze is a little sticky so you’ll just want to consider that when packaging them. Hope that helps!
Hi Jenn,
Thanks for getting back to me! I did a trial run this weekend. I made the dough last night. I kneaded very gently, divided the dough as directed and wrapped one circle of dough in plastic wrap. For the other circle, I added 1/8 cup of flour to see if it would make the texture more dense and I kneaded it a little more. I put both circles of wrapped dough in the fridge over night. I figured the evening prep would cut the time I would need to make three dozens on the morning of the breakfast event (you said they’re best on the day that they are baked, so I’m going with the expert!). It was easy to cut both circles of cold dough. I did a taste test on my family. They all said that the original recipe tasted better than the one with extra flour. Also, since I’m not a fan of pumpkin, I have never had the Starbucks scone, so I bought one to compare. The Starbucks one also has a cake-like texture, except yours came out softer and did not have that hard super-sweet shell of a glaze on top. My husband is a fan of all things pumpkin and he said that the pumpkin glaze from your recipe is a must! The only thing I’m not sure about is why my scones seemed to rise more than yours. Maybe I mixed it too much in the food processor. Anyway, thanks for another great recipe!
Just wanted to clarify, my scones puffed up and seemed too “tall” to bite into without looking silly. They didn’t look as pretty as your pictures and even cracked on top. But still delicious!
Love the recipe it’s so easy! My only adjustment would be the frosting 3 tablespoons of pumpkin purée stops the frosting from hardening so I add less. The scones were very sticky until I used less pumpkin purée on top. Other then that they taste amazing every time! Better then Starbucks! Thank you now I can make them at home. I usually make these starting mid September all through the holidays!