Perfect Pumpkin Pie
This post may contain affiliate links. Read my full disclosure policy.
Make the perfect pumpkin pie with a buttery, flaky crust and a smooth, crack-free filling. It’s the ultimate holiday dessert!

Pumpkin pie is a holiday classic, and when it’s done right, it’s as comforting as dessert gets—a smooth, warmly-spiced filling in a flaky, buttery crust. But for such a seemingly simple dessert, pumpkin pie can be tricky to get just right. Over the years, I’ve tested at least a dozen recipes, and I’ve run into every pitfall: fillings that won’t set, unsightly cracks, and soggy crusts. Whoever coined the term “easy as pie” had clearly never baked a pumpkin pie!
Part of the challenge lies in the many variables. The type of pan you use—ceramic, glass, or metal—makes a big difference in how the pie bakes. Then there’s the pie crust—no two homemade crusts behave exactly the same. And finally, like cheesecake or flan, pumpkin pie is a custard, which means you need to pull it from the oven while it’s still a little jiggly. Take it out too early and it won’t set; leave it in too long and it’ll crack. Sometimes, even perfect timing can’t prevent that dreaded crack!
But after years of testing, I’ve cracked the code. This pumpkin pie recipe is perfect in all the ways that matter: a buttery, flaky crust, a smooth, rich filling, and no unsightly cracks. It’s everything a pumpkin pie should be—and it’s easier than you’d think.
Table of Contents
“I’ve been baking pumpkin pie for what seems like an eternity. The custard always cracks. Not this time. And, not only does the the pie look great, its absolutely delicious! Thank you.”
What You’ll Need To Make Homemade Pumpkin Pie
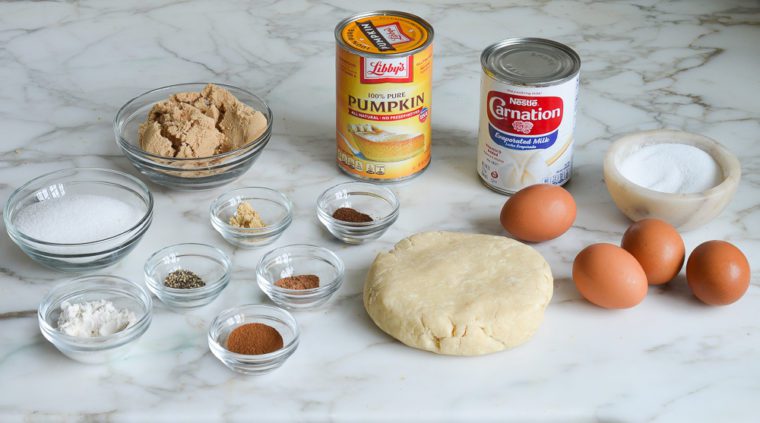
- Pie Crust – The flaky, buttery base for the pumpkin filling; use homemade pie crust or store-bought—whichever you prefer. If you’re going with store-bought, opt for the frozen kind in an aluminum pie pan—it’s easier to blind bake and less likely to shrink.
- Pumpkin – The star of the show, adding rich, earthy flavor and a smooth texture. For the best results, go with Libby’s canned pumpkin puree.
- Egg & egg yolks – The whole egg binds the filling, while the yolks bring extra richness and a silky texture.
- Granulated sugar – Adds sweetness and helps balance the warm spices.
- Light brown sugar – Adds a deeper, molasses-like sweetness that complements the pumpkin.
- All-purpose flour – Slightly thickens and stabilizes the filling to prevent unsightly cracks.
- Salt – Enhances all the flavors and keeps the sweetness in check.
- Spices (ground cinnamon, ginger, nutmeg, cloves, black pepper) – This classic pumpkin pie spice blend gives the dessert its warm, signature flavor, with just a hint of heat from the black pepper.
- Evaporated milk – Makes the filling creamy and smooth, giving the pie a luscious, velvety texture.
- Jump to the printable recipe for precise measurements
Step-By-Step Instructions
Step 1: Blind Bake The Pie Crust
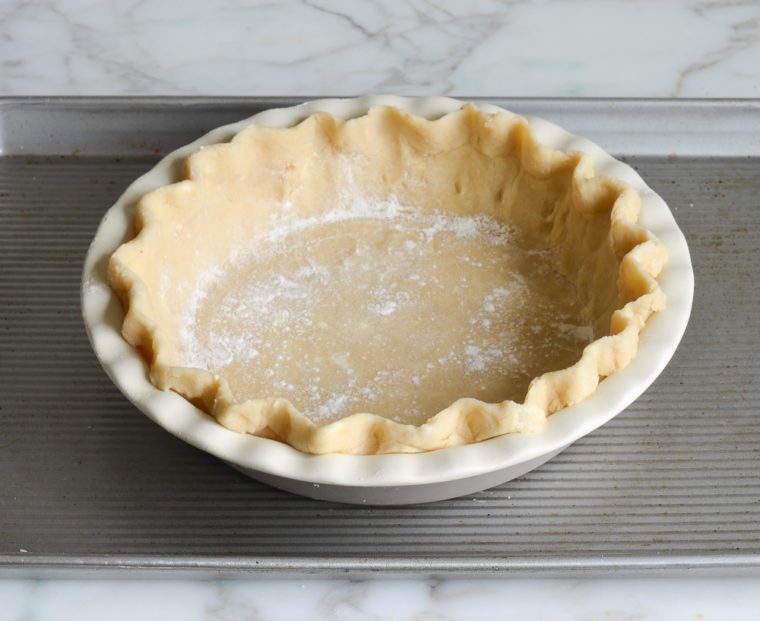
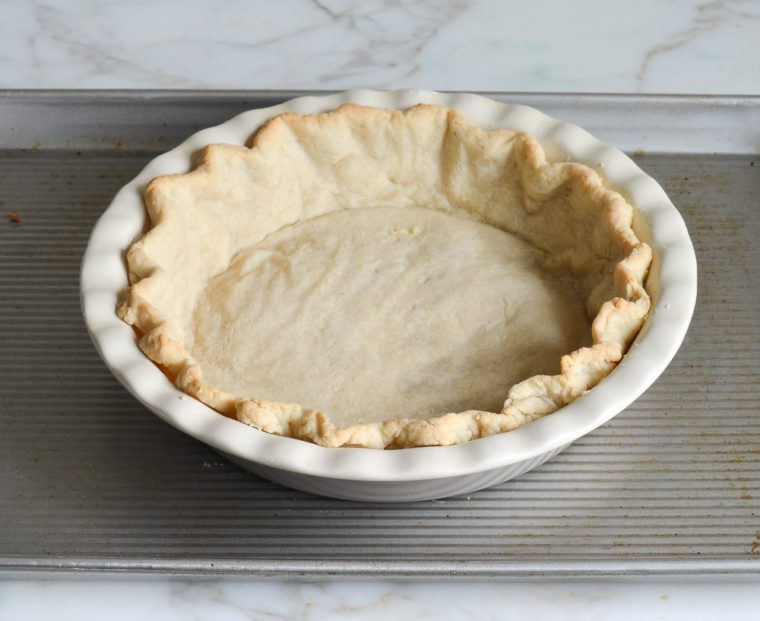
If using a store-bought crust, simply follow the blind-baking instructions on the package. If using a homemade pie dough, roll it out with a rolling pin and fit it snugly into a 9-inch deep-dish pie dish, then chill for at least 30 minutes. Meanwhile, preheat the oven to 375°F. Remove the pie crust from the refrigerator and place it on a baking sheet (this makes it easy to move in and out of the oven).
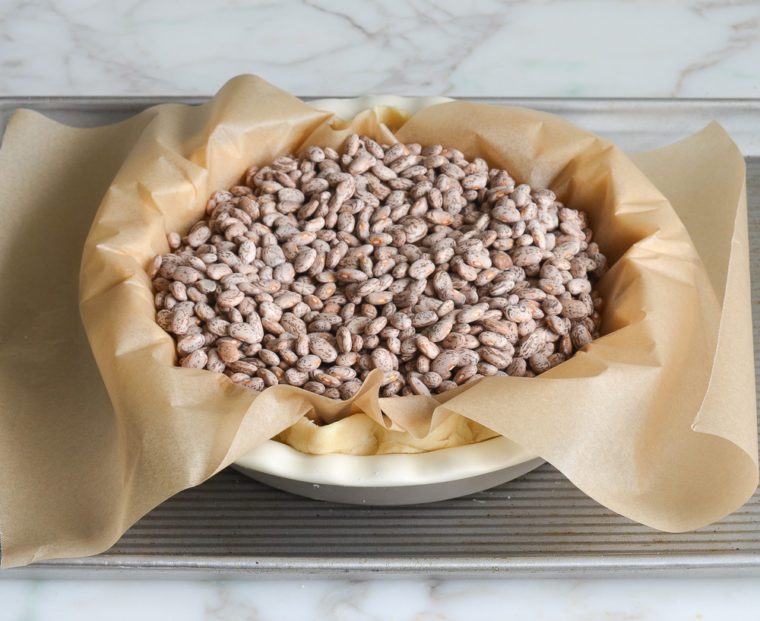
Cover the crust with a piece of parchment paper and fill it about three-quarters full with dried beans or pie weights.
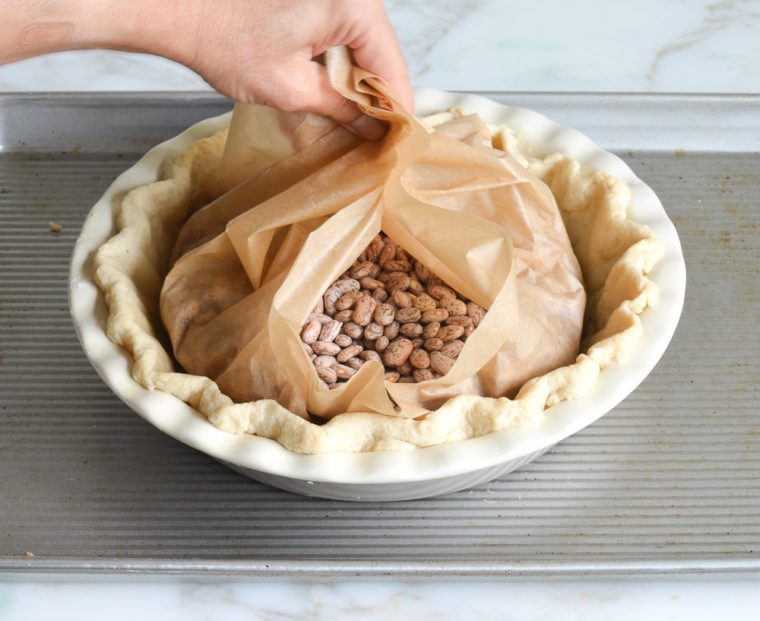
Bake for 20 minutes. Take the crust out of the oven and remove the parchment paper and beans/pie weights.
Bake for another 15 to 20 minutes, until the dough is dry and golden. Don’t worry if the bottom puffs up; just press it down gently with a flat spatula, taking care not to puncture it. Reduce the oven temperature to 325°F.
Step 3: Make The Filling
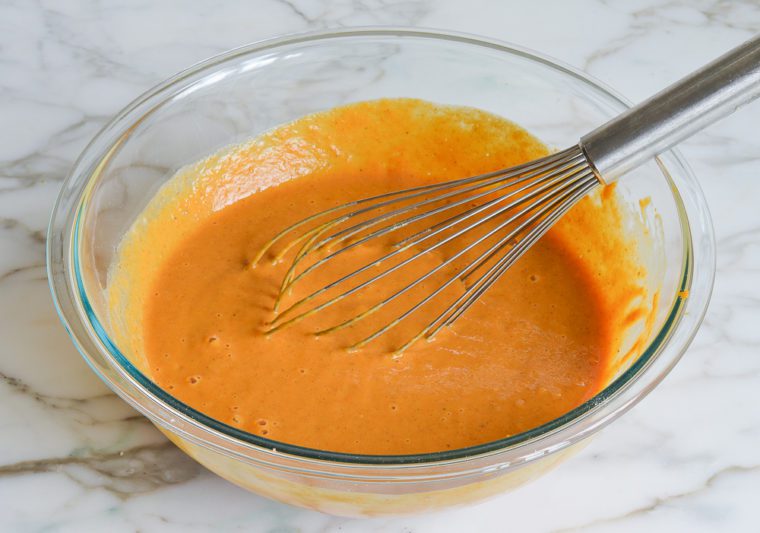
While the crust finishes cooking, combine the pumpkin pie filling ingredients in a large bowl.
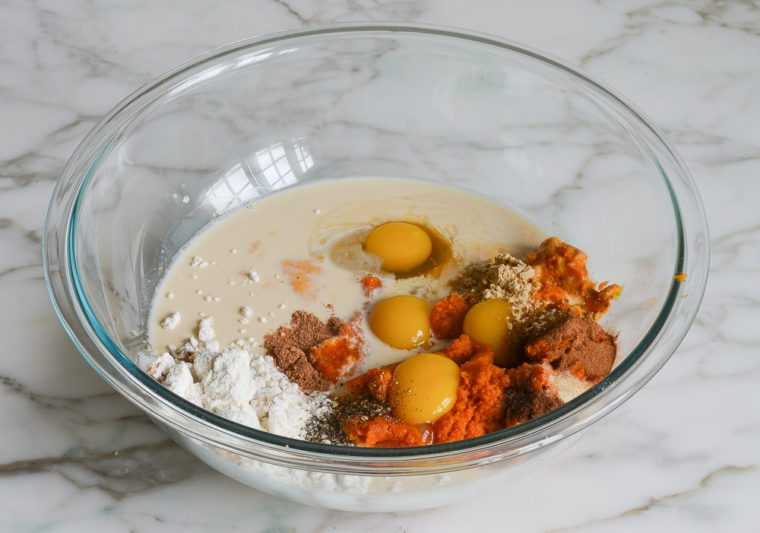
Whisk until the mixture is smooth.
Step 4: Bake the Pumpkin Pie
Pour the filling into the pre-baked crust.
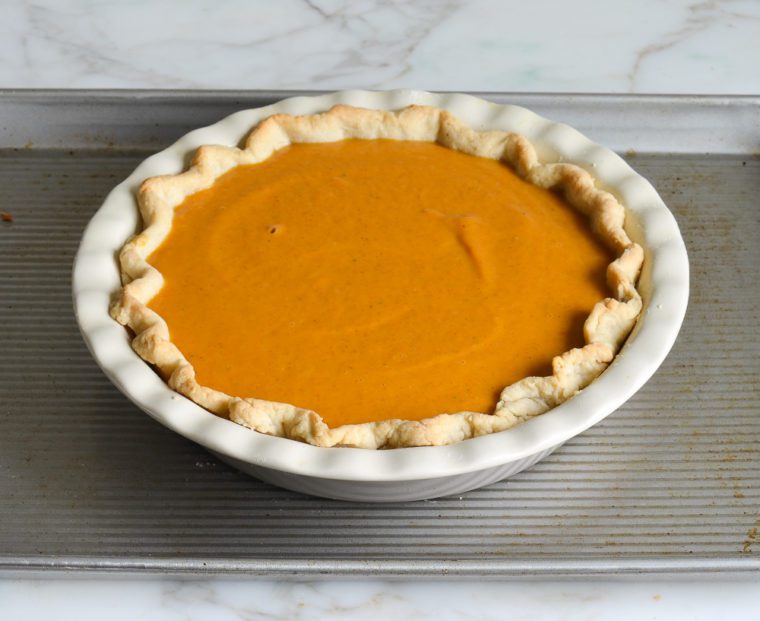
Bake the pie for 50 to 60 minutes, until the filling is just set. It should look dry around the edges and the center should jiggle just slightly if you nudge the pan. The pie will look a little puffed when it comes out of the oven, but it will settle as it cools.
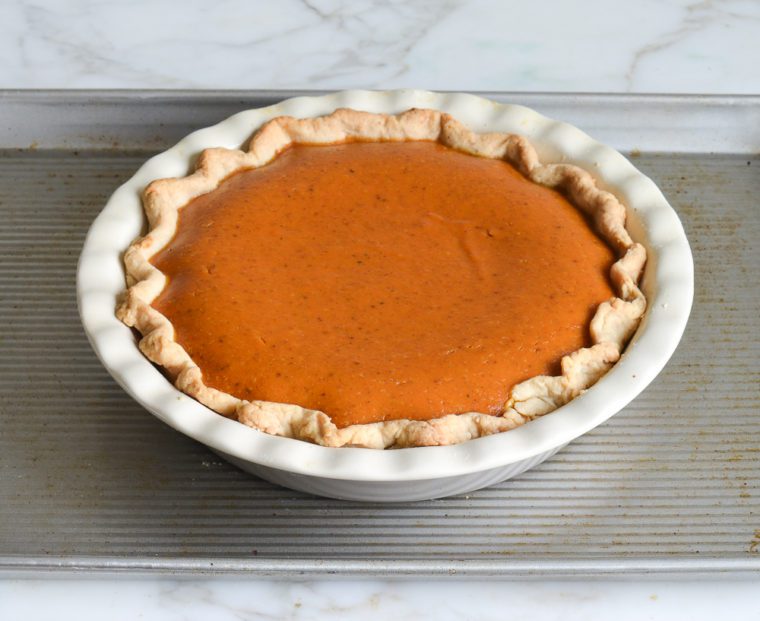
Cool the pie on a wire rack (leave it on the baking sheet) to room temperature, a few hours. Slice or refrigerate until ready to serve. Enjoy!

Video Tutorial
You May Also Like
Perfect Pumpkin Pie
Make the perfect pumpkin pie with a buttery, flaky crust and a smooth, crack-free filling. It’s the ultimate holiday dessert!
Ingredients
- 1 homemade pie crust or 9-inch deep-dish frozen pie crust shell (thawed)
- 1 (15-oz) can pure pumpkin (about 1¾ cups)
- 1 large egg
- 3 large eggs yolks
- ½ cup granulated sugar
- ½ cup light brown sugar, packed
- 2 tablespoons all-purpose flour
- ½ teaspoon salt
- 1 teaspoon ground cinnamon
- 1 teaspoon ground ginger
- ½ teaspoon ground nutmeg
- ⅛ teaspoon ground cloves
- ⅛ teaspoon ground black pepper
- 1¼ cups evaporated milk (you'll need one 12-oz can but you won't use all of it)
Instructions
Blind Bake the Crust
- For homemade crust: Roll out the dough and gently fit it into a (9-inch) deep-dish pie pan, ensuring it's snug against the pan's edges and bottom. Chill in the refrigerator for at least 30 minutes. Meanwhile, preheat the oven to 375°F and set an oven rack in the middle position. Remove the chilled pie crust from the refrigerator and place it on a baking sheet (this makes it easy to move in and out of the oven). Cover the crust with a piece of parchment paper and fill about three-quarters full with dried beans or pie weights. Bake for 20 minutes. Take the crust out of the oven; remove the parchment paper and beans/pie weights and tent the edges with a few strips of foil folded in half lengthwise (this will protect the edges from getting too dark). Bake for another 15 to 20 minutes, until the dough is dry and lightly golden. Don't worry if the bottom puffs up; just press it down gently with a flat spatula, such as a pancake turner, taking care not to puncture it. Remove the foil but don't throw it away; you may need it again.
- For frozen crust: Follow the instructions for blind-baking on the package.
- After blind-baking the crust, reduce the oven temperature to 325°F.
Make the Filling
- In a large bowl, combine the pumpkin, egg, egg yolks, granulated sugar, brown sugar, flour, salt, cinnamon, ginger, nutmeg, cloves, pepper, and evaporated milk. Whisk until smooth, then pour the filling into the pre-baked crust.
- Bake the pie for 50 to 60 minutes (at 325°F), until the filling is just set. It should look dry around the edges, but the center should jiggle just slightly if you nudge the pan. Keep a close eye on the pie as it bakes; if ever the crust looks like it's browning too quickly, tent the edges with foil strips. Let the pie cool on a rack (leave it on the baking sheet) to room temperature, a few hours. Slice or refrigerate until ready to serve.
- Make Ahead: Pumpkin pie can be made one day ahead of time and refrigerated.
- Freezer-Friendly Instructions: The dough can be made ahead, wrapped in plastic, and refrigerated for up to 2 days, or frozen for up to 1 month. If you freeze it, thaw it overnight in the refrigerator. The pie can be frozen after baking for up to 1 month. After it is completely cooled, double-wrap it securely with aluminum foil or plastic freezer wrap, or place it in heavy-duty freezer bag. Thaw overnight in the refrigerator before serving.
Nutrition Information
Powered by ![]()
- Per serving (10 servings)
- Calories: 335
- Fat: 15g
- Saturated fat: 8g
- Carbohydrates: 45g
- Sugar: 27g
- Fiber: 2g
- Protein: 6g
- Sodium: 287mg
- Cholesterol: 103mg
This website is written and produced for informational purposes only. I am not a certified nutritionist and the nutritional data on this site has not been evaluated or approved by a nutritionist or the Food and Drug Administration. Nutritional information is offered as a courtesy and should not be construed as a guarantee. The data is calculated through an online nutritional calculator, Edamam.com. Although I do my best to provide accurate nutritional information, these figures should be considered estimates only. Varying factors such as product types or brands purchased, natural fluctuations in fresh produce, and the way ingredients are processed change the effective nutritional information in any given recipe. Furthermore, different online calculators provide different results depending on their own nutrition fact sources and algorithms. To obtain the most accurate nutritional information in a given recipe, you should calculate the nutritional information with the actual ingredients used in your recipe, using your preferred nutrition calculator.


I’ve never blind-baked a crust for pumpkin pie. Is this something that absolutely has to happen for this to work out? Not sure I have that extra time.
You can skip it, Andrea – the crust just won’t get crisp on the bottom. 🙂
How do you mix all the ingredients from the eggs to the egg yolks
Hi Brenda, You use a whisk to combine all the ingredients for the filling. Hope you enjoy!
Fabulous recipe and instructions. I hope the finished pie makes the road trip in tact. At least I have a picture to prove it turned out beautifully.
Love all your recipes!! My contribution for a large Thanksgiving gathering on Thursday is your Cranberry Orange Sauce, your Cranberry Nut Bread and your Perfect Pumpkin Pie. All have already received rave reviews this season!!
Thank you, thank you, thank you for ALL of your recipes. I have tried every pumpkin pie and pumpkin bread recipe on the internet and once I made yours, I stopped looking. This is THE BEST. It’s is the best pumpkin pie because it actually has a bit of spice in it. Other recipes taste like a big ball of sugar and cinnamon. I even cut the sugar to 2/3 cup to bring out the spice a bit. I am making an all OUAC thanksgiving this year with your pumpkin pie, orange cranberry sauce, mustard/maple salad dressing, and sweet potato casserole. For anyone new to the site, skip google and just use whatever Chef Segal’s recipe says.
You’re so welcome, Brian — your note made my day — happy Thanksgiving! 🙂
Same!! Second year in a row now. Baking pumpkin pie from scratch always had me in a ball of anxiety and a puddle of tears because the product of other recipes never met my expectations. Yet I never gave up. I’m glad I didn’t, because eventually it led me here. Thank you, thank you, THANK YOU!!!
My dough was not crumbly when it came out of food processor … should I try again??
Hi Lois, If it was not crumbly/too wet, I’d try adding another 1 – 2 tablespoons of flour.
Same thing happened to me. Once I added the water to the flour, it turned into the consistency that it’s supposed to be when working on it on the counter top. Is it okay if it comes out like this?
Yes, that’s fine; just keep going.
Can you use the vitamix to make the crust rather than a food processor?
I don’t think a vitamix would work, Christine – sorry! But you could definitely do it by hand using a pastry cutter or your fingers.
I used my Vitamix on the pulse cycle, and it worked great! My husband told me it was the best pumpkin pie I ever made. Thank you for this recipe, Jenn. My question is, Can you double the pie crust recipe for two crusts?
Glad you enjoyed it! And, yes, you can double the pie crust recipe. 🙂
Hi Christine! I just made this pie and used my Ninja blender and it worked perfectly so you can definitely use your vitamix!
Would love to try this, but is there another item I can use instead of the shortening? I don’t want to buy something for a few dollars and not use it again. Thank you
Hi Kate, You can replace the shortening with more butter or lard.
Would you make any changes if using a 9″ aluminum pie pan or a 9″ ceramic pie pan? I’m assuming you used glass since that is what is pictured
Hi Lisa, I don’t think you’ll need to made any changes with either of those pie plates but because I haven’t baked this in either of those, just keep a close eye on it. Enjoy!
Thank you for your quick response, ill let you know how they turn out. Happy Holidays to you and your family!
Thank you for doing all of the leg work it takes to find a perfect recipe! My husband requested a pumpkin pie for his birthday and I’ve never made a pie from scratch before. I followed the recipe as written and it was perfect!