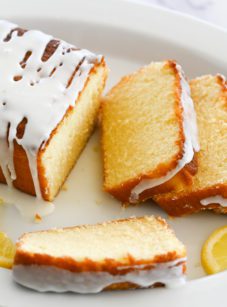
Lemon Bars


This post may contain affiliate links. Read my full disclosure policy.
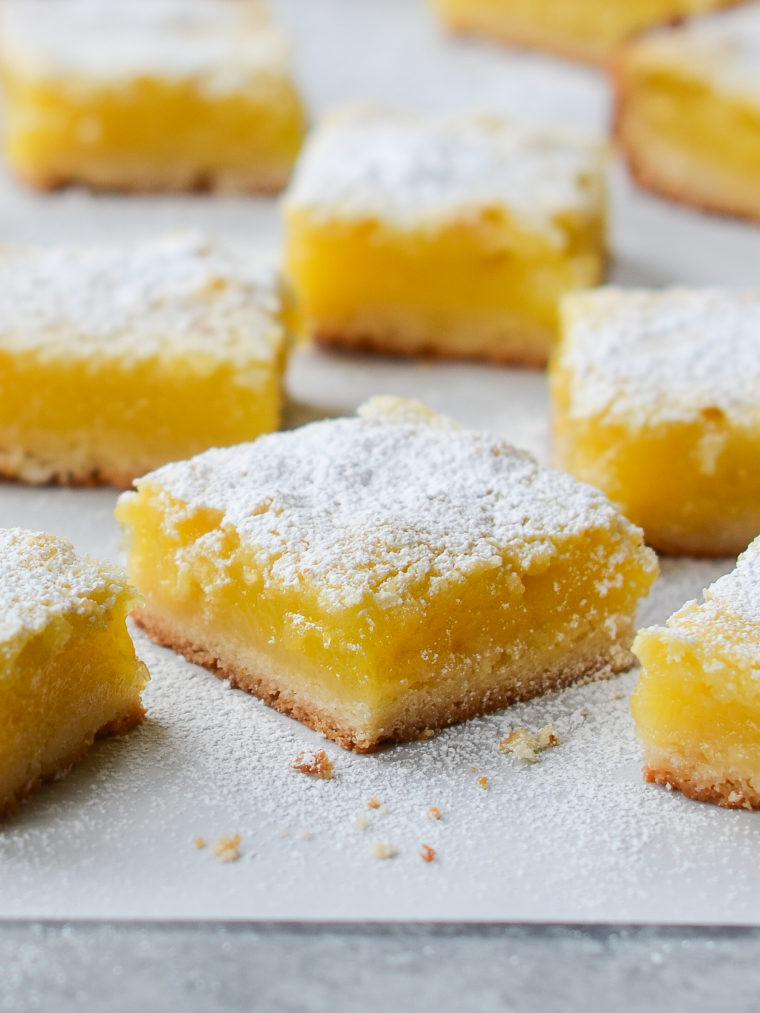
Perfect for potlucks, picnics, or just a quiet afternoon tea, these lemon bars with a buttery shortbread crust and luscious lemon filling are as pretty as they are delicious!
One of my favorites from my first cookbook, these lemon bars stand out for a couple of reasons. First, there’s the crust: a crisp, buttery shortbread enhanced by a little pastry chef trick I love—mixing a touch of cornstarch with the flour. This small tweak, along with the mixing method, gives the base a wonderfully crisp texture, providing the perfect contrast to the rich, luscious lemon layer above.
Then comes the lemon topping itself: tart yet sweet, and bursting with bright, citrusy flavors from plenty of lemon juice and zest. It is truly luscious! These bars are not only easy to whip up with just eight ingredients but also keep beautifully, so you can definitely prepare them ahead of time for any event, big or small.
Table of Contents
“Simply the best lemon bars you’ll ever eat.”
What You’ll Need To Make Lemon Bars
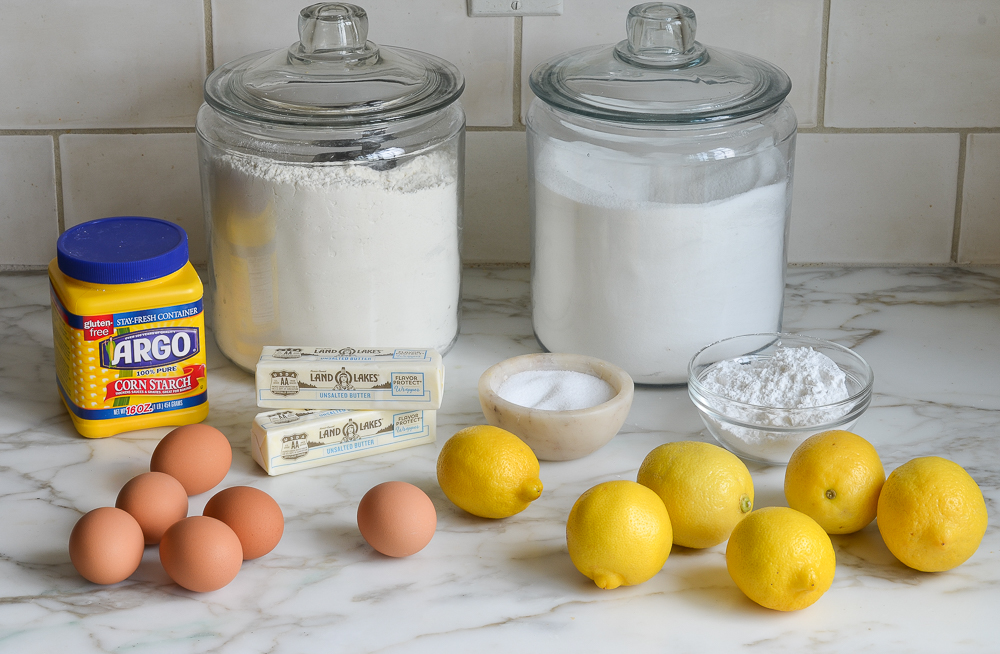
- All-purpose flour: Provides structure to the crust, and also thickens the lemon topping, helping it set once baked.
- Cornstarch: Gives the crust a tender, melt-in-your-mouth texture.
- Confectioners’ sugar: Sweetens the crust while also contributing to its crisp texture. Also used to dust the finished bars for decoration and added sweetness.
- Butter: Adds richness and flakiness to the crust, giving it a shortbread-like texture and flavor.
- Eggs: The base of the topping, giving it structure and richness.
- Granulated sugar: Sweetens the lemon layer and balances the tartness of the lemon juice.
- Lemon zest: Provides a strong, aromatic lemon flavor that enhances the tartness and freshness of the topping. Be sure to zest only the yellow part of the lemon skin and leave the white pith behind, as it’s bitter.
- Freshly squeezed lemon juice: Adds the essential tart lemon flavor to the topping.
- Jump to the printable recipe for precise measurements
Step-by-Step Instructions
Step 1: Make The Crust
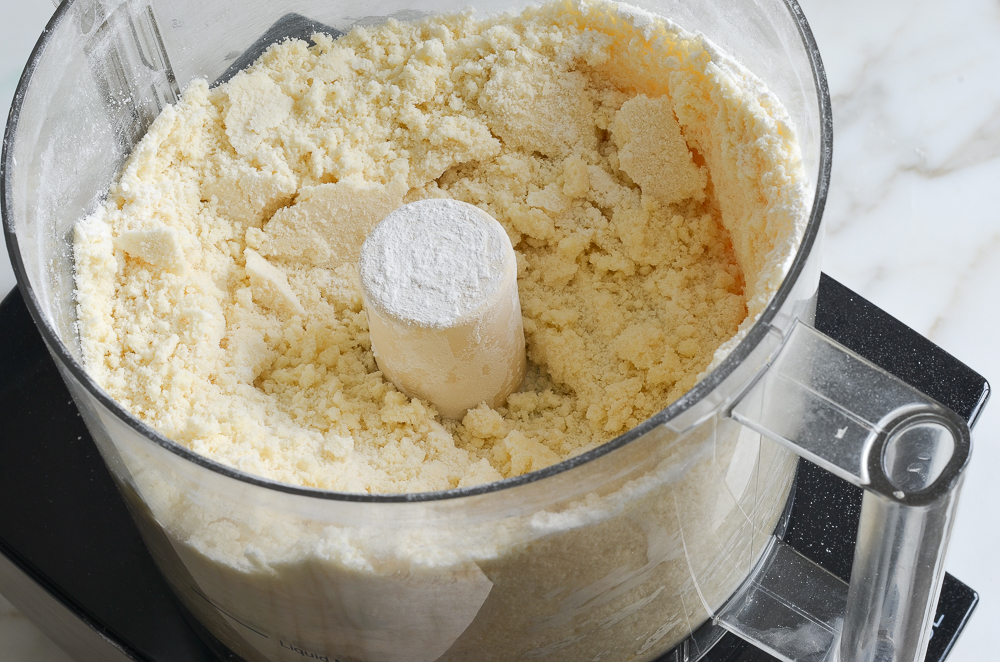
Place the flour, cornstarch, salt and Confectioners’ sugar in the bowl of a food processor fitted with the blade attachment.
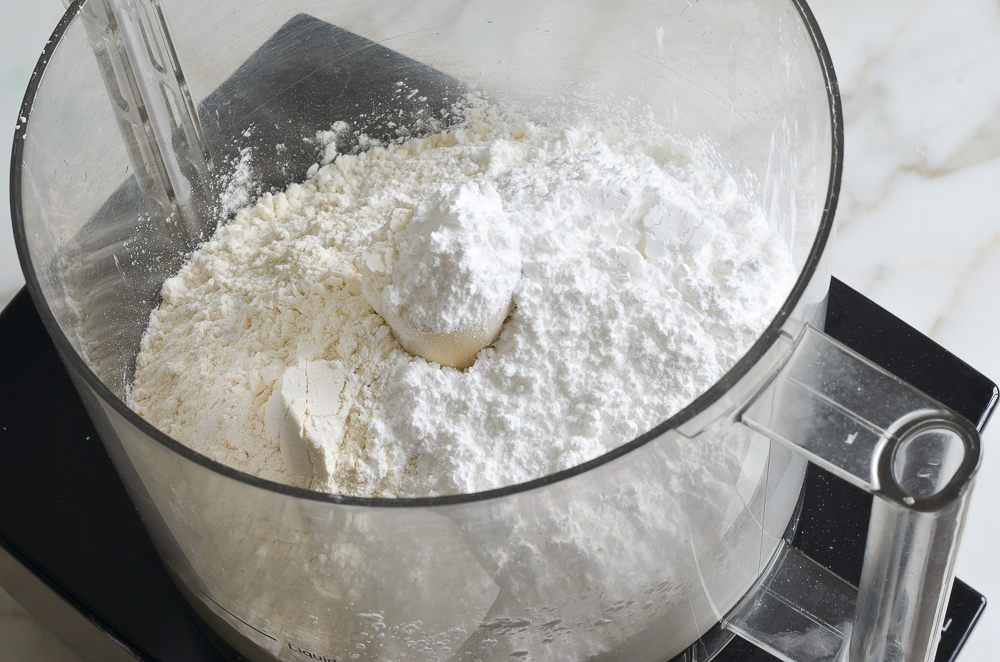
Mix for 15 seconds to blend, then toss in the cold butter.
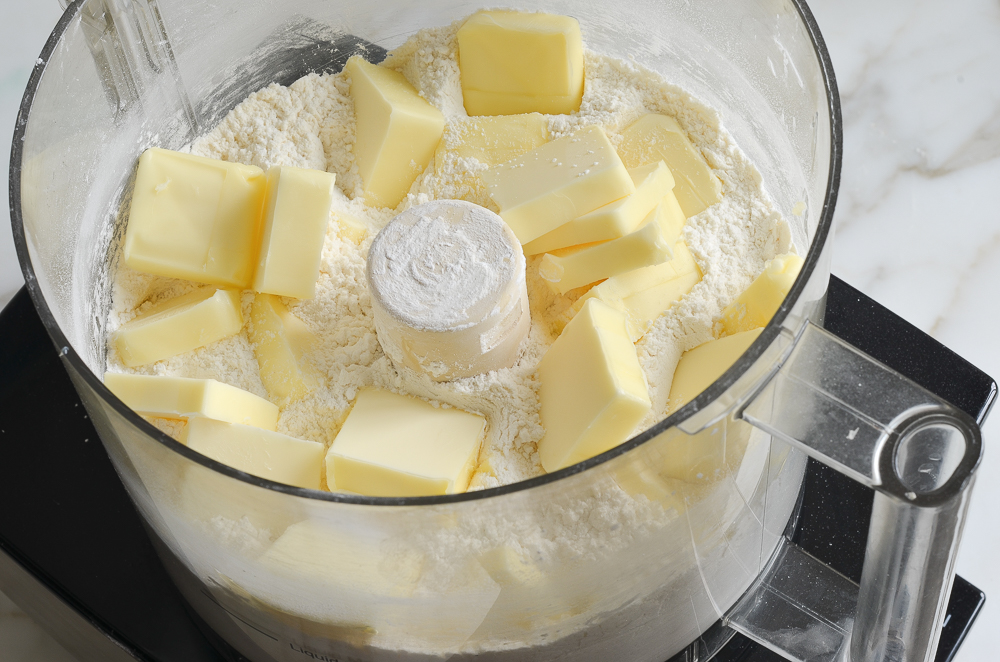
Mix until the mixture resembles coarse meal, 10 to 15 seconds.
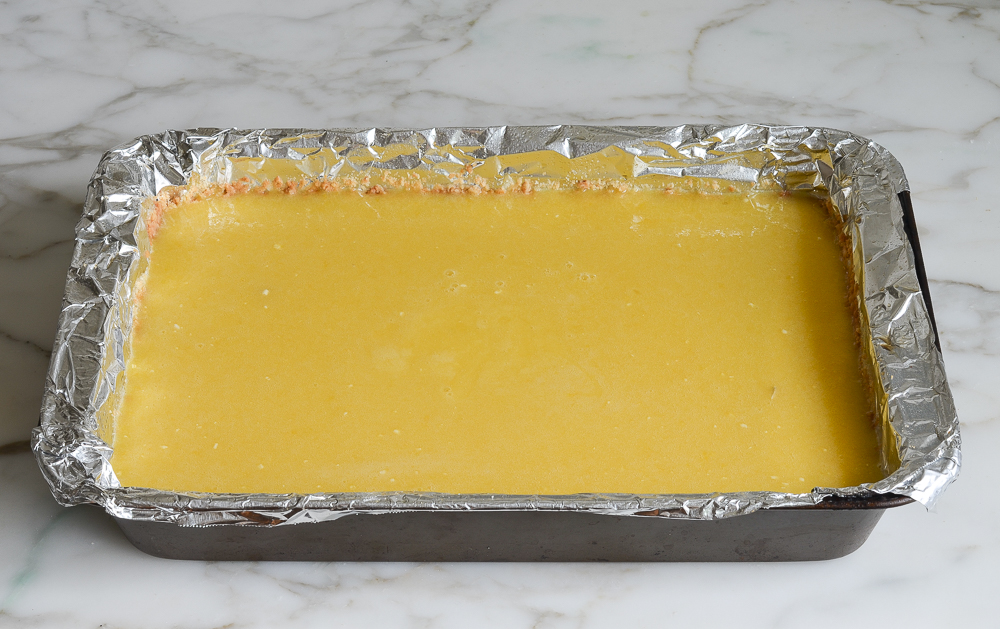
Sprinkle the mixture into a foil-lined, greased 9×13-in pan.
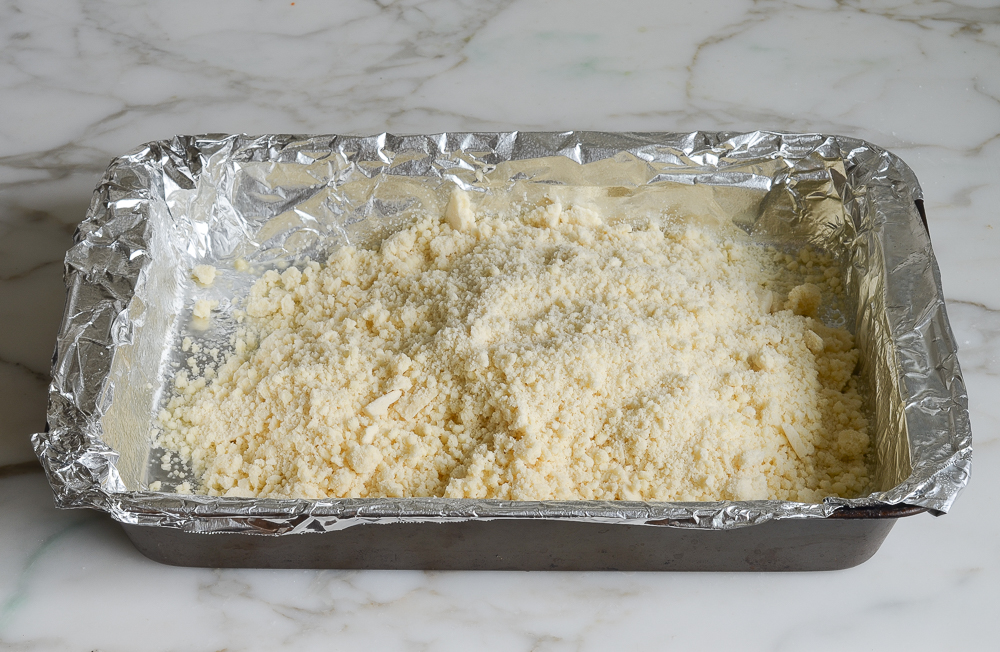
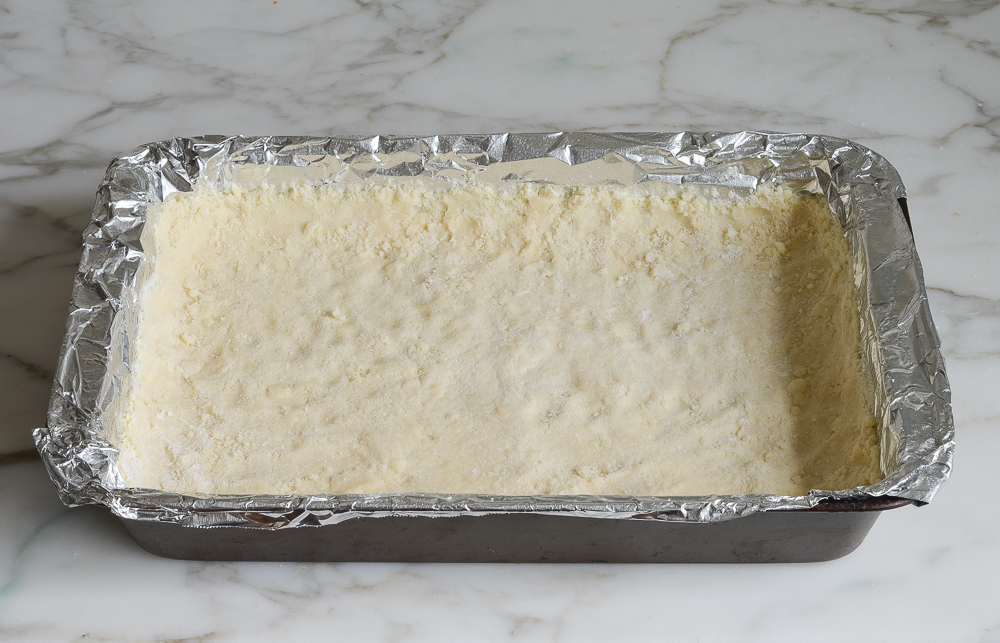
Press firmly with your fingers into an even layer, building up a thin 3/4-inch edge around the sides (this keeps the filling from spilling beneath the crust).
Refrigerate for 30 minutes or freeze for 15 minutes.
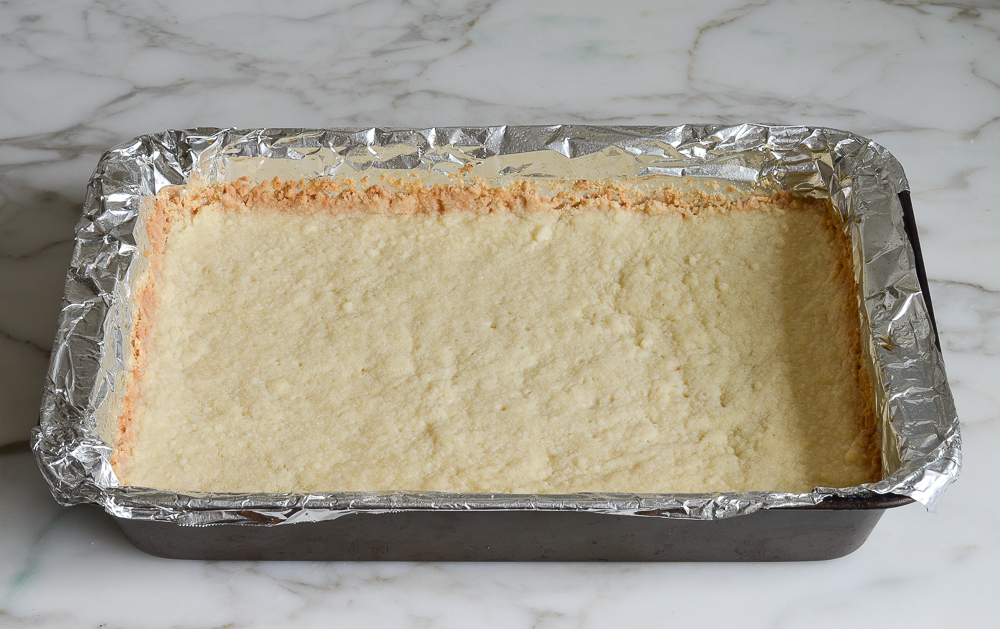
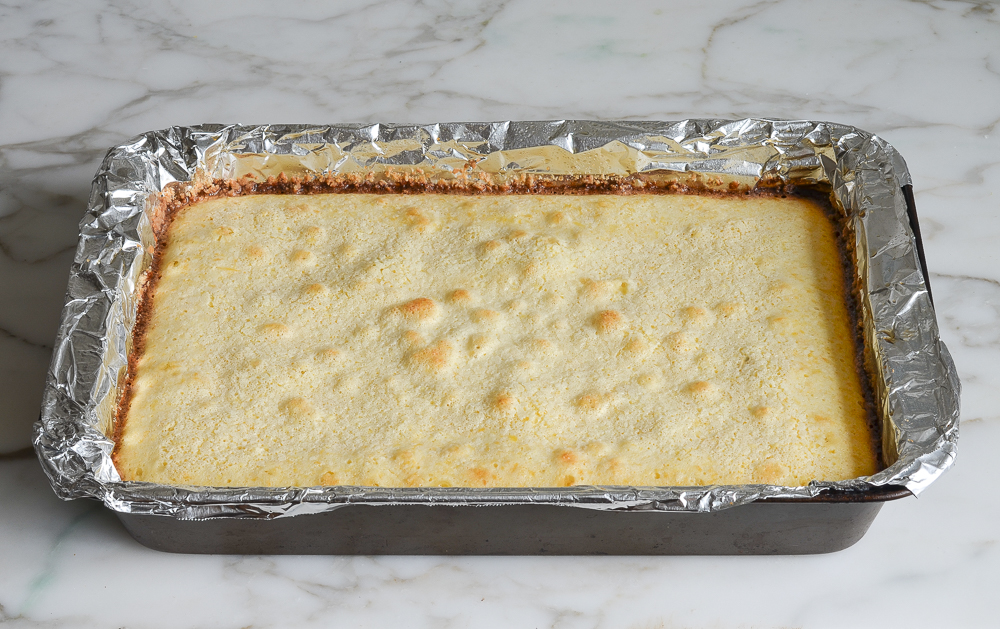
Bake the crust until lightly golden, 15 to 20 minutes.
Step 2: Make The Filling
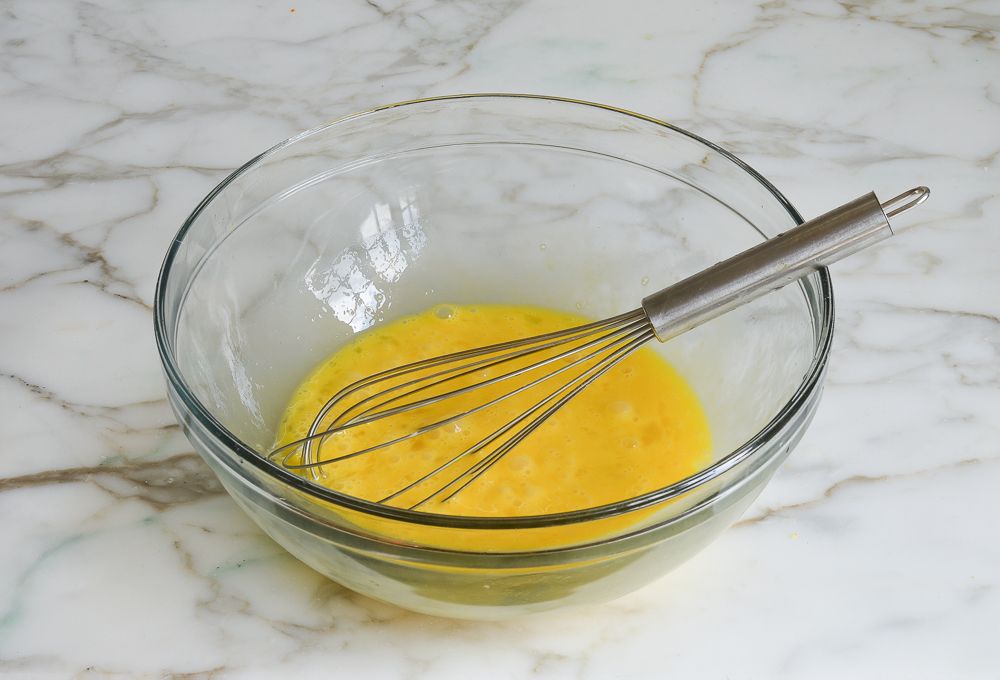
Start by whisking the eggs in a large bowl.
Add the sugar, lemon juice, lemon zest, and flour.
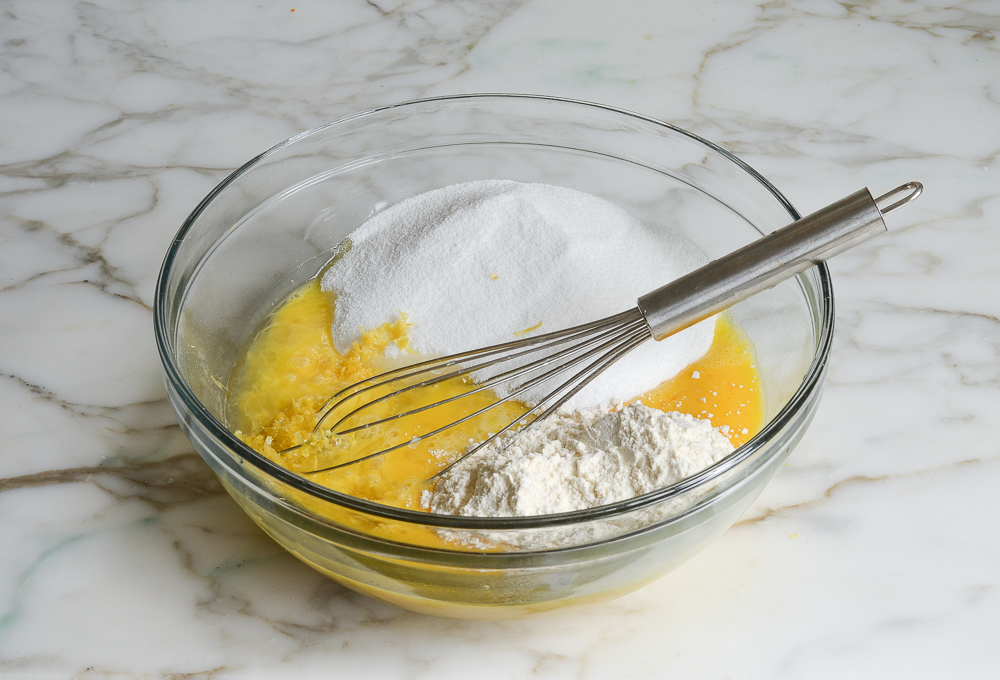
Whisk well, making sure no lumps of flour remain.
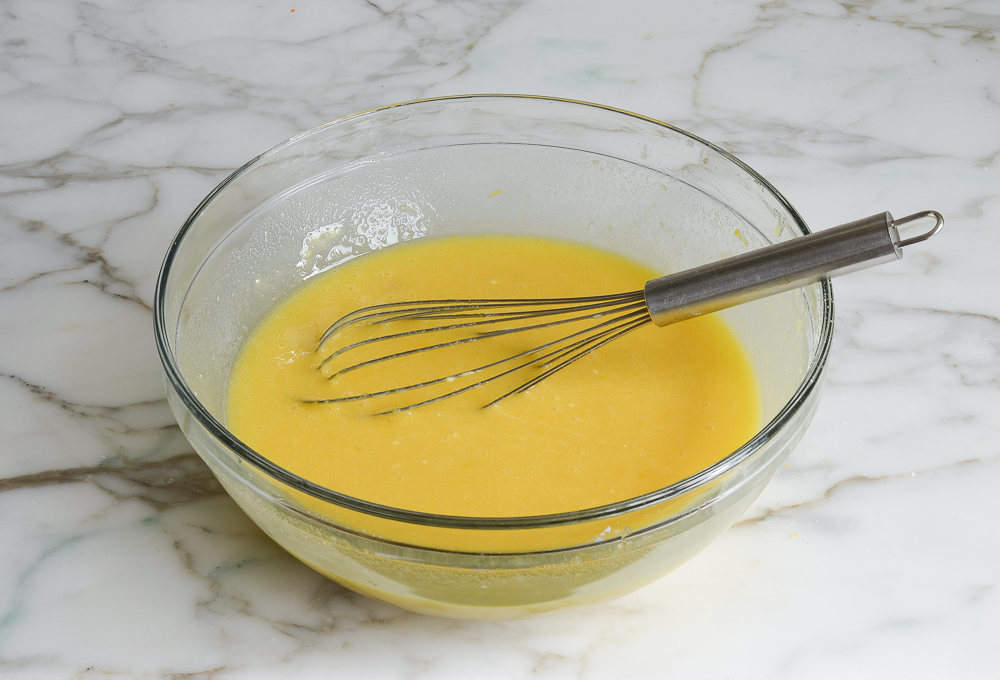
Pour the filling into the baked crust.
Step 3: Bake & Cool
Return the pan to the oven and bake another 30 to 35 minutes, or until the topping is set and firm. Let the bars cool on a rack to room temperature; it will take several hours.
Step 4: Cut the Lemon Bars
Use the foil overhang to lift the baked square out of pan and onto a cutting board. Carefully loosen the foil from the edges of the crust.
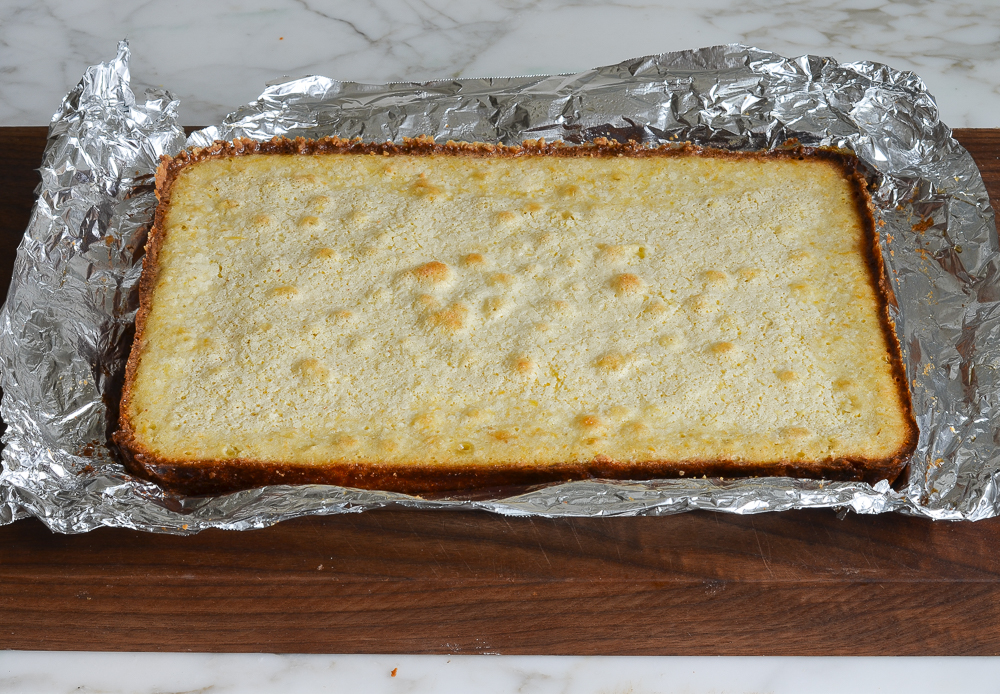
Using a sharp knife, cut into squares or triangles.
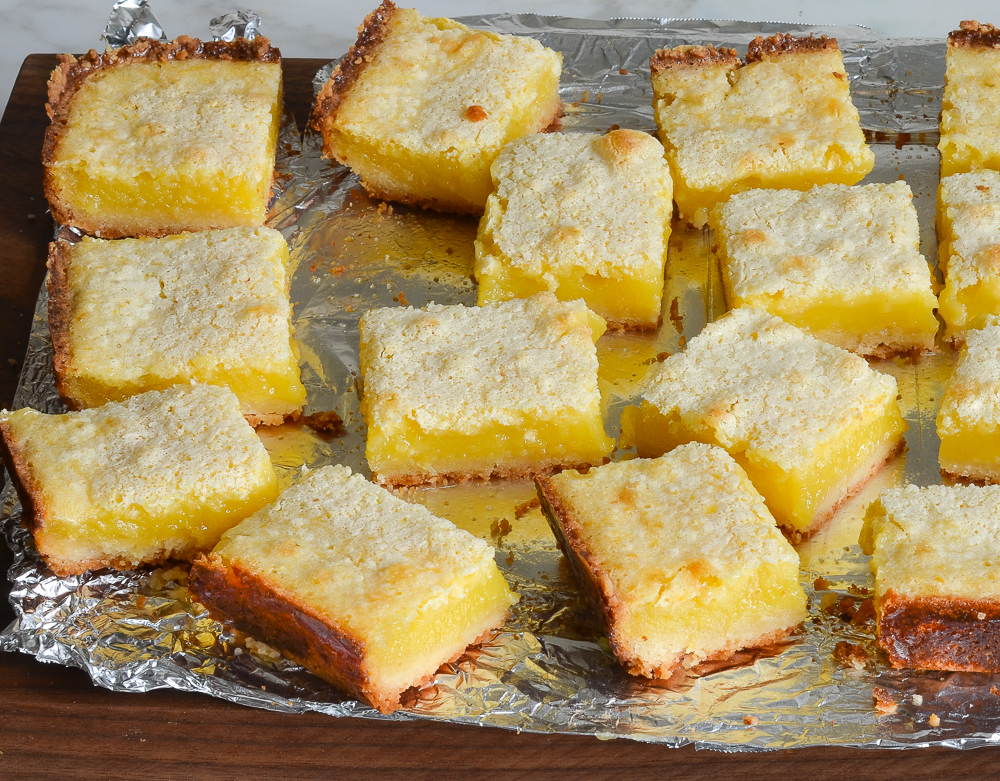
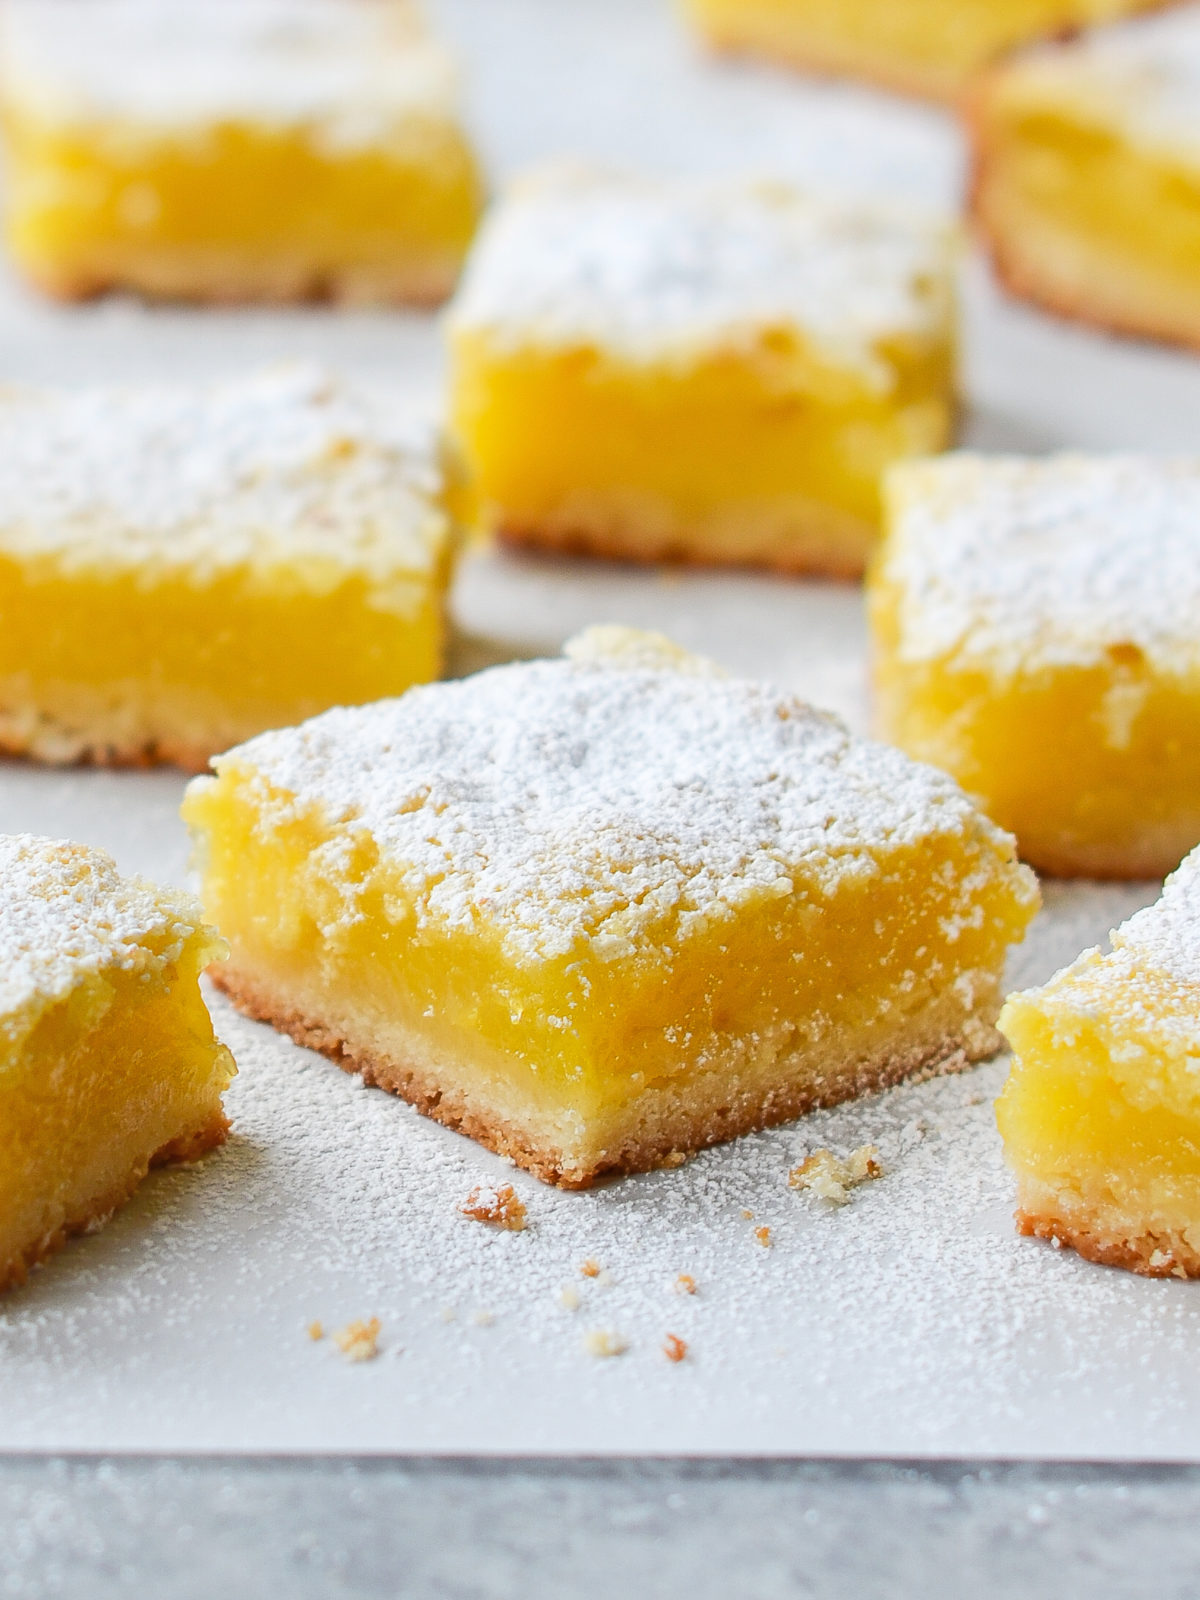
Use a fine sieve to dust the squares with Confectioners’ sugar. Store the bars in a covered container in the refrigerator for up to 4 days. Serve chilled or room temperature.
Video Tutorial
Frequently Asked Questions
Absolutely, lemon bars can be made up to 2 days ahead of time (and leftovers will keep nicely for up to 5 days). You can store them either before or after cutting; however, they can be a bit sticky, so it’s generally easier to store them before cutting into individual bars. Once they’re fully set and chilled, wrap them well or place them in an airtight container to maintain their freshness and prevent them from absorbing any unwanted fridge odors.
Yes, lemon bars freeze beautifully—they are even good frozen! To freeze the bars, let them cool completely and freeze the batch whole, covered tightly with aluminum foil or plastic freezer wrap, for up to three months. (The cut bars can also be frozen in a single layer.) Before serving, remove them from the freezer and let them thaw overnight in the refrigerator. Cut the bars and then sprinkle with confectioners’ sugar before serving.
Yes, you can easily substitute lemon with lime to make lime bars. This swap will give your bars a tropical, slightly different flavor. For a more nuanced taste, consider using half lemon and half lime juice.
Leftover lemon bars should be stored in an airtight container in a single layer in the refrigerator. You may need to dust them with confectioners’ sugar before serving again.
No, I wouldn’t recommend using bottled lemon juice, as fresh is key for that bright, tart flavor. Plus, you need the zest anyway, so using fresh lemons is absolutely essential.
You May Also Like
Luscious Lemon Bars
Perfect for potlucks, picnics, or just a quiet afternoon tea, these lemon bars with a buttery shortbread crust and luscious lemon filling are as pretty as they are delicious!
Ingredients
For the Crust
- 1¾ cups all-purpose flour, spooned into measuring cup and leveled-off
- ¼ cup cornstarch
- 1 teaspoon salt
- 1 cup Confectioners' sugar, plus more to decorate finished bars
- 2 sticks (1 cup) cold unsalted butter, cut into ½-inch pieces
For the Lemon Topping
- 6 large eggs
- 3 cups granulated sugar
- 2 tablespoons lemon zest (be sure to zest the lemons before juicing)
- ⅔ cup freshly squeezed lemon juice, from 5 to 6 lemons
- ⅔ cup all-purpose flour
Instructions
Make the Crust
- Adjust an oven rack to the middle position and preheat the oven to 350°F.
- Cover a 9x13-in metal baking pan with heavy-duty aluminum foil (see note below). Push the foil neatly into the corners and up the sides of the pan, using two pieces if necessary to ensure that the foil overlaps all edges (the overhang will help removal from the pan). Spray the foiled pan with nonstick cooking spray.
- Place the flour, cornstarch, salt, and Confectioners' sugar in the bowl of a food processor fitted with the blade attachment and mix for a few seconds. Add the butter and mix to blend until the mixture resembles coarse meal, 10 to 15 seconds. Sprinkle the mixture into the prepared pan and press firmly with your fingers into an even layer, building up a thin ¾-inch edge around the sides (this keeps the filling from spilling beneath the crust). Refrigerate for 30 minutes or freeze for 15 minutes.
- Bake the crust until lightly golden, 15 to 20 minutes.
Make the Filling
- In a large bowl, whisk together the eggs, sugar, lemon juice, lemon zest, and flour. Be sure no lumps of flour remain.
- When the crust is ready, give lemon mixture a quick final stir and then pour over top. Immediately return the pan to the oven and bake another 30 to 35 minutes, or until the topping is set and firm. Let the bars cool on a rack to room temperature; it will take several hours.
- To cut, use the foil overhang to lift the baked square out of pan and onto a cutting board. Carefully loosen the foil from the edges of the crust, using a knife if necessary. Using a sharp knife, cut into squares or triangles. Use a fine sieve to dust the squares with Confectioners' sugar. Store the bars in a covered container in the refrigerator for up to 4 days. Serve chilled or room temperature.
- Freezer-Friendly Instructions: The bars can be frozen for up to 3 months. After they are completely cooled, freeze the batch whole, covered tightly with aluminum foil or plastic freezer wrap. Before serving, remove them from the freezer and let them thaw overnight in the refrigerator. Cut the bars and then sprinkle with Confectioners’ sugar before serving.
- Note: Be sure to use heavy-duty aluminum foil; regular aluminum foil may stick. Parchment paper can also be used to line the pan.
Nutrition Information
Powered by ![]()
- Per serving (20 servings)
- Serving size: 1 large square
- Calories: 306
- Fat: 11 g
- Saturated fat: 6 g
- Carbohydrates: 50 g
- Sugar: 36 g
- Fiber: 1 g
- Protein: 4 g
- Sodium: 140 mg
- Cholesterol: 80 mg
This website is written and produced for informational purposes only. I am not a certified nutritionist and the nutritional data on this site has not been evaluated or approved by a nutritionist or the Food and Drug Administration. Nutritional information is offered as a courtesy and should not be construed as a guarantee. The data is calculated through an online nutritional calculator, Edamam.com. Although I do my best to provide accurate nutritional information, these figures should be considered estimates only. Varying factors such as product types or brands purchased, natural fluctuations in fresh produce, and the way ingredients are processed change the effective nutritional information in any given recipe. Furthermore, different online calculators provide different results depending on their own nutrition fact sources and algorithms. To obtain the most accurate nutritional information in a given recipe, you should calculate the nutritional information with the actual ingredients used in your recipe, using your preferred nutrition calculator.
I bake for the homeless and for a local monthly beach cleanup that attracts 250-330 volunteers. So I bake almost daily. One of my favorite things is to find the best example of a recipe, often going through many trials, or several years. Some recipes end up in the recycle bin after one taste, and some have notes for future trials. When I saw you 2019 Luscious Lemon Bar recipe, I had to compare it to what had been my favorite. I made both, and you guessed it. What had been my favorite lemon bar recipe is now in the recycle bin, and I will search no longer for the best lemon bar recipe, knowing that I have found it. Thank you so much. Looking forward to my next trial.
Another excellent recipe. Thank you so much I have never had a failure with any of your recipes. This recipe makes enough to share and have some to put in the freezer.
The lemon bars had just the right amount of tartness and everyone who ate them loved the crust.
I have shared your website with many of my friends as they are always asking me for the recipes.
😊
Hi Jen – I made these over the weekend and they tasted amazing! My only issue was that when I went to take them out of the pan (with the aluminum foil), they broke in half so cutting them evenly became a challenge. The bars were definitely cooked well (the top was a bit darker than your pic, actually) and were not still warm as I had chilled them in the fridge for several hours. Any tips to prevent this next time?
Hmmm… I’ve never had that problem. Did you use heavy-duty foil? (I don’t think regular foil would be sturdy enough for this.) If you did and still had that problem, I’d suggest that after they’ve cooled in the fridge, that you stick the bars in the freezer for 10 or 15 minutes before pulling the foil out of the pan. Hope that helps!
382 reviews and 5 stars — thought I couldn’t go wrong, but this didn’t work for me at all. I also chose this recipe because it made twice as many as most other recipes, but then I had to throw out two-thirds of the pan. First: flour and butter made… flour. Nothing close to a coarse meal. I added a tiny bit of melted butter to get it to stick a little and look like your picture. Next: shortbread mixture barely covered the pan, certainly not enough to go up the sides. Finally: after full time cooking and a little more, plus plenty of cooling time, I got a few usable tiny squares and a lot of sticky glop. I am an experienced baker and have made lots of lemon squares, but this one was a fail.
I followed your recipe to a T, while I’ve never made anything from scratch in my whole life, these came out perfect! My family was quite impressed! These are my go to when I want to spoil my family! Thank you so much for this recipe! I’ll save it forever!
My experience exactly! I still will try more of her recipes cuz ill assume that european ingredients are diff than us
These were made this weekend, using Meyer lemons. Amounts of juice, sugar, and zest as per recipe.
Someone must have taken a vacuum cleaner to the plate, because they were gone in about an hour.
My wife, who did SOME of the work (hey, I stopped whacking the weeds around the lemon tree and picked one of the lemons!) was a bit concerned whether the crust would hold together after baking, because it didn’t feel very solid when pressing it into the baking dish before the crust pre-bake. And, after the baking everything, the filling seemed to be a bit soft.
We left everything in the refrigerator overnight, and it was perfect. Blame the apprehension on a lack of experience with lemon bars.
These are amazing! I don’t bake often, and the recipe was so easy. I forgot to refrigerate the crust, but that didn’t seem to affect the final product. Mixing the flour into the granulated sugar before adding to the eggs eliminated the flour clumps in the filling.
These are amazing every time i make them! I used GF flour in mine. Definitely luscious!
Good day I love your recipes! I want to make the lemon bars but I don’t own a food processor can you tell me what to do please
Karen
Hi Karen, You can cut the butter into the flour mixture with two knives or rub it in with your fingers – it will just take a while! You could also try using softened butter and an electric mixer. Hope that helps!
Thanks Jen it suddenly did and the recipe turned out FANTASTIC! Thanks so much 🌷
I’m surprised you have not addressed the gluten-free question yet. I am looking forward to making this but need to know about substituting GF flour. Thank you.
Jane
I think it’d work well here, Jane. I’d use King Arthur measure for measure.
I used GF flour with this recipe, i used Bob’s Redmill 1:1 in the blue and clear bag.
Hi Jenn, I looked at all of the comments, but I am not clear if the suggestions for using Meyer lemons were for “old” recipe.
What are you suggestions for Meyer lemons? Less sugar? More lemon juice? Please help; I have a Meyer lemon tree that is bursting with lemons….
Thank you so much.
Hi Isabel, Since Meyer lemons are sweeter, I’d reduce the sugar by 1/4 cup. I’d love to know how they turn out!