Lemon Pound Cake

This post may contain affiliate links. Read my full disclosure policy.
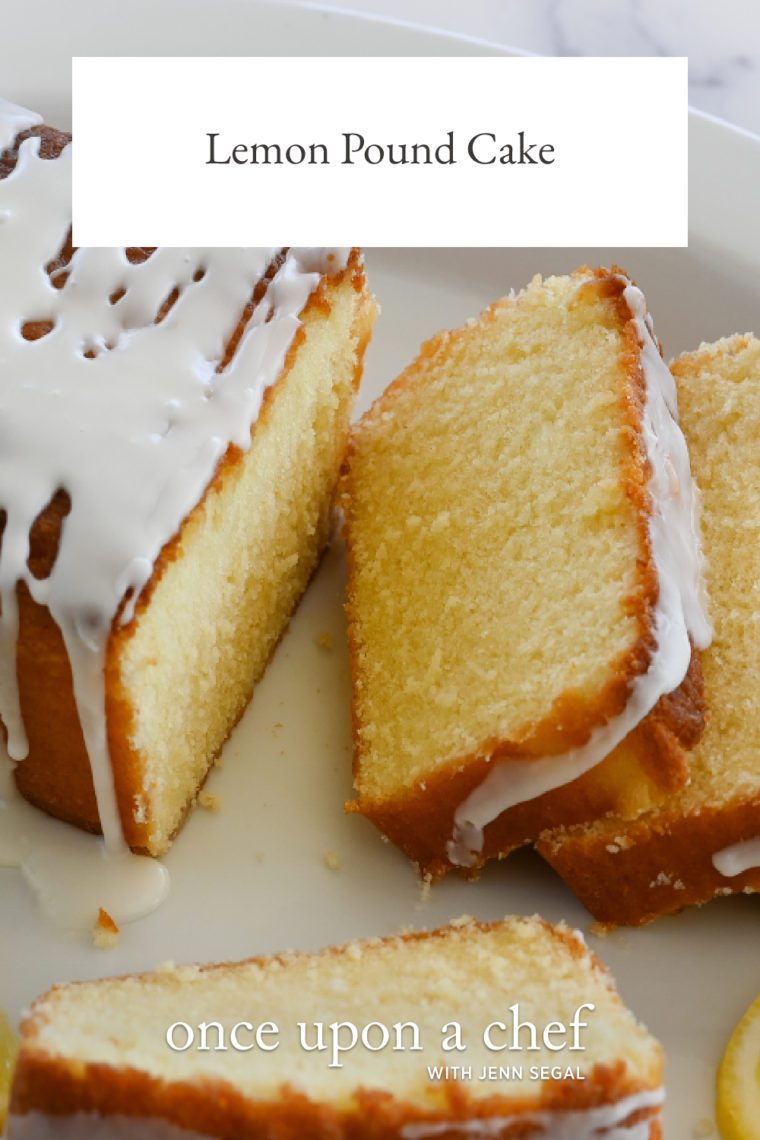
This lemon pound cake is the ultimate dessert for lemon lovers.
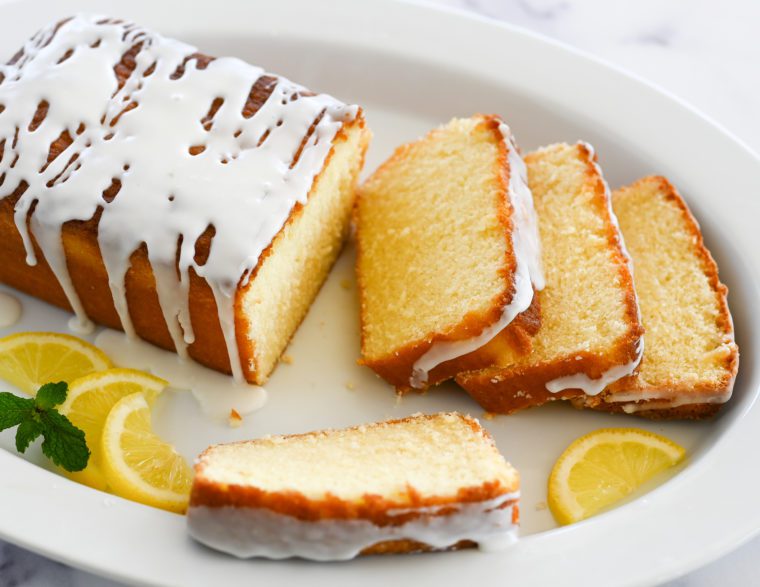
Calling all lemon lovers! This lemon pound cake is a dessert made just for you. The recipe incorporates both lemon zest and lemon juice into the cake batter, infusing the cake with a lovely lemon flavor. But the real magic happens after baking — the cake is generously doused with lemon syrup and then drizzled with a tart lemon glaze, delivering an intense burst of lemon flavor with every bite. The recipe yields two ultra-moist loaves that stay fresh for days on the countertop or can be frozen for later. If you’d like to switch things up, try my popular lemon poppyseed cake and lemon blueberry pound cake variations. A big thank you and shoutout to Karen Tannenbaum, one of my longtime readers, for inspiring this wonderful recipe!
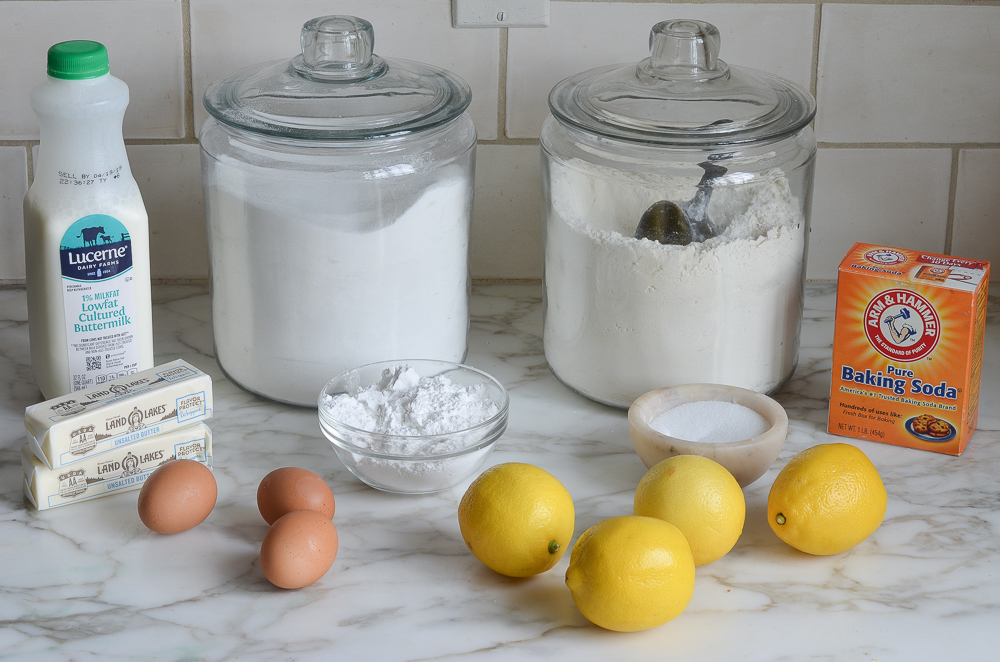
What You’ll Need To Make Lemon Pound Cake
STEP-BY-STEP INSTRUCTIONS
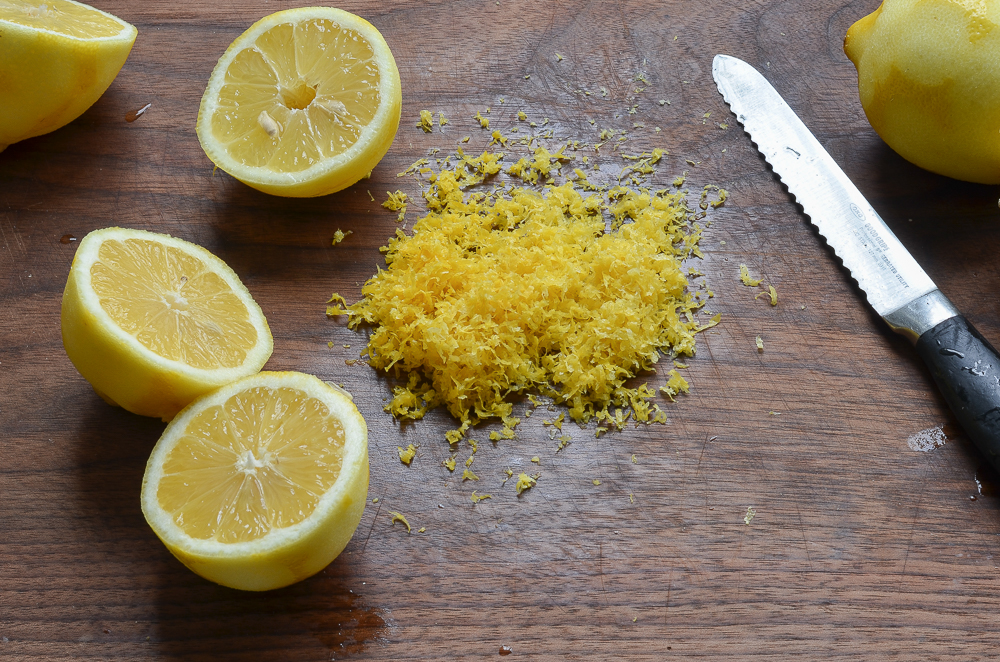
Start by zesting and juicing your lemons. And be sure you zest the lemons first, otherwise, it will be impossible once they are juiced. The best tool for zesting is a rasp grater but any fine grater will do.
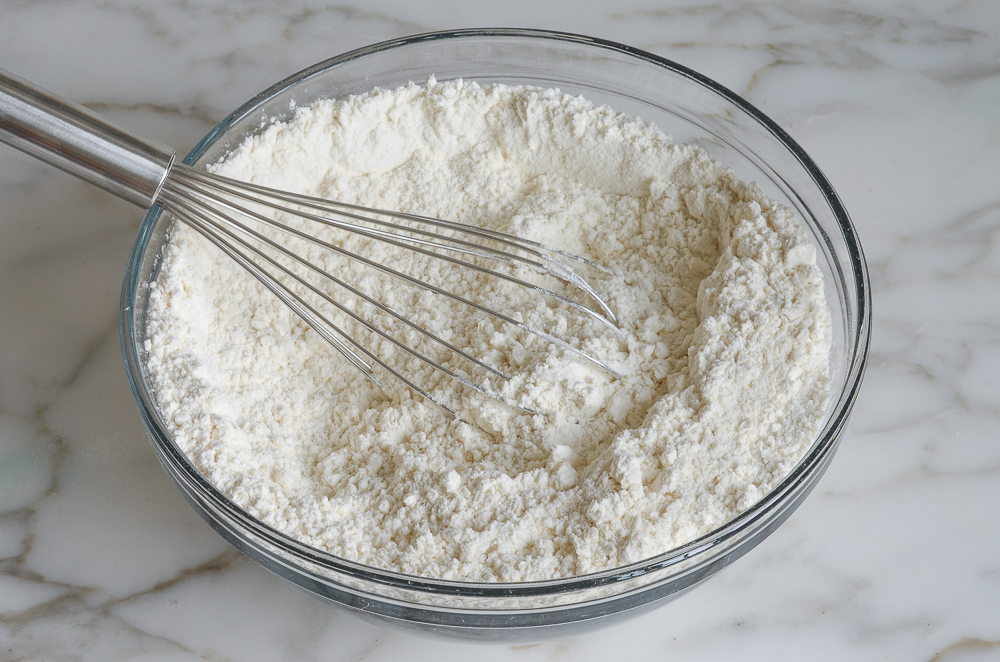
 Combine the flour, salt, and baking soda in a mixing bowl. I always add dry ingredients in little piles so I don’t forget what I’ve already added.
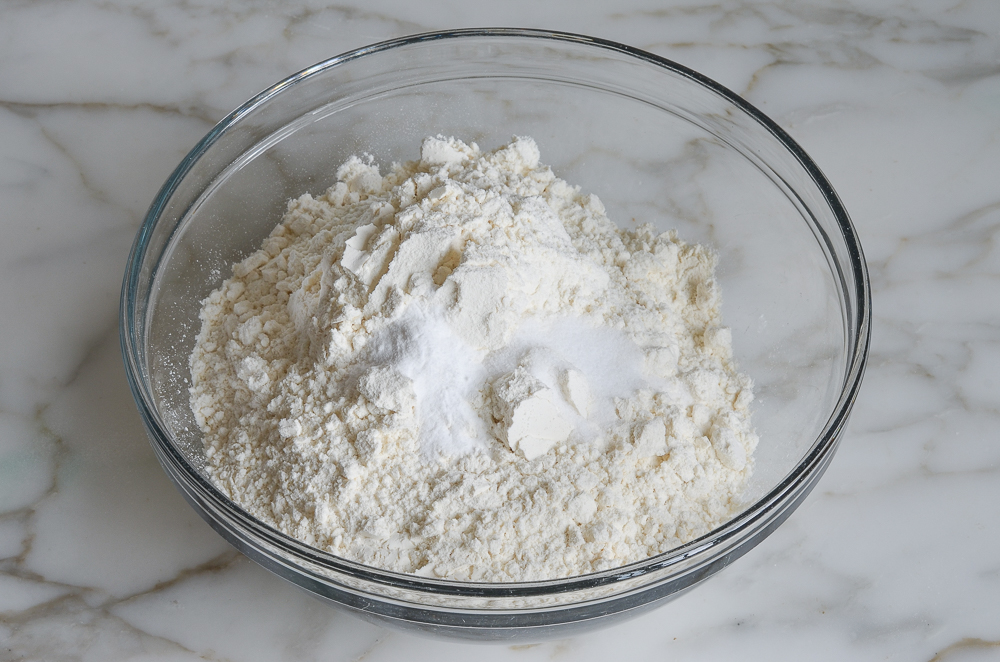 Whisk and set aside.
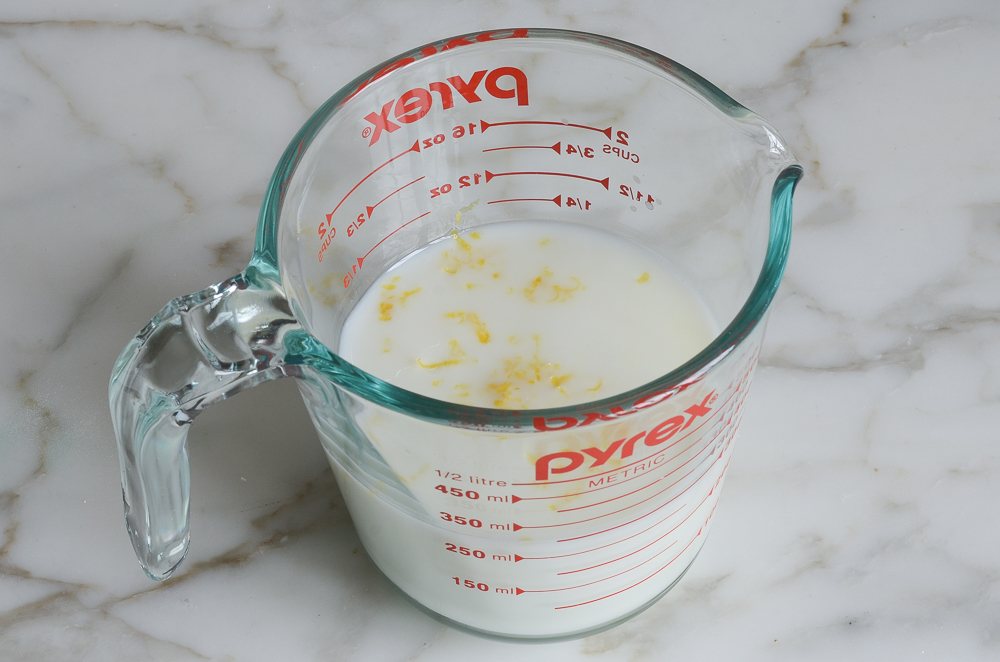
In another bowl, whisk together the buttermilk, lemon zest, and lemon juice. Set aside.
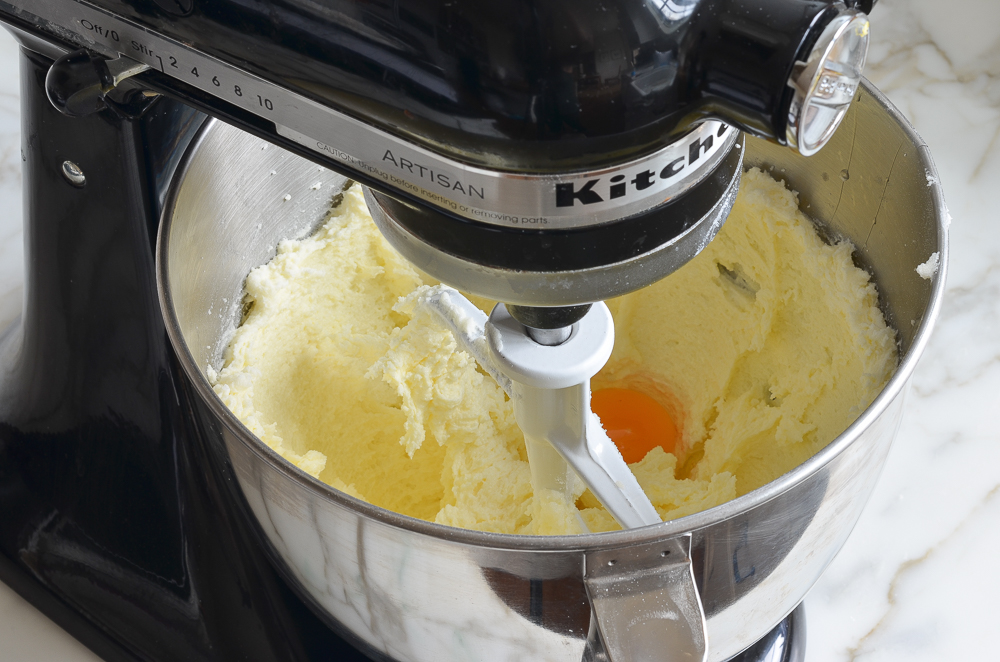
In the bowl of an electric mixer fitted with the paddle attachment (or beaters), cream the butter and sugar on medium speed until light and fluffy, 3 to 4 minutes.
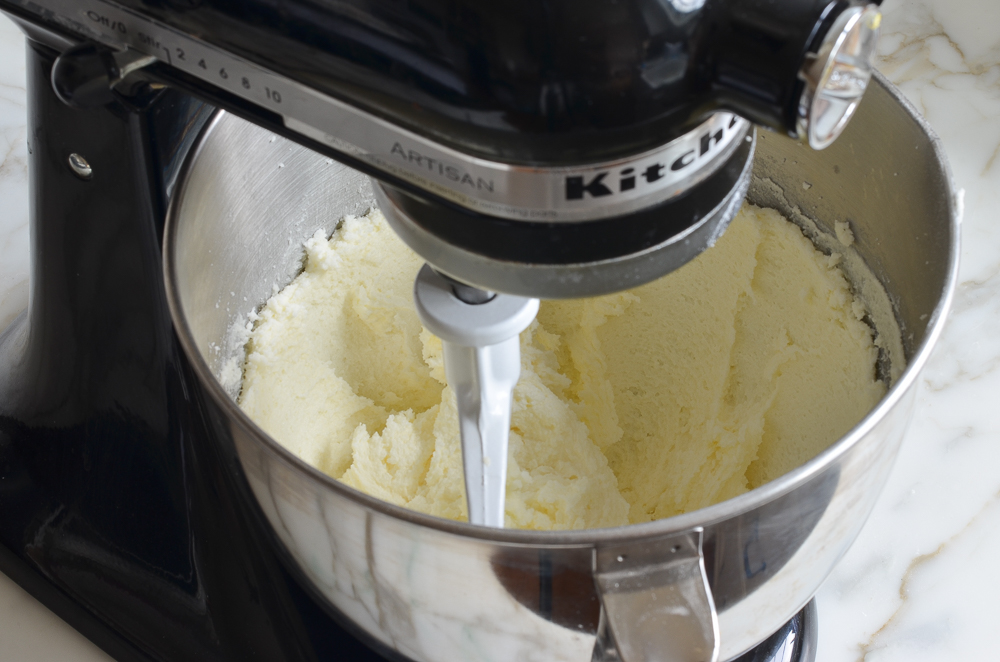
Scrape down the sides of the bowl, then beat in the eggs one at a time, beating well after each addition. Scrape down the sides of the bowl again.
With the mixer on low speed, beat in one-quarter of the flour mixture, then one-third of the buttermilk mixture. Beat in another quarter of the flour, then another third of the buttermilk mixture. Repeat with another quarter of the flour and the remaining buttermilk mixture. Finally, beat in the remaining flour mixture.
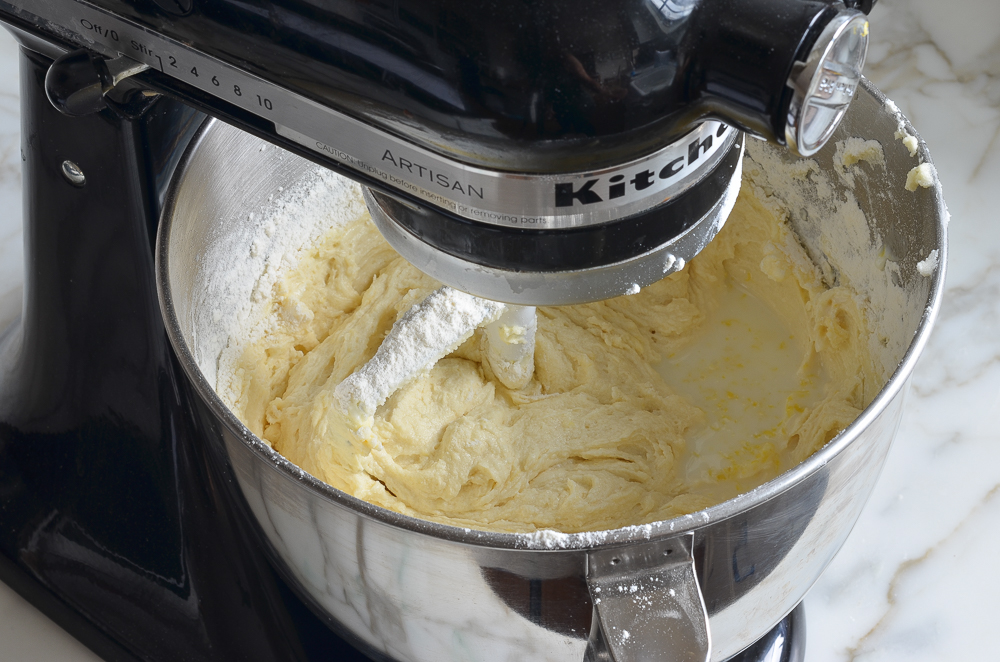
Scrape down the sides of the bowl, and give a quick mix to make sure all of the ingredients are well-incorporated.
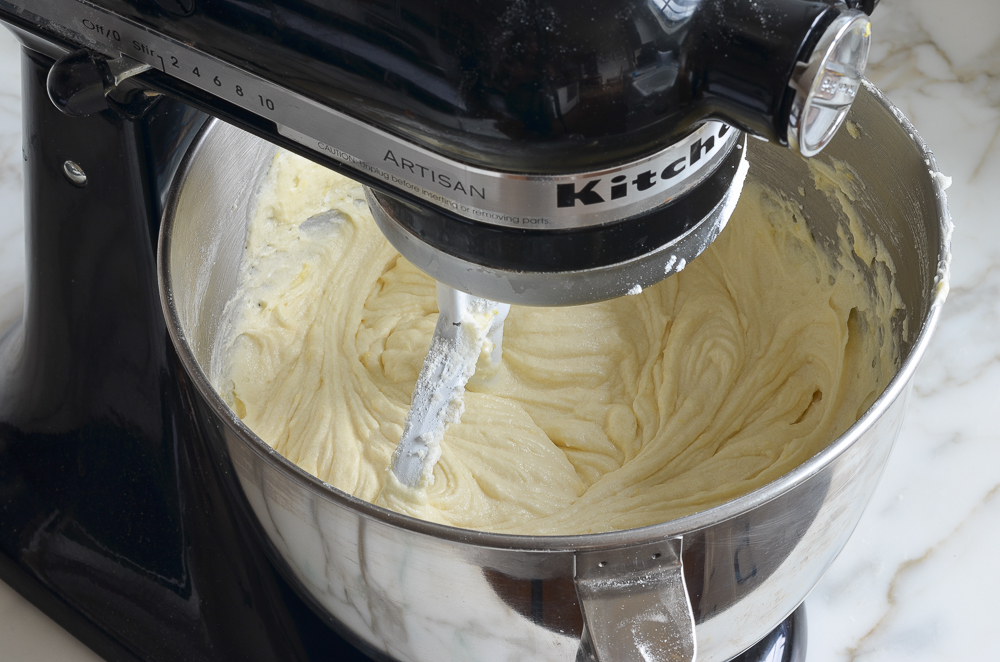
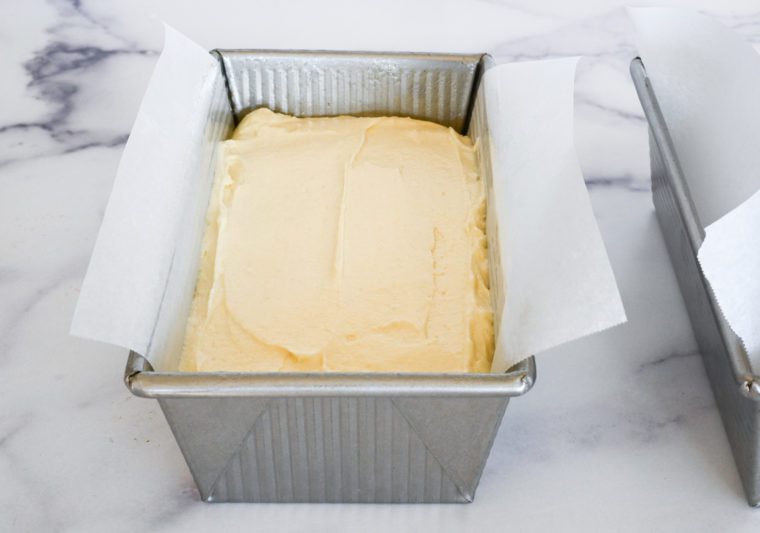
Transfer the cake batter to the prepared pans and smooth with a rubber spatula.
Bake for 55 to 65 minutes, or until the top is golden and a tester comes out clean.
Set the cakes on a cooling rack, and cool in the pans for 10 minutes.
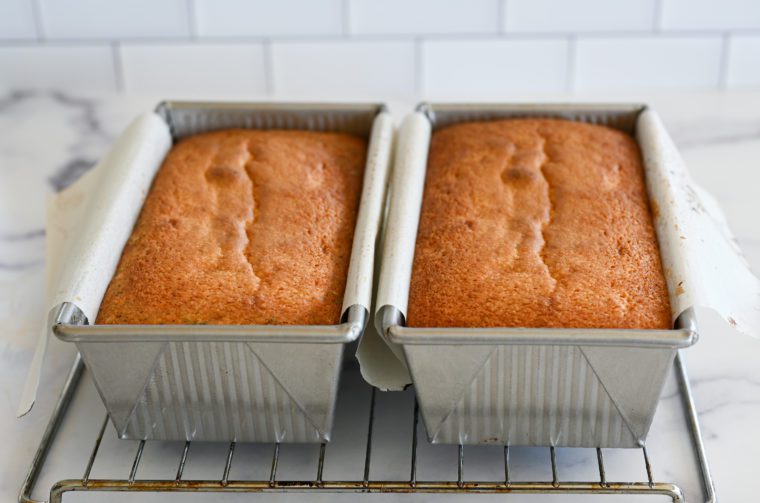
Carefully run a knife along the unlined sides of the pans to loosen the cake from the pan. Using the parchment slings, lift the cakes out of the pans and place onto the rack, leaving the parchment paper in place under the cakes. Let cool for about 1 hour.
When the cakes are almost cool, make the syrup. Combine the water and sugar in a saucepan and bring to a boil. Remove from the heat and stir in the lemon juice.

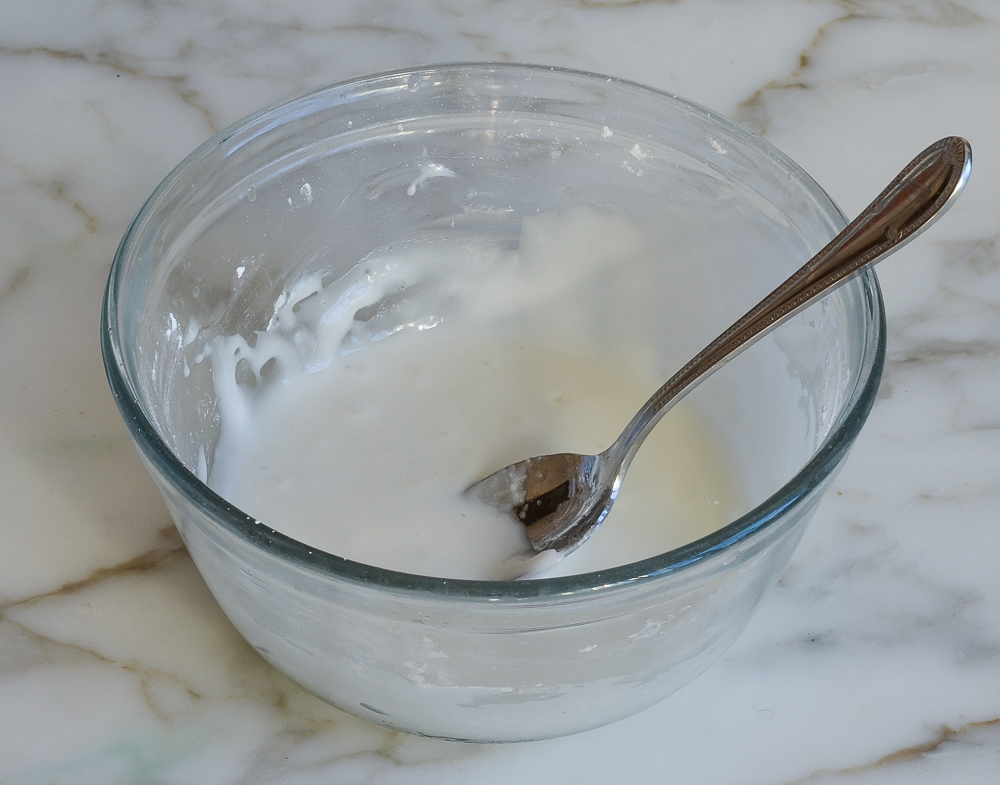
To make the glaze: in a medium bowl, whisk together the confectioners’ sugar and lemon juice. Add more confectioners’ sugar or lemon juice as necessary to make a thick but pourable glaze (it should be a little thicker than you’d think, about the consistency of molasses or honey).
When the cakes are cool, carefully transfer them to serving platters. Gradually brush the warm syrup all over the cakes, including the sides, letting it soak in as you go.
Finally, spoon the glaze over the top of the cake, letting it drip down the sides.
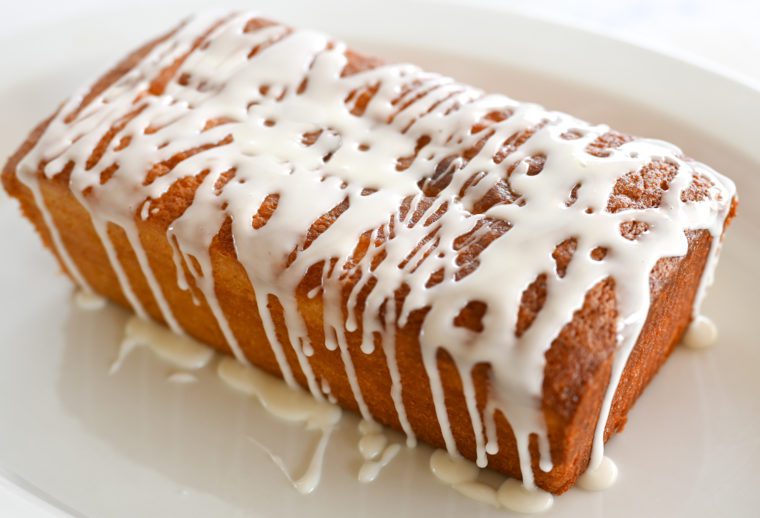
Let the cakes sit for about one hour to allow the glaze to set before serving.
How To Freeze Lemon Pound Cake
The cakes can be frozen without the glaze for up to 3 months. After they are completely cooled, double-wrap them securely with aluminum foil or plastic freezer wrap, or place them in a heavy-duty freezer bag. Thaw overnight on the countertop before serving. (Add the syrup before the cake is frozen and add the glaze after the cake is thawed.)
Note: This recipe was updated in 2022; to see the original version, click here.
You May Also Like
- Warm Lemon Pudding Cakes
- Lemon Poppy Seed Muffins
- Lemon Bars
- Cake Pans to Cookie Sheets: 16 Essential Baking Pans
Lemon Pound Cake
This lemon pound cake is the ultimate dessert for lemon lovers.
Ingredients
For the Cake
- 3 cups all-purpose flour, spooned into measuring cup and leveled-off with a knife
- ½ teaspoon baking soda
- ½ teaspoon salt
- 1 cup buttermilk (low-fat is fine) (see note)
- 2 tablespoons (packed) grated lemon zest (see note)
- 2 tablespoons fresh lemon juice
- 2 sticks (1 cup) unsalted butter, softened
- 2¼ cups granulated sugar
- 3 large eggs
For the Syrup
- 2 tablespoons water
- 2 tablespoons granulated sugar
- 2 teaspoons fresh lemon juice
For the Glaze
- 1 cup confectioners' sugar
- 2 tablespoons fresh lemon juice
Instructions
- Preheat the oven to 350°F and set an oven rack in the middle position. Spray two 8½ x 4½-inch loaf pans with nonstick cooking spray. Line the long sides of the pans with parchment paper “slings” and spray lightly with nonstick cooking spray again.
- In a medium bowl, whisk together the flour, baking soda and salt. Set aside.
- In another bowl, whisk together the buttermilk, lemon zest and lemon juice. Set aside.
- In the bowl of an electric mixer fitted with the paddle attachment (or beaters), cream the butter and sugar on medium speed until light and fluffy, 3 to 4 minutes. Scrape down the sides of the bowl, then beat in the eggs one at a time, beating well after each addition. Scrape down the sides of the bowl again.
- With the mixer on low speed, beat in one-quarter of the flour mixture, then one-third of the buttermilk mixture. Beat in another quarter of the flour, then another third of the buttermilk mixture. Repeat with another quarter of the flour and the remaining buttermilk mixture. Finally, beat in the remaining flour mixture. Scrape down the sides of the bowl, and give a quick mix to make sure all of the ingredients are well-incorporated.
- Divide the thick batter into the prepared pans and smooth with a rubber spatula. Bake for 55 to 65 minutes, or until the top is golden and a tester comes out clean.
- Set the cakes on a cooling rack, and cool in the pans for 10 minutes. Carefully run a knife along the unlined sides of the pans to loosen the cake from the pan. Using the parchment slings, lift the cakes out of the pans and place onto the rack, leaving the parchment paper in place under the cakes. Let cool for about 1 hour.
- When the cakes are almost cool, make the syrup. Combine the water and sugar in a saucepan and bring to a boil. Remove from the heat and stir in the lemon juice.
- When the cakes are cool, carefully transfer them to serving platters.
- Gradually brush the warm syrup all over the cakes, including the sides, letting it soak in as you go.
- To make the glaze: in a medium bowl, whisk together the confectioners' sugar and lemon juice. Add more confectioners' sugar or lemon juice as necessary to make a thick but pourable glaze (it should be a little thicker than you'd think, about the consistency of molasses or honey). Spoon the glaze over the top of the cake, letting it drip down the sides. Let the cakes sit for about one hour to allow the glaze to set before serving.
- Note: If you’d like to make your own buttermilk, check out the easy method here.
- Note: You'll need 4 to 5 large lemons for the entire recipe.
- Make-Ahead/Freezer-Friendly Instructions: The cakes can be made up to 1 day ahead of time and stored in a cake dome or airtight container at room temperature. They can also be frozen (without the final glaze) for up to 3 months. After they are completely cooled, double-wrap securely with aluminum foil or plastic freezer wrap, or place them in a heavy-duty freezer bag. Thaw overnight on the countertop before serving. (Add the syrup before the cake is frozen and add the glaze after the cake is thawed.)
Nutrition Information
Powered by ![]()
- Per serving (16 servings)
- Serving size: 1 slice
- Calories: 313
- Fat: 7g
- Saturated fat: 4g
- Carbohydrates: 59g
- Sugar: 40g
- Fiber: 1g
- Protein: 4g
- Sodium: 143mg
- Cholesterol: 51mg
This website is written and produced for informational purposes only. I am not a certified nutritionist and the nutritional data on this site has not been evaluated or approved by a nutritionist or the Food and Drug Administration. Nutritional information is offered as a courtesy and should not be construed as a guarantee. The data is calculated through an online nutritional calculator, Edamam.com. Although I do my best to provide accurate nutritional information, these figures should be considered estimates only. Varying factors such as product types or brands purchased, natural fluctuations in fresh produce, and the way ingredients are processed change the effective nutritional information in any given recipe. Furthermore, different online calculators provide different results depending on their own nutrition fact sources and algorithms. To obtain the most accurate nutritional information in a given recipe, you should calculate the nutritional information with the actual ingredients used in your recipe, using your preferred nutrition calculator.
Hi Jenn! Is there a reason the cakes need to cool before brushing the warm syrup all over the cakes? I would think the glaze would soak in better if the cakes were warm? What’s the advantage of cooling them first?Thank you!
Hi L – You could do it either way, but wait til the cakes are cool to add the glaze or it may melt.
Loved this lemon cake. It had a light and fine crumb. I’m used to having more syrup to brush on the cakes. I would double it next time. I also added 5-6 tsp of lemon to the xxx sugar. I made one for my family and another for a friend.
Could you use a little powdered sugar on to instead of the glaze.? That might make it a little less sugary.
Hi Carol, Yes but I wouldn’t skip the soaking syrup as it adds moisture to the cake. Enjoy!
I don’t have any buttermilk on hand but do have sour cream and plain Greek yogurt. Would all sour cream or a combination of the yogurt & sour cream be an okay replacement for the buttermilk?
Thanks Jenn.
Cheers.
PS: I absolutely love your recipes, they’re always fabulous, so if I need to wait until I can get some buttermilk to make this so be it!
Hi Susan, thanks for your nice words about the recipes – so glad you like them! It’s fine to use either sour cream or yogurt; just thin it out with a little regular milk. Enjoy!
Hi, Can I use 1/2 yoghurt and 1/2 milk instead of buttermilk.?
Thanks
Sure, Josephine, that should work. Enjoy!
Could this beautiful recipe be made into mini loaves?
Yep!
It worked really well thank you 🙏🏽
Thank you for sharing. The cake has the most beautiful texture. However I do find 450gr of sugar is way too much since there is syrup and glaze on top of the cake.. I cut the sugar down to 250gr, and the cake still turned out beautiful. Definitely keeping this recipe!
Cheers,
Christina
Just made these 2 loaves today and they were a little overcooked after 55 minutes. My oven temperature is accurate since I check its accuracy often with a good oven thermometer because I bake a lot. However, I should have known better because I used Wilton non-stick loaf pans. I find that anything I bake in non-stick pans (whether black, gray, or gold colour) cook faster than regular aluminum pans without any coating. I noticed in your other cake recipes wherein you used black or dark non-stick pans as pictured, majority of comments were about having to cook it longer than the baking time you suggested in the recipe.
Anyway, thank you for sharing your recipes. So far, I like almost everything I’ve tried.
Hi Jenn!! I just found this recipe, looks amazing!!
I’m wondering.. Would the Cake dry out if I don’t put the syrup on it?
Sammie –
Hi Sammie, The cake will still be good without the syrup, but it won’t be nearly as moist. If you leave it off, I would make sure to serve the cake very fresh.
Hi Jenn!
Thanks again for your wonderful recipes. I wanted to know if I can make this in a Bundt pan, like your lemon poppy cake? I guess I will have it bake it longer .
Thank you!
Hi Taline, This recipe was originally made in a Bundt pan, but a lot of readers had issues with sticking so I changed it. You can see the original recipe and instructions here.
Delicious to the max!
Hi Jenn! Love, love the lemons pound cake(use your old Bundt Cake pan recipe). Have you tried limes rather than lemons? I have friends that are lime lovers and think this cake is so good with lemonsl Just maybe limes would work. Thank you!
Hi Debbie, Glad you like this! I haven’t personally tried this with limes, but some other readers have and have been happy with the results, so I think it’s worth a try!