Khachapuri (Georgian Cheese Bread)


This post may contain affiliate links. Read my full disclosure policy.
Learn to make authentic khachapuri, the delicious boat-shaped Georgian cheese bread. Filled with a mixture of flavorful cheeses and topped with an egg, this comforting dish is perfect for any meal.

The first time I tried khachapuri, or Georgian cheese bread, was at Hachapuria, a little restaurant in Jerusalem known for its authentic Georgian dishes. I remember thinking it was one of the best things I’d ever eaten. The name khachapuri comes from the Georgian words “khacho” (meaning cheese curds) and “puri” (meaning bread), so it translates to “cheese bread.” Khachapuri is kind of like a white pizza, but shaped like a boat and and topped with an egg. It’s amazing when made from scratch with homemade dough, but if you’re short on time, store-bought pizza dough works nicely and gets this delicious dish on the table fast!
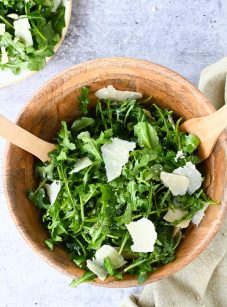
Pair khachapuri with an arugula salad or green apple and celery salad, or go for a light soup—my zucchini soup or vegetable soup would both be great options. This recipe is loosely adapted from A Good Bake by Melissa Weller.
What You’ll Need to Make Khachapuri

- All-Purpose Flour: Forms the base of the dough, and also used for dusting to prevent sticking during preparation. To ensure accuracy, always measure flour by spooning it into the measuring cup and leveling it off—it makes a difference!
- Instant/Rapid-Rise Yeast: This leavening agent helps the dough rise quickly.
- Sugar: Feeds the yeast and adds a hint of sweetness to the dough.
- Water: Hydrates the dough, helping the ingredients combine and activating the yeast.
- Unsalted Butter: Adds richness and flavor to the dough.
- Gruyere, Cheddar, Feta, And Pecorino Romano Or Parmigiano Reggiano Cheese: This combination of cheeses creates a rich filling with a balance of sharp, tangy, salty, and nutty flavors.
- Eggs: The signature soft yolk topping lends richness to the final dish. An additional egg is used as an egg wash to give the dough a golden, shiny finish when baked.
- Flaky Sea Salt: Adds a delicious salty finish to the baked khachapuri. If you don’t have any on hand, kosher or table salt will work, too.
- Fresh Dill: Adds a fresh, herbal note to the final baked dish, if desired.
- Jump to the printable recipe for precise measurements
Step-By-Step Instructions
Step 1: Prepare the Dough
In the bowl of a stand mixer, combine the flour, yeast, sugar, and salt.

Use a whisk to combine.

Add the water and softened butter.

Fit the mixer with the dough hook and mix on low speed for 2 minutes. Increase the speed to medium and knead for 5 minutes. Turn off the mixer and remove the bowl from the stand. Remove the dough hook and shape the dough into a ball in the bowl.

Cover the bowl loosely with plastic wrap or a damp clean kitchen towel and let rise in a warm, draft-free spot for 2 hours, until doubled in size.

Step 2: Refrigerate the Dough
Line a baking sheet with parchment paper. Lightly flour a clean work surface and place the dough on top. Divide it into 4 equal pieces. Form each piece into a tight ball and place them on the baking sheet. Refrigerate for 1 hour or up to overnight. (If refrigerating overnight, wrap the dough balls in plastic wrap.)

Line two baking sheets with parchment paper. Preheat the oven to 400°F, arranging the racks in the top and bottom thirds of the oven.
Step 3: Shape and Fill
Lightly dust a large clean work surface with flour. Remove one ball of dough from the refrigerator and roll it into an oval about 10 inches long by 7 inches wide. Place on a prepared baking sheet.

Spoon one-quarter of the cheese mixture onto the center of the dough, spreading it to within 1 inch of the edges.

Pull the dough’s edges up around the cheese.

Fold and twist the ends to form a boat shape.

Repeat with the remaining dough balls.

Step 4: Bake the Khachapuri
Brush the exposed edges with egg wash.

Bake for 18 to 20 minutes, until lightly golden and the cheese is melted.

Remove from the oven. Crack an egg into the center of each khachapuri (if the cheese has puffed up, leaving no room for the egg, push the cheese down with the tines of a fork to make room). Sprinkle each egg with a pinch of flaky sea salt.

Increase the oven temperature to 450°F and bake for an additional 8 to 10 minutes, until the egg whites are opaque and the yolks are still runny.

Remove the khachapuri from the oven and let them cool slightly. Serve warm, sprinkled with dill, if desired.

Note: Feel free to bake 1 or 2 khachapuri at a time, leaving the remaining dough in the fridge until ready to use. In this case, place the oven rack in the center position to ensure even baking.

You May Also Like


Khachapuri
Learn to make authentic khachapuri, the delicious boat-shaped Georgian cheese bread. Filled with a mixture of flavorful cheeses and topped with an egg, this comforting dish is perfect for any meal.
Ingredients
For the Dough
- 4 cups all-purpose flour, spooned into measuring cup and leveled-off, plus more for dusting
- 1 tablespoon instant/rapid-rise yeast (note: you'll need more than 1 packet)
- 2½ tablespoons sugar
- 2¼ teaspoons salt
- 1¼ cups water
- 4 tablespoons (¼ cup) unsalted butter, softened
For the Filling
- 6 oz Gruyere cheese (1½ cups)
- 6 oz cheddar cheese (1½ cups)
- 4 oz feta cheese (1 cup)
- ¼ cup Pecorino Romano or Parmigiano Reggiano cheese
For Baking
- 1 large egg, beaten (for egg wash)
- 4 large eggs (for topping)
- Flaky sea salt (kosher or table salt can be substituted)
- 2 tablespoons chopped fresh dill, optional
Instructions
- Prepare the Dough: In the bowl of a stand mixer, combine the flour, yeast, sugar, and salt. Use a whisk to combine. Add the water and softened butter. Fit the mixer with the dough hook and mix on low speed for 2 minutes. Increase the speed to medium and knead for 5 minutes. Turn off the mixer and remove the bowl from the stand. Remove the dough hook and shape the dough into a ball in the bowl. Cover the bowl loosely with plastic wrap or a damp clean kitchen towel and let rise in a warm, draft-free spot for 2 hours, until doubled in size.
- Refrigerate the Dough: Line a baking sheet with parchment paper. Lightly flour a clean work surface and place the dough on top. Divide it into 4 equal pieces. Form each piece into a tight ball and place them on the baking sheet. Refrigerate for 1 hour or up to overnight. (If refrigerating overnight, wrap the dough balls in plastic wrap.)
- Prepare for Baking: Line two baking sheets with parchment paper. Preheat the oven to 400°F, arranging the racks in the top and bottom thirds of the oven.
- Shape and Fill: Lightly dust a large clean work surface with flour. Remove one ball of dough from the refrigerator and roll it into an oval about 10 inches long by 7 inches wide. Place on a prepared baking sheet. Spoon one-quarter of the cheese mixture onto the center of the dough, spreading it to within 1 inch of the edges. Pull the dough's edges up around the cheese, folding and twisting the ends to form a boat shape. Repeat with the remaining dough balls.
- Bake: Brush the exposed edges with egg wash and bake for 18 to 20 minutes, until lightly golden and the cheese is melted.
- Remove from the oven. Crack an egg into the center of each khachapuri (if the cheese has puffed up, leaving no room for the egg, push the cheese down with the tines of a fork to make room). Sprinkle each egg with a pinch of flaky sea salt.
- Increase the oven temperature to 450°F and bake for an additional 8 to 10 minutes, until the egg whites are opaque and the yolks are still runny.
- Remove the khachapuri from the oven and let them cool slightly. Serve warm, sprinkled with dill, if desired.
- Note: Feel free to bake 1 or 2 khachapuri at a time, leaving the remaining dough in the fridge until ready to use. In this case, place the oven rack in the center position to ensure even baking.
Pair with

Nutrition Information
Powered by ![]()
- Per serving (4 servings)
- Serving size: 1 khachapuri
- Calories: 1,123
- Fat: 54 g
- Saturated fat: 30 g
- Carbohydrates: 107 g
- Sugar: 9 g
- Fiber: 3 g
- Protein: 49 g
- Sodium: 1,090 mg
- Cholesterol: 384 mg
This website is written and produced for informational purposes only. I am not a certified nutritionist and the nutritional data on this site has not been evaluated or approved by a nutritionist or the Food and Drug Administration. Nutritional information is offered as a courtesy and should not be construed as a guarantee. The data is calculated through an online nutritional calculator, Edamam.com. Although I do my best to provide accurate nutritional information, these figures should be considered estimates only. Varying factors such as product types or brands purchased, natural fluctuations in fresh produce, and the way ingredients are processed change the effective nutritional information in any given recipe. Furthermore, different online calculators provide different results depending on their own nutrition fact sources and algorithms. To obtain the most accurate nutritional information in a given recipe, you should calculate the nutritional information with the actual ingredients used in your recipe, using your preferred nutrition calculator.
Loved it!!
Thanks Jenn!
Can we use bread flour, or is it better with all-purpose?
Hi Gregg, I haven’t tried it but I assume it would work with bread flour—the crust will just be chewier. I’d love to know how it turns out if you try it.
Great recipe, made it tonight and my husband loved it. I halved the recipe with good success. Thanks Jenn!
Thank you for reminding me of how wonderful khachapuri is! The recipe I use is more complicated and involves stuffing the rolled edge of the boat. I plan to use your recipe in future, particularly now that cooler weather is here.. Your recipes have never failed me and many have become favourites. Pot roast and beef stew are two well used and stained print-outs!
😊