Gyros
This post may contain affiliate links. Read my full disclosure policy.
Yee-roh or ji-roh? No matter how you say it, it’s hard to beat the taste of a Greek gyro — and they’re easier to make than you’d think!
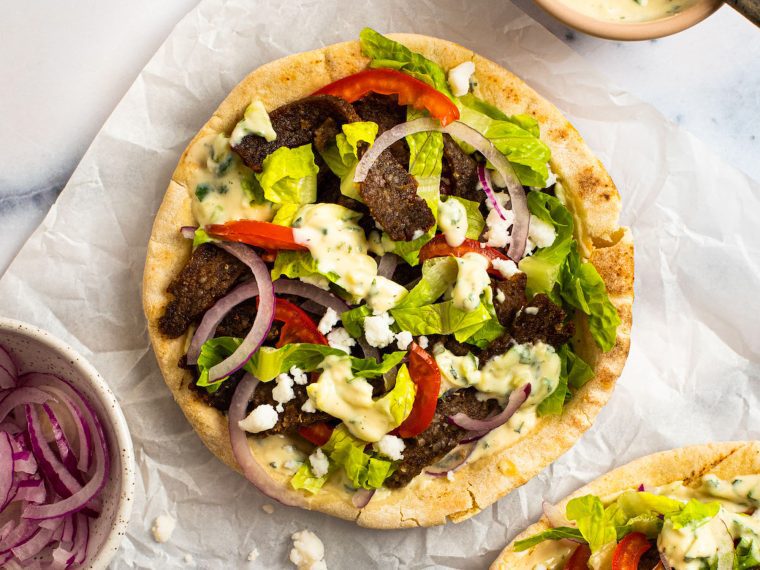
Chances are, you’ve savored a delicious gyro, but have you been pronouncing it correctly? It’s actually ‘yee-roh.’ (Do yourself a favor and watch this hilarious Jimmy Fallon/Luke Bryan clip about the pronunciation — it will give you a laugh). This flavorful dish gets its name from the Greek ‘gyros,’ meaning ‘turn’ — a direct reference to how the succulent slices of meat are prepared, gently rotating on a vertical spit, their flavor deepening with each turn.
In Greek restaurants in the States, you’ll find two types of gyros: Greek-American gyros, made with ground meats and spices formed into a cone and cooked on a rotisserie, and authentic Greek gyros, made with marinated, whole cuts of meat tightly stacked into a tower and slowly roasted on a spit. Both versions are incredibly delicious!
This recipe focuses on the Greek-American gyro since it’s much easier to replicate at home. To make it, simply blend ground beef and lamb with bread crumbs, oregano, onion powder, garlic powder, and ground cumin. Next, shape this mixture into two loaves and bake them. After baking, thinly slice the loaves and quickly sear the slices in a skillet, which gives you beautifully crispy slices.
How To Serve Gyros
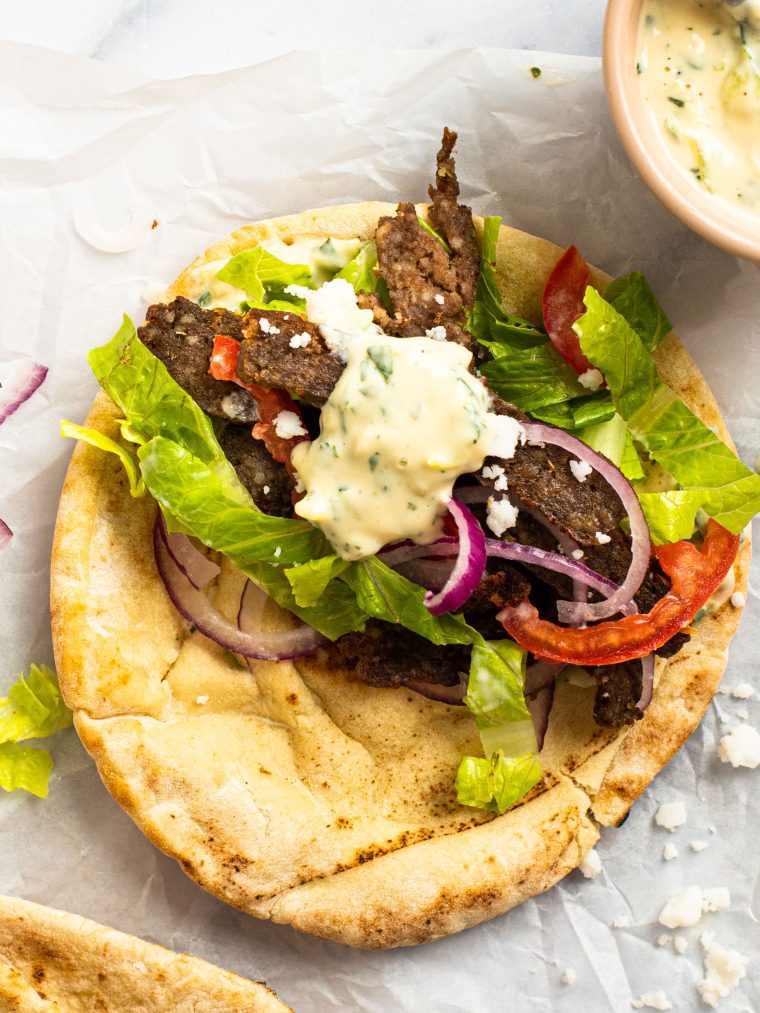
You can enjoy the gyro meat a few ways. Serve it atop a vibrant Greek salad for a light meal or wrap the slices in a warm pita bread with tzatziki sauce, juicy tomatoes, crisp lettuce, and crumbled feta. What’s great about this recipe is that it yields a generous two loaves, allowing you to freeze one loaf for those harried nights when you don’t have time to cook.
Note: The meat will taste a bit salty on its own but needs the extra salt for flavor when added to sandwiches and salads.
WHAT YOU’LL NEED TO MAKE gyros
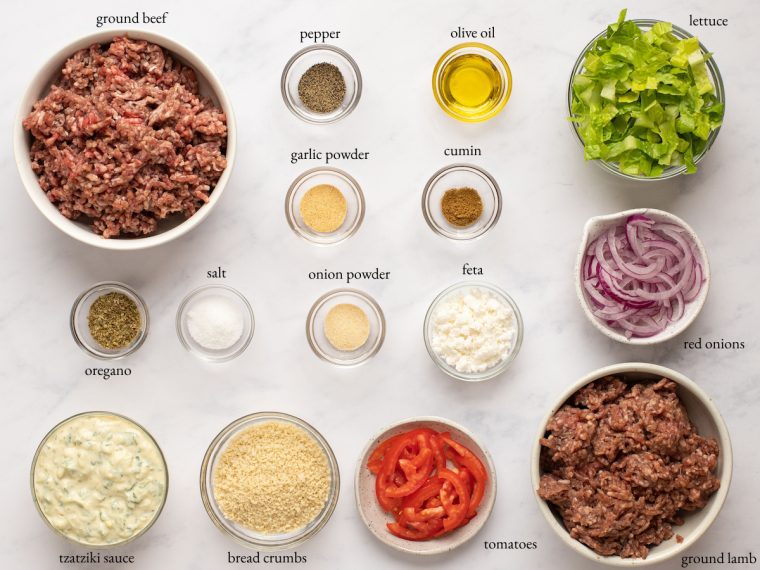
In developing this recipe, I experimented with both fresh and dried onion and garlic. Surprisingly, the dried versions delivered the best flavor. This helps to reduce the prep time, which is always a bonus!
You might be tempted to use just one type of meat, and while it will certainly taste delicious, it may not entirely emulate that authentic gyro flavor we’re aiming for.
There are two types of pita bread — with and without pockets. If you plan to eat these as wraps, you’ll want to buy pocketless pitas. If your store has a few options, pick the softest, fluffiest ones; they will be the easiest to roll up.
Sometimes at restaurants, you’ll get a few french fries tucked into your pita alongside meat and other fixings. I haven’t included them here, but if you’ve got some frozen fries on hand, feel free to add a few in!
STEP-BY-STEP INSTRUCTIONS
Step 1: Make the Gyro Meat
Preheat the oven to 300°F and set an oven rack in the middle position. Line a baking sheet with heavy-duty aluminum foil.
Place the beef, lamb, bread crumbs, salt, pepper, oregano, onion powder, garlic powder, and cumin in the bowl of a food processor fitted with the steel blade.
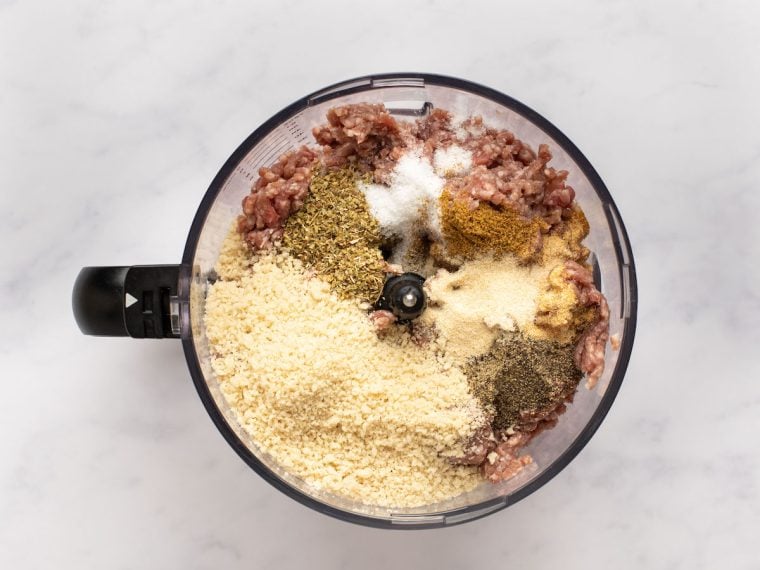
Process until the mixture is well combined and paste-like, scraping down the bowl as necessary, about 1 minute.
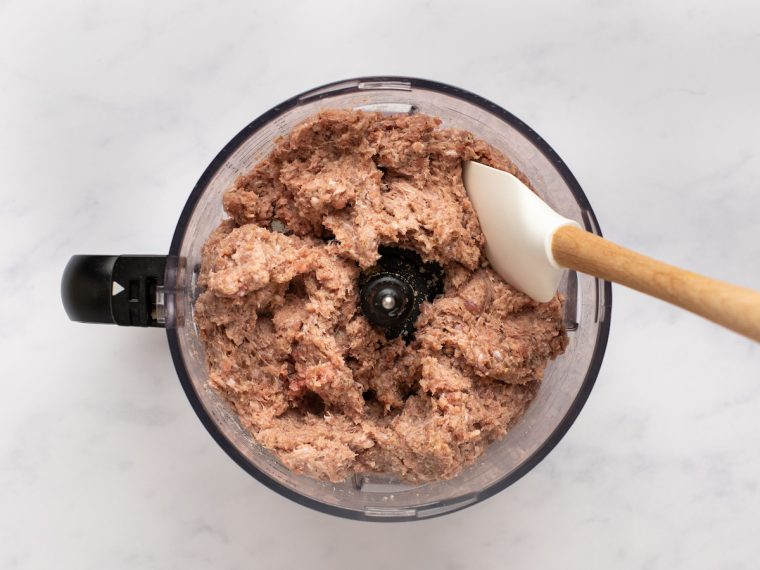
Using moist hands, form the mixture into two free-form loaves about 1 inch high, 8 inches long, and 4 inches wide directly on the prepared baking sheet.
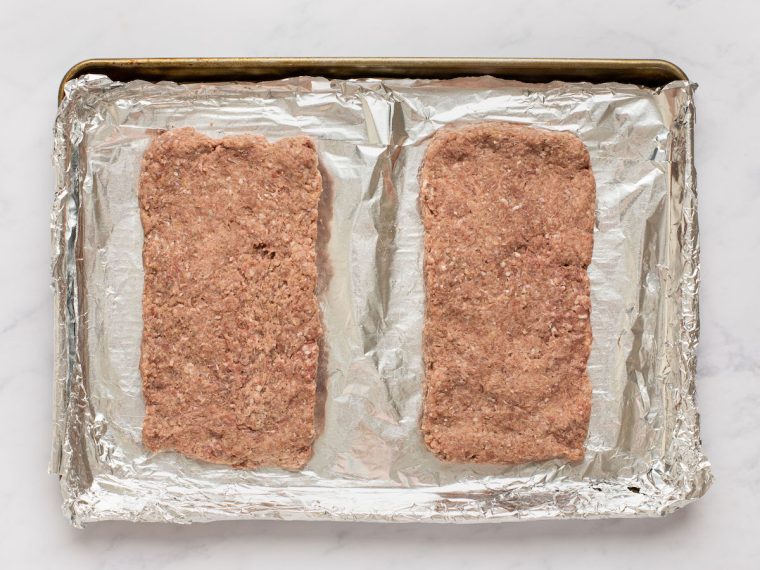
Bake for 40 to 45 minutes, or until meat is firm in the center and reaches an internal temperature of 160°F. Let sit for about 10 minutes, or chill until ready to slice, up to 4 days.
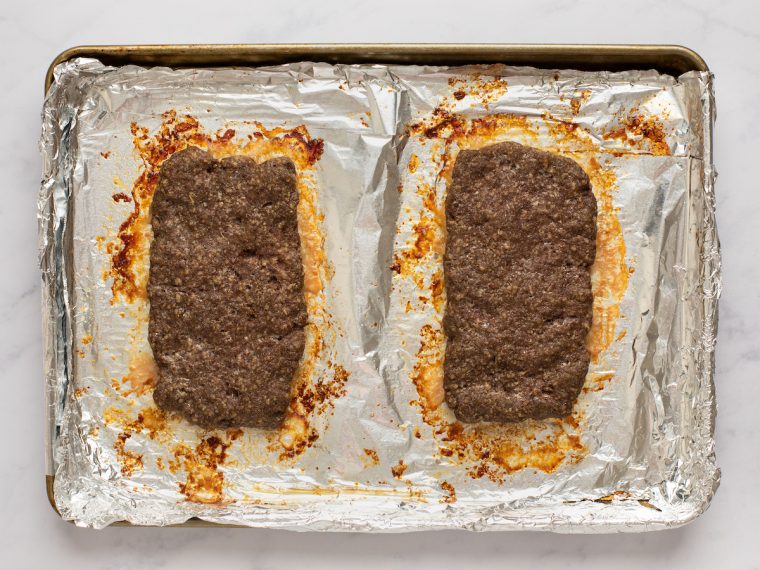
Transfer the loaves to a cutting board and slice between ⅛ and ¼ inch thick.
The gyro loaves (or unbrowned slices) can be prepared up to 4 days ahead of time and refrigerated, or frozen for up to 3 months. Thaw overnight in the refrigerator before browning and serving.
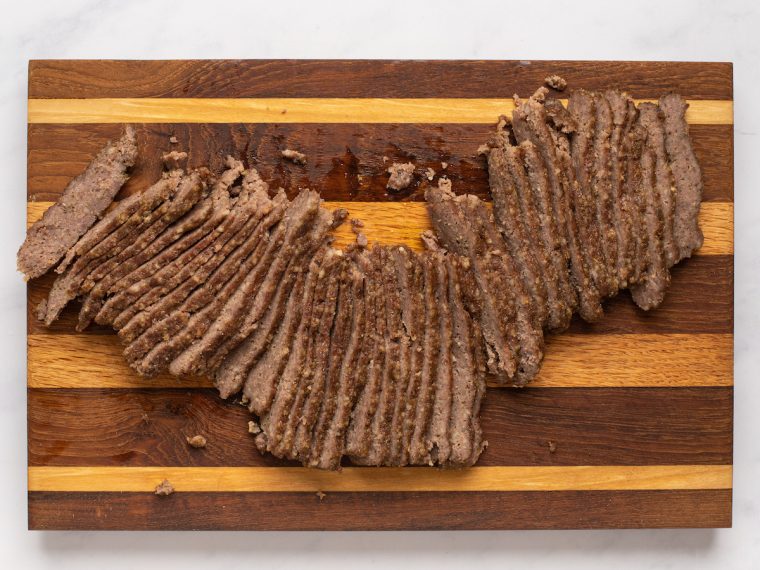
To serve, working in batches, heat about 1 tablespoon of oil in a nonstick skillet over medium heat. Cook the gyro slices in a single layer until lightly browned, 30 to 60 seconds per side.
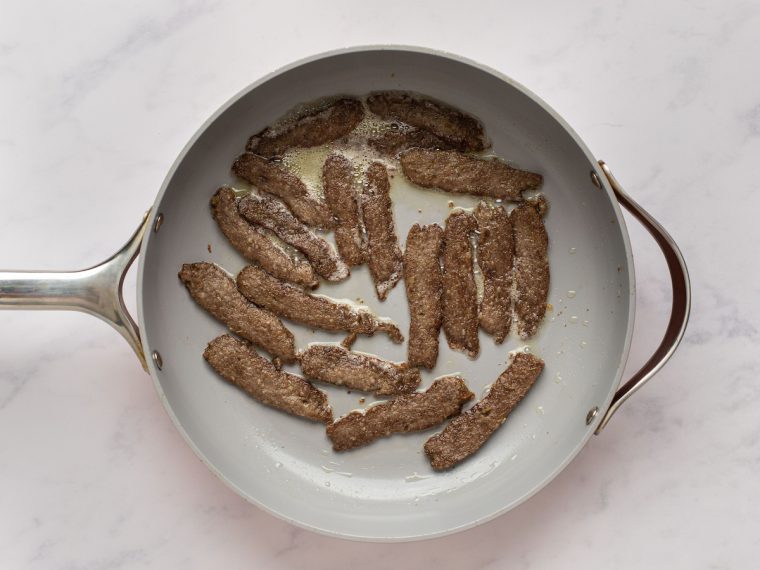
Step 2: Assemble the Gyros
Serve the gyros with pita bread, tzatziki sauce, tomatoes, onion, lettuce, and feta.
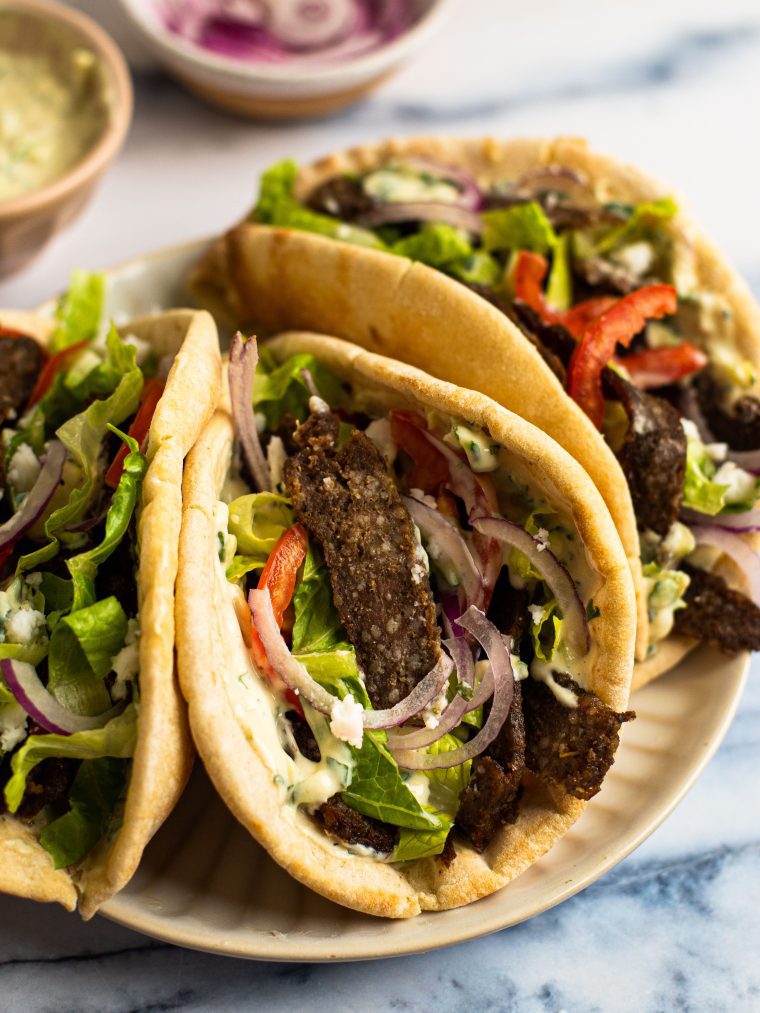
To wrap your gyro, get a parchment or foil piece twice the size of your pita. Place the pita slightly off the top edge, spread tzatziki, add meat and toppings in a line in the middle. Fold the gyro and parchment/foil in half over the toppings. Wrap the parchment/foil edges over the pita and tuck the outer edge under a fold to secure it.
You may also like
- Greek-Style Lamb Burgers
- Middle Eastern Lamb Kofta
- Falafel
- Grilled Moroccan Meatballs with Yogurt Sauce
- Avgolemono Soup
Gyros
Yee-roh or ji-roh? No matter how you say it, it’s hard to beat the taste of a Greek gyro — and they’re easier to make than you’d think!
Ingredients
For the Gyro Meat
- 1 pound 80% lean ground beef
- 1 pound ground lamb
- ½ cup plain bread crumbs
- 1½ teaspoons salt
- 1 teaspoon freshly ground black pepper
- 2 teaspoons dried oregano
- 1 teaspoon onion powder
- 1 teaspoon garlic powder
- ½ teaspoon ground cumin
For Serving
- Olive oil
- Pita bread
- Tzatziki sauce
- Thinly sliced tomatoes and red onion
- Lettuce
- Feta cheese
Instructions
- Preheat the oven to 300°F and set an oven rack in the middle position. Line a baking sheet with heavy-duty aluminum foil.
- Place the beef, lamb, bread crumbs, salt, pepper, oregano, onion powder, garlic powder, and cumin in the bowl of a food processor fitted with the steel blade. Process until the mixture is well combined and paste-like, scraping down the bowl as necessary, about 1 minute.
- Using moist hands, form the mixture into two free-form loaves about 1 inch high, 8 inches long, and 4 inches wide directly on the prepared baking sheet. Bake for 40 to 45 minutes, or until meat is firm in the center and reaches an internal temperature of 160°F. Let sit for about 10 minutes, or chill until ready to slice, up to 4 days. Transfer the loaves to a cutting board and slice between ⅛ and ¼ inch thick.
- To serve, working in batches, heat about 1 tablespoon of oil in a nonstick skillet over medium heat. Cook the gyro slices in a single layer until lightly browned, 30 to 60 seconds per side. Serve with pita bread, tzatziki sauce, tomatoes, onion, lettuce, and feta.
- Make-Ahead Instructions: The gyro loaves (or unbrowned slices) can be prepared up to 4 days ahead of time and refrigerated, or frozen for up to 3 months. Thaw overnight in the refrigerator before browning and serving.
- Note: Nutritional information is for gyro meat only.
Pair with
Nutrition Information
Powered by ![]()
- Per serving (6 servings)
- Calories: 446
- Fat: 33 g
- Saturated fat: 14 g
- Carbohydrates: 8 g
- Sugar: 1 g
- Fiber: 1 g
- Protein: 27 g
- Sodium: 377 mg
- Cholesterol: 109 mg
This website is written and produced for informational purposes only. I am not a certified nutritionist and the nutritional data on this site has not been evaluated or approved by a nutritionist or the Food and Drug Administration. Nutritional information is offered as a courtesy and should not be construed as a guarantee. The data is calculated through an online nutritional calculator, Edamam.com. Although I do my best to provide accurate nutritional information, these figures should be considered estimates only. Varying factors such as product types or brands purchased, natural fluctuations in fresh produce, and the way ingredients are processed change the effective nutritional information in any given recipe. Furthermore, different online calculators provide different results depending on their own nutrition fact sources and algorithms. To obtain the most accurate nutritional information in a given recipe, you should calculate the nutritional information with the actual ingredients used in your recipe, using your preferred nutrition calculator.

I made your gyro last night. It was delicious, my family loved it. Your recipes are always spot on Jen.
How necessary is the food processor? I don’t have one, but your recipe looks the best, the best one I’ve found online… if I were to try to just smash together with my hands and really but some muscle into it, is that even an option? (assume I do everything else the exact same)
Hi John, a food processor is best, and a mixer would be my second choice, but if you don’t have either, I think it will work. It won’t have quite the same texture but will still be good. I’d love to hear how it turns out if you try it!
I never thought I could make my own Gyros at home but these were easy and so delicious! Next time, I think I’ll mix everything in two batches – it was a bit full in my food processor. I froze the second loaf for another week – already craving them! Now we don’t have to go to a restaurant for gyros.
These were so easy to make and the meat is delicious. Definitely adding to our monthly rotation!
Excellent recipe. Family loved it. I added spices from Morocco and it was amazing. We are going to try to mold the meat on skewers to bbq. Another perfect dinner that my family sincerely appreciated
Hi Jen,
I tried this recipe the day i saw it! I can’t believe i was able to make such good gyros at home! I’ve tried many of your recipes and every one has turned out amazing! Thank you for sharing your talent!
Are you using Greek oregano?
Hi Linda, No, I buy standard oregano (McCormick brand).
I’ve never bought or eaten pitas and don’t know what they are like, but we love your Naan recipe and I wondered if they would work with these gyros.
Jenn, I’m eager to try this but have never bought pita. We LOVE your Naan recipe – is that something that would work with this, or do I need to buy pita? (Is there a big difference?)
Hi Judy, it would be fine to use the naan (and glad you like it) – hope you like the gyros as well!
Thank you! We loved it with the Naan.
Jen, I love all of your recipes, and your cookbooks take pride of place in my kitchen! You make me look like a great chef! All we need now is to teach Jimmy Fallon how to correctly pronounce tzatziki LOL!