Falafel
This post may contain affiliate links. Read my full disclosure policy.
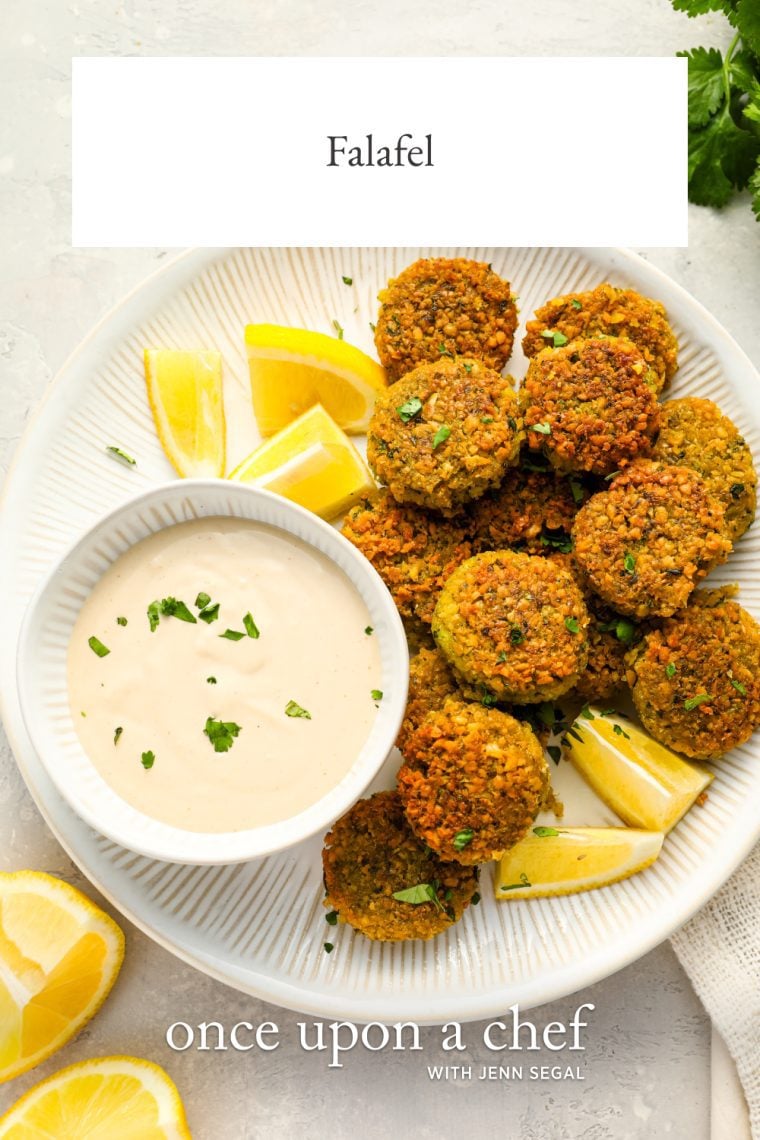
Learn the secret to perfect, crispy falafel with my simple recipe—no deep-frying required! The crucial ingredient? Dried chickpeas; canned chickpeas simply won’t cut it for truly authentic falafel.

Falafel, a popular vegetarian street food throughout the Middle East, are deep-fried patties made from ground chickpeas (or fava beans), herbs, and spices. Traditionally, they’re stuffed into pita or served as part of a mezze platter with Israeli salad, hummus, tabbouleh, baba ganoush, and tahini sauce.
Making falafel at home may seem intimidating, but it’s actually quite simple—almost like making meatballs, and you don’t even need to deep-fry. The key, and I can’t stress this enough, is to avoid using canned chickpeas. Many recipes call for them, but I can tell you from experience that they just don’t work well (unless you want a mushy disaster on your hands!). The best falafel is made with dried chickpeas that have been soaked overnight but not cooked. If you’re short on time, you can use the quick-soak method, which only takes about an hour.
“I was a culinary goddess when I made this falafel recipe. The falafel was as good as or better than any I’ve had in a restaurant and was pretty easy. Just toss the ingredients into a food processor and fry up the patties…Really delicious!”
What You’ll Need To Make Falafel

- Dried Chickpeas: The base ingredient for falafel; they provide the structure and texture. Soaking them overnight (or using the quick-soak method) ensures they are soft enough to blend but firm enough to hold together during cooking. Do not use canned chickpeas!
- Scallions: Add a mild onion flavor without overpowering the mixture, contributing to the aromatic base of the falafel.
- Parsley and Cilantro: These herbs add a fresh, vibrant flavor and a bit of color to the falafel.
- Garlic: Provides a sharp, pungent flavor that complements the earthiness of the chickpeas, spices, and herbs.
- Cumin and Cinnamon: These spices add warmth and depth, giving the falafel a distinct, mildly spiced flavor profile typical of Middle Eastern cuisine.
- Vegetable Oil: Used for pan-frying the falafel, giving them a crispy exterior while keeping the interior moist and flavorful.
- Jump to the printable recipe for precise measurements
Step-By-Step Instructions
Begin by soaking the chickpeas: Put the chickpeas in a large bowl and cover with water by about 4 inches. Soak for 24 hours, adding more water as necessary to keep the chickpeas covered (they will double or triple in size).

Alternatively, if you’re short on time, you can use the quick-soak method: place the beans in a pot and cover with water by about three inches; bring to a rolling boil and boil for five minutes, then remove the pan from the heat and let stand for one hour.

Drain the chickpeas and add to a food processor along with the scallions, garlic, herbs, salt, pepper, and spices. Process until the chickpeas are finely minced, scraping the bowl as necessary, a few minutes. The consistency should well-moistened and able to bind together. If the mixture doesn’t hold together easily when shaping into patties or seems too crumbly, continue processing until it binds properly. This step is crucial for ensuring the falafel doesn’t fall apart during cooking.

Form the mixture into patties.

Heat about 1/4-inch of oil in a nonstick sauté pan over medium heat. Pan-fry the falafel in batches, flipping once, until golden brown all over, 4 to 5 minutes total. (Before frying your first batch of falafel, you can ensure the oil is the right temperature by frying one patty in the center of the pan. If you notice that the outside of the patty is browning before a total cook time of 4 to 5 minutes, reduce the heat a bit.)

Drain on paper towels.

Serve warm with tahini or yogurt sauce. If you have leftover cooked falafel, you can refrigerate it for up to 3 days; reheat in a 325°F oven for 10 to 15 minutes, or until heated through.

Frequently Asked Questions
Yes, falafel can be made ahead of time. You can prepare the mixture and form the patties up to a day in advance. Store the uncooked patties on a baking sheet lined with parchment paper in the refrigerator. When you’re ready to cook, fry them directly from the fridge.
Yes, falafel can be frozen. After forming the patties, place them on a baking sheet and freeze them until solid. Then transfer the frozen patties to a freezer bag or airtight container. They can be stored in the freezer for up to three months. When ready to cook, you can fry them directly from frozen, just allow a little extra time to cook through.
Falafel can fall apart during cooking if the mixture is too dry or hasn’t been processed enough to bind together. It’s crucial to use dried chickpeas that have been properly soaked and to process the mixture until it can easily form patties without crumbling. If the mixture seems too crumbly, continue processing until it holds together properly. Ensuring the patties are compact when formed is also key to preventing them from breaking apart.
No, canned chickpeas are too soft and contain too much moisture, which can prevent the falafel from achieving the proper texture and can cause them to fall apart during frying. Dried chickpeas, when soaked and processed correctly, provide the right texture and binding quality needed for authentic falafel.
Leftover falafel can be stored in an airtight container in the refrigerator for up to three days. To reheat, bake them in the oven at 325°F oven for 10 to 15 minutes, or until heated through. Falafel can also be frozen; place them on a baking sheet to freeze individually, then transfer to a freezer bag or container. Reheat directly from frozen in the oven.
Video Tutorial
You May Also Like

Falafel
Learn the secret to perfect, crispy falafel with my simple recipe—no deep-frying required! The crucial ingredient? Dried chickpeas; canned chickpeas simply won’t cut it for truly authentic falafel.
Ingredients
- 2 cups dried chickpeas, rinsed and picked over
- 8 scallions, light and dark green parts, from 1 bunch, coarsely chopped
- ¼ cup chopped fresh parsley leaves
- ¼ cup chopped fresh cilantro leaves
- 4 cloves garlic, coarsely chopped
- 2 teaspoons salt
- 1 teaspoon ground black pepper
- ½ teaspoon cumin
- ¼ teaspoon cinnamon
- Vegetable oil, for frying
Instructions
- Soak the chickpeas: Put the chickpeas in a large bowl and cover with water by about 4 inches. Soak for 24 hours, adding more water if necessary to keep the chickpeas covered, as they will double in size. For a quicker option, use the quick-soak method: place the beans in a pot, cover with water by about 3 inches, bring to a rolling boil for 5 minutes, then remove from heat and let stand for 1 hour.
- Prepare the Mixture: Drain the chickpeas and place in the bowl of a food processor fitted with the steel blade. Add the scallions, parsley, cilantro, garlic, salt, pepper, cumin, and cinnamon. Process until the chickpeas are very finely minced, scraping down the sides of the bowl as necessary, a few minutes. The consistency should well-moistened and able to bind together. If the mixture doesn't hold together easily when shaping into patties or seems too crumbly, continue processing until it binds properly. This step is crucial for ensuring the falafel doesn’t fall apart during cooking.
- Form the falafel: Using heaping tablespoonfuls, form the mixture into patties about ½ inch thick and 1½ inches wide. The mixture should be compact and able to hold together well when shaped. If it feels too crumbly, process it a bit more. If the mixture sticks to your hands, moisten your hands with a bit of water to help shape the patties.
- Cook the falafel: Heat ¼-inch of oil in a large nonstick sauté pan over medium heat. When the oil is hot and shimmering, add half of the falafel to the pan (the falafel should sizzle immediately when you drop it in the oil; if it doesn't, wait another minute or two for the oil to heat up.) When the first side is golden, flip and cook a few minutes more until golden all over. The total cook time should be 4 to 5 minutes. Using a slotted spoon, transfer the falafel to a paper towel-lined plate to drain. Cook the second batch, then serve warm or room temperature with tahini sauce or yogurt sauce.
- Make-Ahead/Freezing Instructions: You can prepare the mixture and form the patties up to a day in advance. Store the uncooked patties on a baking sheet lined with parchment paper in the refrigerator. When you're ready to cook, fry them directly from the fridge. The uncooked falafel can also be frozen. After forming the patties, place them on a baking sheet and freeze them until solid. Then transfer the frozen patties to a freezer bag or airtight container. They can be stored in the freezer for up to three months. When ready to cook, you can fry them directly from frozen; just allow a little extra time to cook through. Leftover falafel can be stored in an airtight container in the refrigerator for up to three days. To reheat, bake them in the oven at 325°F for 10 to 15 minutes, or until warmed through. Falafel can also be frozen after cooking; place them on a baking sheet to freeze individually, then transfer to a freezer bag or container. Reheat directly from frozen in the oven.
- Note: Nutritional information was calculated assuming that approximately 2 tablespoons of the oil are absorbed into the falafel when frying.
Pair with
Nutrition Information
Powered by ![]()
- Per serving (12 servings)
- Serving size: 2 falafel
- Calories: 153
- Fat: 4 g
- Saturated fat: 0 g
- Carbohydrates: 22 g
- Sugar: 4 g
- Fiber: 4 g
- Protein: 7 g
- Sodium: 111 mg
- Cholesterol: 0 mg
This website is written and produced for informational purposes only. I am not a certified nutritionist and the nutritional data on this site has not been evaluated or approved by a nutritionist or the Food and Drug Administration. Nutritional information is offered as a courtesy and should not be construed as a guarantee. The data is calculated through an online nutritional calculator, Edamam.com. Although I do my best to provide accurate nutritional information, these figures should be considered estimates only. Varying factors such as product types or brands purchased, natural fluctuations in fresh produce, and the way ingredients are processed change the effective nutritional information in any given recipe. Furthermore, different online calculators provide different results depending on their own nutrition fact sources and algorithms. To obtain the most accurate nutritional information in a given recipe, you should calculate the nutritional information with the actual ingredients used in your recipe, using your preferred nutrition calculator.
Gluten-Free Adaptable Note
To the best of my knowledge, all of the ingredients used in this recipe are gluten-free or widely available in gluten-free versions. There is hidden gluten in many foods; if you're following a gluten-free diet or cooking for someone with gluten allergies, always read the labels of your ingredients to verify that they are gluten-free.


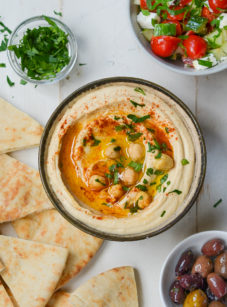
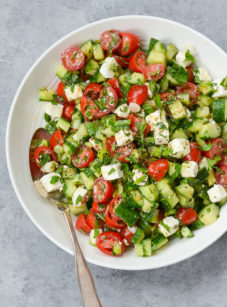
This is a great falafel recipe! I made it as written several times, though this time we tried out our new airfryer as an alternative cooking method…400 degrees for about 10 minutes. 17 balls ( using a small scoop -approx 1.5 Tablespoon size) to fit on a single layer in the basket. There was still about 1 cup mix remaining, so I froze that. I’ve had good luck thawing the uncooked mix and using for a quick dinner. I also make a lemon tahini dressing (started with Moosewood recipe) which can also be frozen.
I served the falafel with pita, broccoli sprouts, tomatoes, hummus, and the lemon tahini sauce. We also had a side of tabbouli salad (also from Moosewood) and had Jenn’s fabulous raspberry ricotta cheesecake. My guests were very complimentary throughout dinner and delighted to take leftovers home for another meal.
Jenn, thanks so much for providing these great recipes. It seems like all of the recipes that I’ve tried on your site are phenomenal which leads me to have great trust in everything that you provide us. Thank you!
I made this tonight and it is definitely going into the regular rotation. I love falafel but never even thought to make it myself til now. This recipe comes together really quickly. I soaked the beans the night before and the rest took about 20 minutes from start to plate. I realized after looking at the photos that I used less oil than was called for – probably had 1/8 inch which was enough. I made the tzatziki to go with it and a simple salad of red lettuce and an heirloom yellow tomato. Can’t wait to take the leftovers for lunch!
An update to my original review.
1. I mixed mine for a full minute in the food processor after reading other reviews and they stayed together no problem.
2. These are really amazing right out of the pan. They are pretty good a day after making them, but after that mine dried out. I’d recommend making them right before you eat them – crispy and delicious.
Is it possible to freeze the cooked falafel patties.
Hi Sandy, I’ve never frozen falafel before, so I can’t say for sure, but I think it should work. Please let me know how they are once you thaw them!
hi there….is it possible to make these a day early, refrigerate and then re-heat? Will it affect the texture etc? Thank you!!
Hi Melissa, I’ve only eaten these right after cooking them, but I think they would reheat nicely. I’d reheat them in a 325-degree oven for 10 -15 minutes, or until heated through. Hope you enjoy!
This is a tasty and straightforward recipe; practically perfect in every way! I make these in about 25 minutes, start (after rehydrating the chickpeas overnight) to finish.
Definitely use dried chickpeas and rehydrate them overnight. The raw chickpeas stay together the best and have a better texture than even the quick boiled version.
I don’t have a food processor so after prepping all of the ingredients, I break them up into approximately 1/3 batches and use my ninja chopper. After a quick stir in a bowl to blend the batches together, they’re ready to pan-fry.
One tip, pack the falafel patties tightly when forming in your hands or they may break up in the pan.
Really easy, delicious recipe! Thank you!
This was such an exciting recipe to attempt! I’d never made anything remotely similar, but Jenn’s instructions made it fool proof. It was almost magical to watch the uncooked patties become falafel before my eyes! I’ve now made this dish twice, and reduced both the salt and cinnamon by half the second time around…That was a nearly perfect spice blend for my husband and I, but next time I may try using 3/4 tsp salt and rolling the patties in sesame seeds before frying. This is a recipe I always can’t wait to try again!
Hi Jen.
Do I cover the chickpeas with a cloth towel or saran wrap when letting soak over night?
Don’t want to mess up as I would love to be able to make homemade falafel.
Thanks
Megan
Hi Megan, It won’t have a huge impact on the recipe one way or the other, but yes, I’d cover them when letting them soak. Hope you enjoy!
Once again, your recipe has made dinner a complete winner in our home! These falafels were fabulous. I had some trouble with the amount of chickpeas in my food processor — there were almost more than my processor (a Ninja) could handle. So, I processed the chickpeas on their own for about a minute. Then when they were ground down enough that they weren’t up to the lid any longer, I added the rest of the ingredients and blended for about 3-4 more minutes, scraping down the sides after every minute. I used an ice-cream scoop to shape the falafels and had no trouble at all with them falling apart while cooking. Another 5-star recipe! I look forward to trying something new from your website every week. Thank you so much for making meal time fun again. I can’t wait to get my hands on your cookbook!
So happy you’re enjoying the recipes, Leah! 😊
Made for the first time today. Really great and sooo easy! They fried beautifully after soaking the dried chickpeas for almost 24h. Looking forward to making again and will try to freeze some. Thanks for all your fantastic recipes- you are now my go to site for recipes!
My daughter (who recently became vegetarian) and I made these last night and they were absolutely fabulous. I soaked the chickpeas for 24 hours. We kept hearing a popping/clicking noise in the kitchen and finally realized that the chickpeas were making that noise as they expanded in the soaking water! We used avocado oil for frying and served these on a bed of fresh spinach along with cucumbers, tomatoes and yogurt sauce. The seasoning was spot on. So delicious!
Just finished making these….had the same experience as some of the other people who’ve commented: they wouldn’t hold together before getting them in the pan, so I put them back in the food processor and processed them for a full minute. This time they held together nicely. I discovered that I really like these with tahini sauce, tomatoes and spinach.