Dry-Brined Turkey
This post may contain affiliate links. Read my full disclosure policy.
Discover the secret to a perfectly juicy and flavor-packed bird with this easy dry-brined turkey recipe—it’s a holiday game-changer!
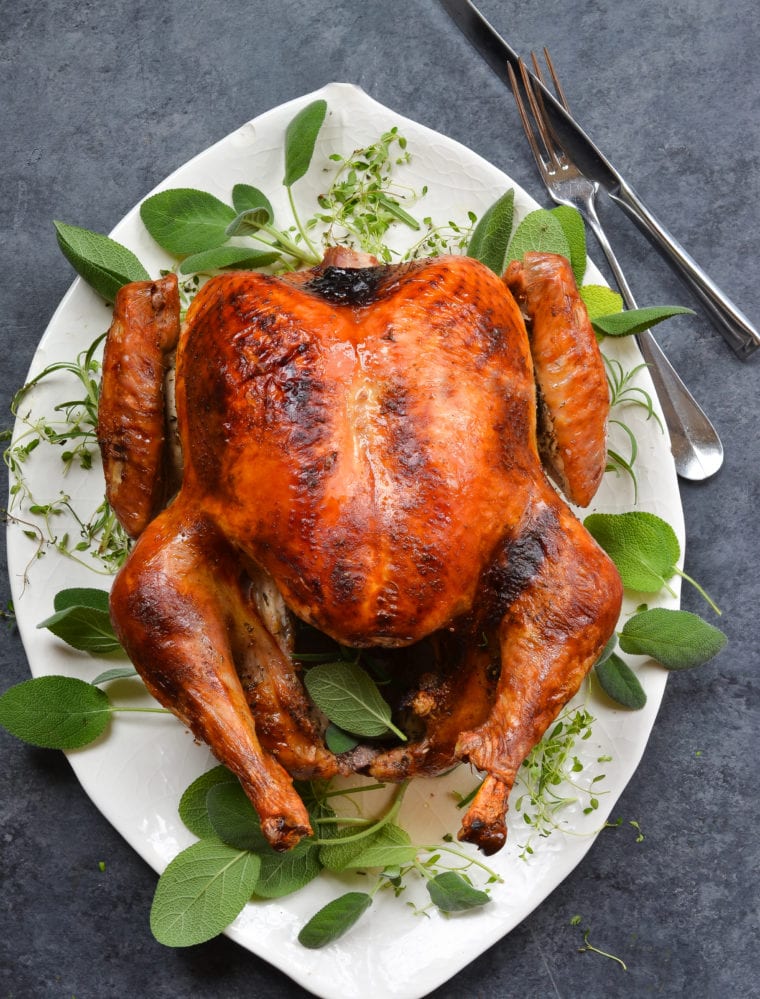
This fantastic dry-brined turkey recipe was passed on to me by the talented food stylist Rebecca Jurkevich, who styled my second cookbook. She told me it was the best turkey she’d ever made—and she’s styled plenty of turkeys for holiday magazines and photo shoots over the years! Adapted from Jeff Mauro and featured in Rachel Ray Magazine, the recipe’s biggest draw is its simplicity.
You start by rubbing a salt and seasoning mixture—the dry brine—onto the turkey’s skin, then let it rest in the fridge overnight. The salt not only deeply seasons the meat but also draws out the turkey’s natural juices, creating a self-brine that the meat reabsorbs, guaranteeing flavorful, juicy, tender results from the inside out. Plus, the overnight rest in the fridge dries out the skin, so when you cook it, you end up with the most beautifully crispy, golden-brown exterior. Whether you’re a seasoned cook or tackling Thanksgiving turkey for the first time, this dry-brined method is a must-try for its ease and reliability.
Table of Contents
“My husband just declared this is the best turkey we’ve made in 40 years!!!! I concur!!”
Wet Brining vs. Dry Brining
Dry brining involves rubbing salt, herbs, and spices onto the turkey skin and letting it rest in the fridge overnight (or longer). In contrast, wet brining requires soaking the turkey in a seasoned saltwater solution, which often means dealing with a large cooler or bag—a process that can be quite cumbersome. Both methods enhance flavor and juiciness, but dry brining is much simpler and produces beautifully crisp skin.
What You’ll Need To Make A Dry-Brined Turkey
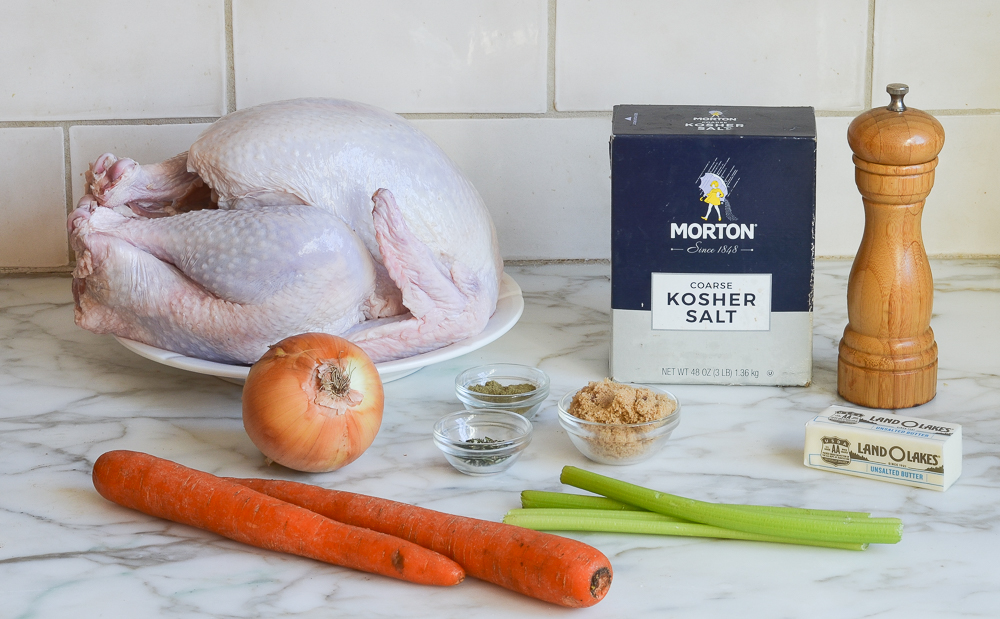
- Turkey – For the best results with this dry-brining method, avoid kosher turkeys, injected turkeys, or self-basting turkeys. These birds have already been treated with salt or a brining solution. However, if you can only find one of these, you can still use this recipe—just halve the amount of salt in the dry brine to avoid over-salting.
- Light brown sugar – Adds a touch of sweetness to balance the salt in the brine and enhances the turkey’s natural flavors.
- Kosher salt – The essential component of the dry brine; it draws moisture out of the skin for extra-crispy results while seasoning the meat throughout. I use Morton brand kosher salt; if you’re using Diamond Crystal kosher salt, which has lighter, flakier grains, you’ll need to increase the amount to ¼ cup to achieve the same level of seasoning. The difference is due to the way the salts are processed: Morton has denser, more compact granules, so it measures saltier per tablespoon than the lighter Diamond Crystal.
- Herbs (dried thyme and sage) – Infuse the turkey with earthy, savory flavors and bring that quintessential holiday flavor.
- Freshly ground black pepper – Provides a mild, peppery bite to balance the other seasonings.
- Unsalted butter – Coats the turkey for baking, enhancing richness and helping to brown the skin.
- Aromatics (yellow onion, carrots, and celery) – Add depth and sweetness to the drippings, creating a flavorful base for the gravy.
- Jump to the printable recipe for precise measurements
Step-by-Step Instructions
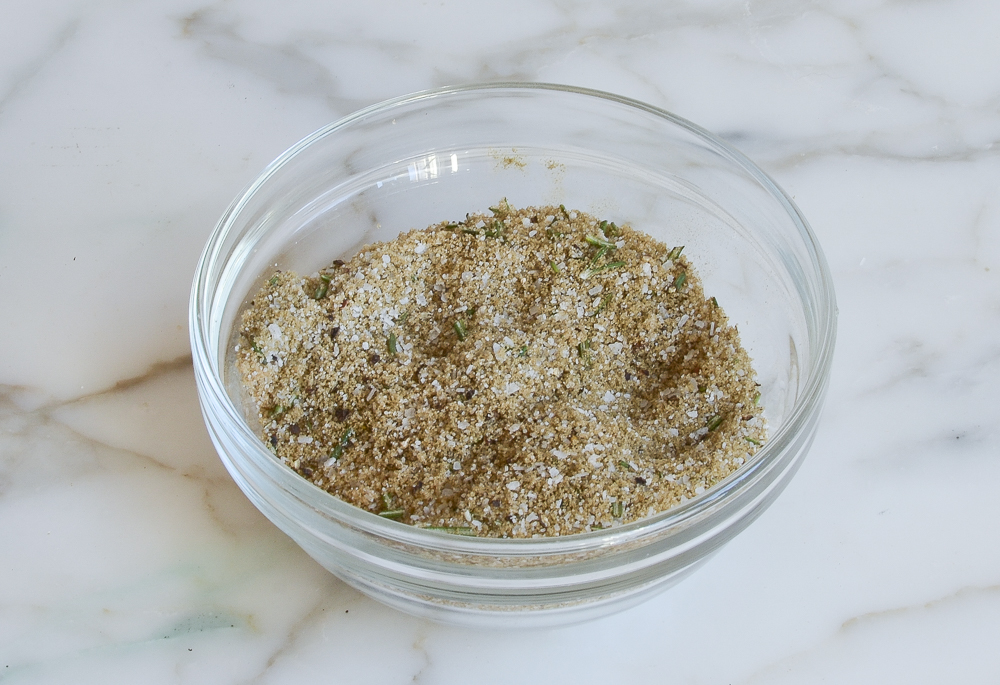
In a small bowl, mix the sugar, salt, thyme, sage, and pepper for the dry brine.
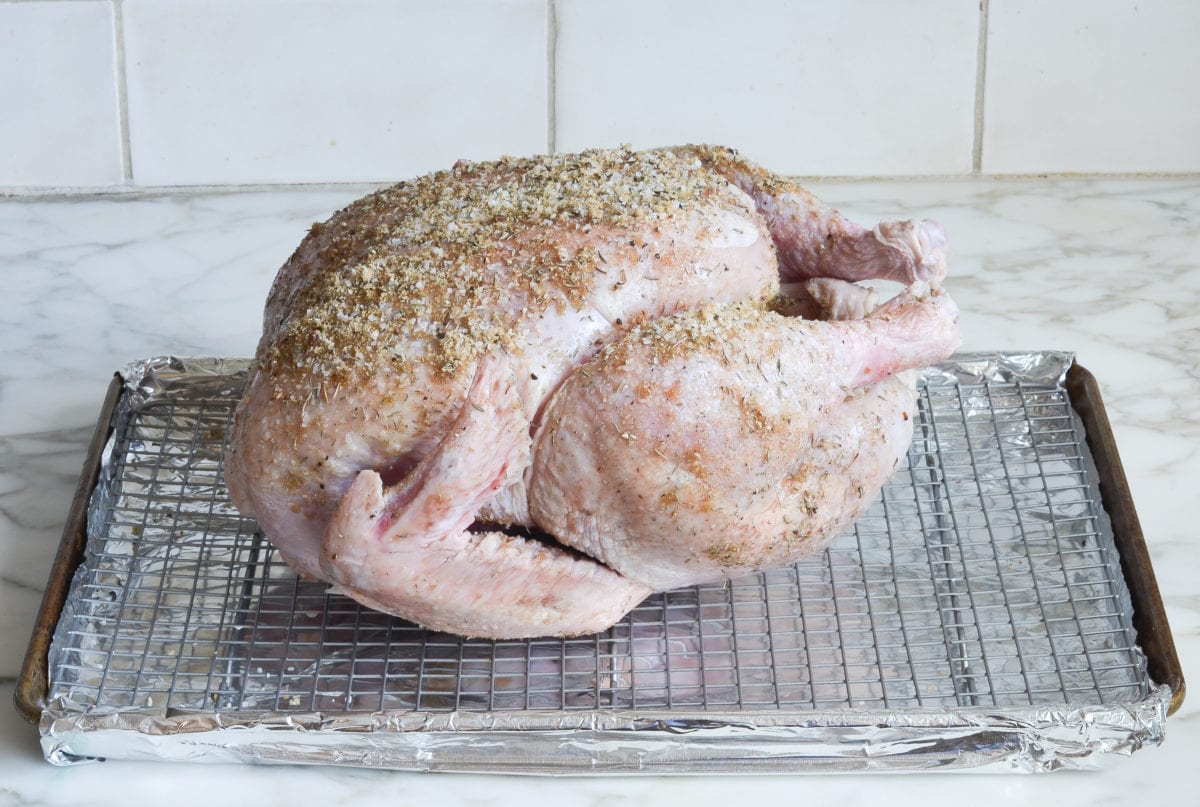
Place the turkey breast side up on the rack of a baking sheet. Rub and pat the dry brine all over the turkey, including inside the cavity. Refrigerate, uncovered, for at least 24 hours and up to 48 hours. The longer you allow the turkey to brine, the more flavorful and moist it will be, but don’t go past the max recommended time.
Using damp paper towels, brush the dry brine off the turkey.
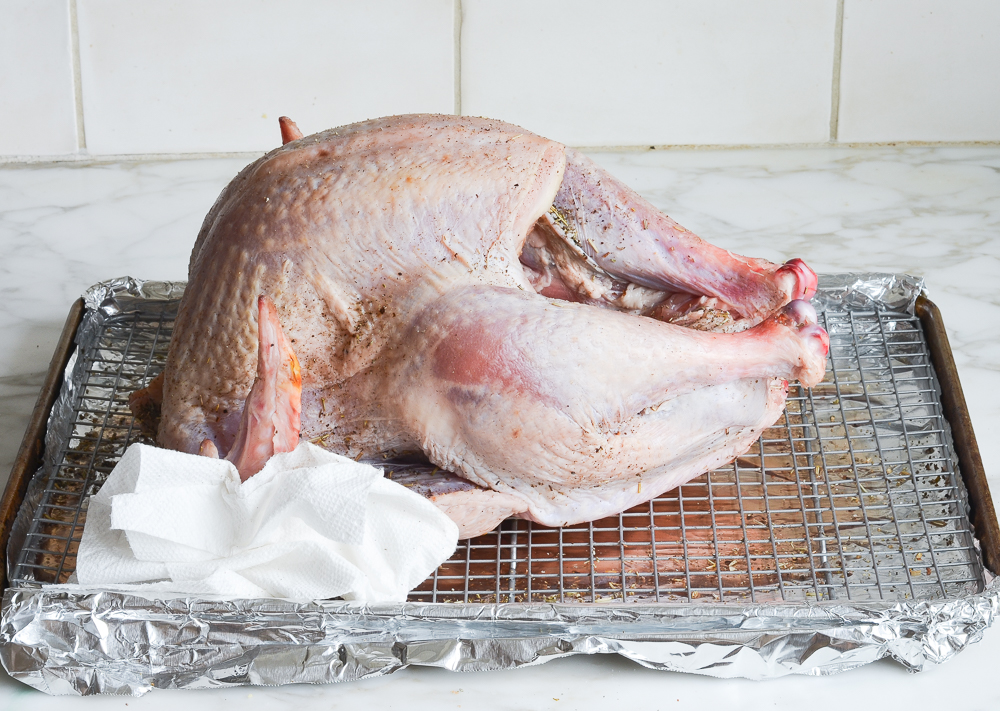
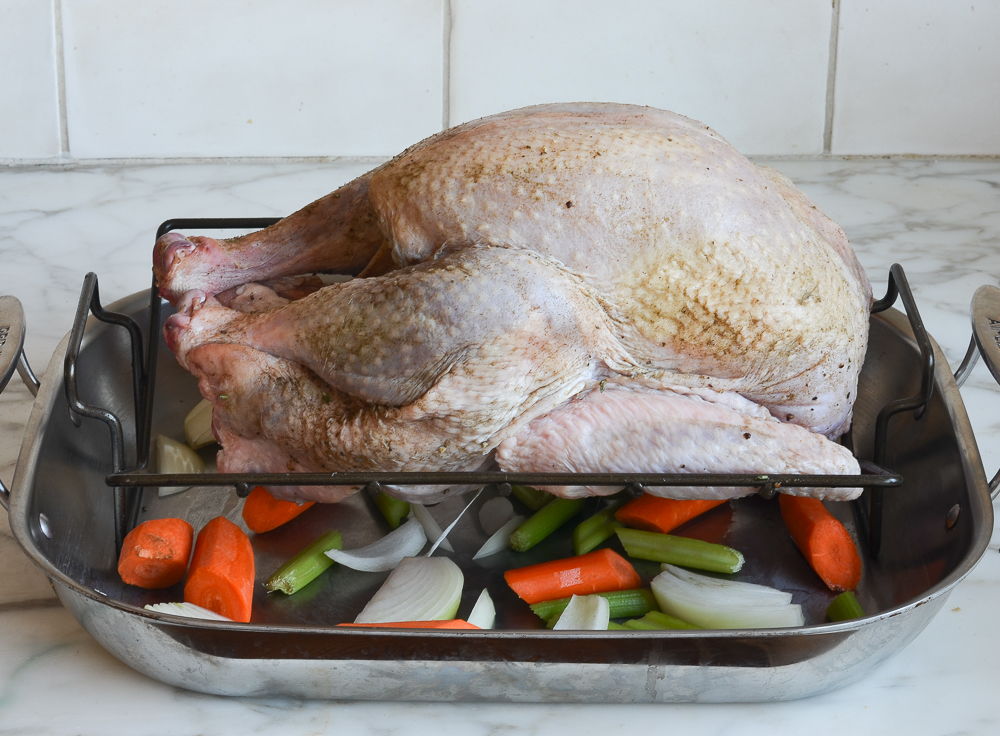
Scatter the onion, carrots, and celery in the bottom of a large roasting pan. Place a roasting rack inside the pan and place the turkey on the rack. Tuck the wings underneath the bird.
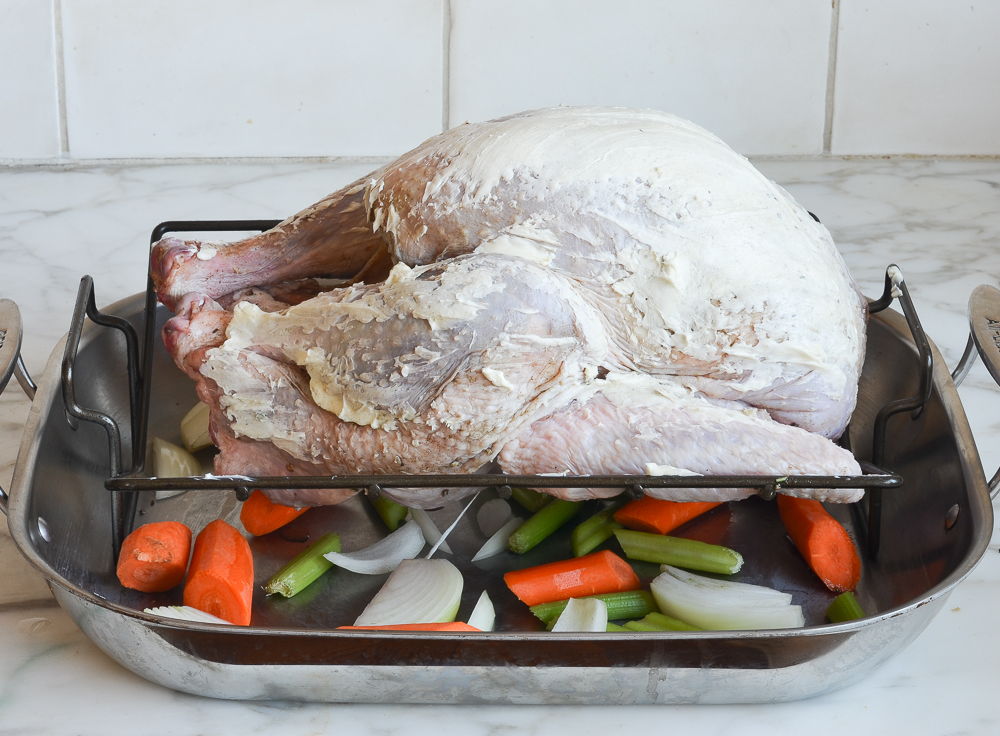
Using your hands, smear the butter all over the turkey.
Roast the turkey until the skin is deep golden and an instant-read thermometer registers 165°F when inserted into the thickest part of the breast and the thigh, 1-3/4 to 2-1/2 hours. Check the turkey after 1-1/2 hours. If it’s getting too dark, cover it loosely with foil.
Note: The cooking time will depend on the size of your turkey. For best results, I recommend using a digital thermometer with a leave-in probe and remote monitor, like the one shown below. That way, you can monitor the temperature of the turkey without ever opening your oven.
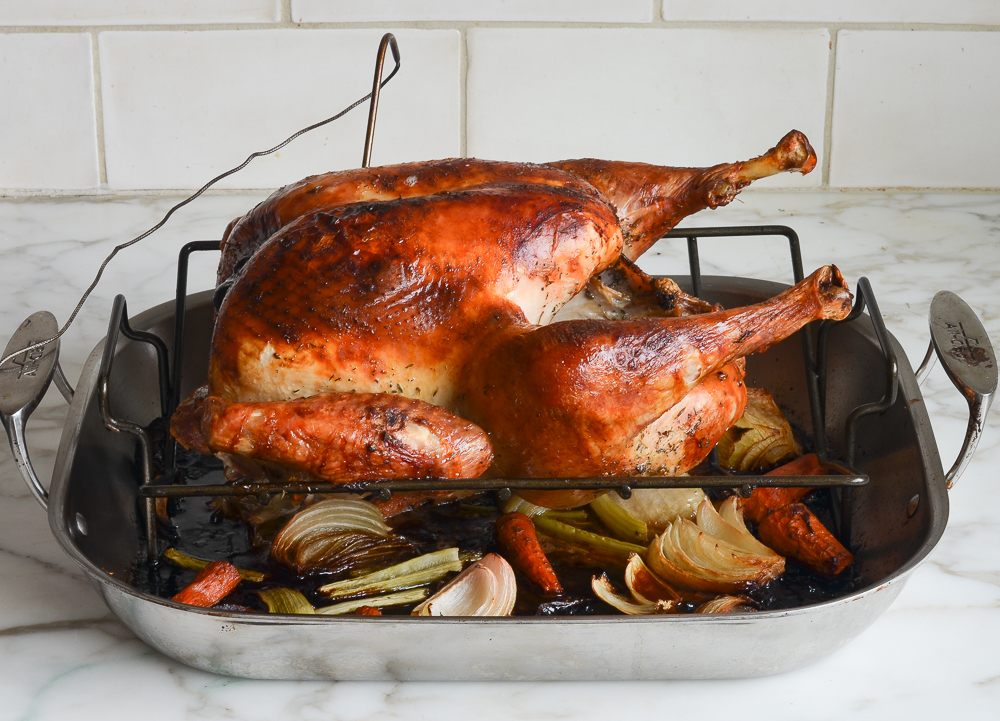
Using clean oven mitts (that you don’t mind getting dirty), carefully tilt the turkey so any juices from the cavity pour into the roasting pan. Transfer the turkey to a platter or cutting board. Tent with foil and let rest for 20 to 30 minutes. Remove the vegetables from the pan and discard (or if they aren’t too soft/brown, save them and arrange on the serving platter with the turkey). Reserve the drippings in the pan for the gravy. While the turkey rests, make the turkey gravy.
Carve the turkey and serve with the gravy on the side. Serve with stuffing and cranberry sauce.
You May Also Like
Dry-Brined Turkey
Discover the secret to a perfectly juicy and flavor-packed bird with this easy dry-brined turkey recipe—it’s a holiday game-changer!
Ingredients
- 1 (12 to 14-pound) turkey, patted dry (see note)
- ¼ cup (packed) light brown sugar
- 3 tablespoons Morton kosher salt (or ¼ cup Diamond kosher salt)
- 2 teaspoons dried thyme
- 2 teaspoons dried sage leaves or ground sage
- 1 teaspoon freshly ground black pepper
- 6 tablespoons unsalted butter, at room temperature
- 1 large yellow onion, cut into wedges
- 2 carrots, cut into 2-inch pieces
- 2 stalks celery, cut into 2-inch pieces
Instructions
- Line a rimmed baking sheet with aluminum foil for easy clean up, and set an oven rack on top.
- Remove and discard the truss that holds turkey legs together (if the legs are held together with turkey skin, cut the skin to release them). Trim off and discard any excess fat in the neck or body cavity. Remove giblets and neck; discard or save for stock. Rinse the turkey inside and out with warm water. Pat dry with paper towels.
- In a small bowl, mix the sugar, salt, thyme, sage, and pepper for the dry brine. Place the turkey on the rack of the prepared baking sheet. Rub and pat the dry brine all over the turkey, including inside the cavity. Refrigerate, uncovered, for at least 24 hours and up to 48 hours. (For food safety, ensure the turkey remains in the refrigerator at 40°F or lower during the entire brining period. If brining for longer than 24 hours, you can cover the turkey loosely with plastic wrap for the first part of the brining process and then uncover it for the final 24 hours to allow the skin to dry.)
- Preheat the oven to 375°F and set an oven rack in the lower third of the oven. Using damp paper towels, brush the dry brine off the turkey.
- Scatter the onion, carrots, and celery in the bottom of a large roasting pan. Place a roasting rack inside the pan and place the turkey on the rack. Tuck the wings underneath the bird. Using your hands, smear the butter all over the turkey.
- Roast the turkey until the skin is deep golden and a leave-in or instant-read thermometer registers 165°F when inserted into the thickest part of the breast and the thigh, 1¾ to 2½ hours (see note). Check the turkey after 1½ hours. If the skin is getting too browned, cover it loosely with foil.
- Using clean oven mitts (that you don't mind getting dirty), carefully tilt the turkey so any juices from the cavity pour into the roasting pan. Transfer the turkey to a platter or cutting board. Tent with foil and let rest for 20 to 30 minutes. Remove the vegetables from the pan and discard (or if they aren't too soft/brown, save them and arrange on the serving platter with the turkey). Reserve the drippings in the pan for the gravy.
- While the turkey rests, make the gravy.
- Carve the turkey and serve with the gravy on the side.
- Make-Ahead Instructions: If you don't mind losing the crispy skin, the turkey can be roasted and carved ahead of time. Pour a thin layer of the gravy into an ovenproof serving dish. Arrange the carved turkey nicely on top of the gravy; cover tightly with plastic wrap and refrigerate for up to two days. Refrigerate the remaining gravy in a separate container. To reheat: remove the plastic wrap and cover the platter with aluminum foil. Place in a 325°F-oven for 20 to 30 minutes, until the turkey is hot. Reheat the gravy in the microwave or on the stovetop.
- Note on Selecting Your Turkey: For the best results with this dry-brining method, look for a turkey that is not kosher, injected, or labeled as "self-basting." These types of turkeys have already been treated with salt or a brining solution. However, if you can only find a kosher, injected, or self-basting turkey, you can still use this recipe, as these birds do still benefit from additional seasoning. Just halve the amount of salt in the dry brine to avoid over-salting.
- Note: I've given a range for the cooking time, which will depend on the size of your turkey. For best results, I recommend using a digital thermometer with a leave-in probe and remote monitor (like this one). That way, you can monitor the temperature of the turkey without ever opening your oven.
Pair with
Nutrition Information
Powered by ![]()
- Per serving (8 servings)
- Calories: 1,075
- Fat: 47 g
- Saturated fat: 15 g
- Carbohydrates: 6 g
- Sugar: 5 g
- Fiber: 0 g
- Protein: 147 g
- Sodium: 1,619 mg
- Cholesterol: 513 mg
This website is written and produced for informational purposes only. I am not a certified nutritionist and the nutritional data on this site has not been evaluated or approved by a nutritionist or the Food and Drug Administration. Nutritional information is offered as a courtesy and should not be construed as a guarantee. The data is calculated through an online nutritional calculator, Edamam.com. Although I do my best to provide accurate nutritional information, these figures should be considered estimates only. Varying factors such as product types or brands purchased, natural fluctuations in fresh produce, and the way ingredients are processed change the effective nutritional information in any given recipe. Furthermore, different online calculators provide different results depending on their own nutrition fact sources and algorithms. To obtain the most accurate nutritional information in a given recipe, you should calculate the nutritional information with the actual ingredients used in your recipe, using your preferred nutrition calculator.
Gluten-Free Adaptable Note
To the best of my knowledge, all of the ingredients used in this recipe are gluten-free or widely available in gluten-free versions. There is hidden gluten in many foods; if you're following a gluten-free diet or cooking for someone with gluten allergies, always read the labels of your ingredients to verify that they are gluten-free.

Hi! I just began the dry brine process and it went on dry and now seems a bit wet. Is this ok?
Thanks!
Christine
Hi Christine, Yes this is normal – enjoy!
Please help! My husband brined our turkeys too soon. We are cooking 2 because we have a large crowd coming, and he couldn’t get a large enough one. It will be more than 48 hours. He hasn’t been feeling well and miscalculated his time. He did it a day ahead. So the turkeys will be brined for 48 hours tomorrow afternoon. What is your advice? Should we take the brine off of it? He is thinking of cooking them tomorrow to be safe with the meat even though we don’t need them until Monday night.
Hi Pam, You could rinse off the brine, pat the skin very dry, and place back in the fridge until ready to cook. Or you can cook the bird a day ahead and then reheat — either way it should be fine!
Thanks so much! We have used this dry brine for Thanksgiving and it was great! I have also used your gravy, stuffing, mashed potatoes and cranberry sauce. They are all wonderful! I really appreciate your advice and recipes. They always turn out perfect and delicious!
Hi Jenn
Was wondering if the turkey needs to be fresh or can I use a frozen, defrosted turkey.
Love all your recipes!
Ruth
So glad you like the recipes, Ruth! You can definitely use a frozen, thawed turkey. Enjoy!
Hey Jenn!
Great recipe, but did you ever try it on a bone in turkey breast? Like to try it for small group for Christmas. The stuffed looks good but looking for something a little easier.
Hi Kat, I haven’t tried it with a turkey breast, but a number of readers have commented that they have successfully.
Hello Jenn,
As we sat down for Thanksgiving dinner, one which included many of your recipes, I realized that you and your site make us novice cooks, like me, better than we really are. This is not meant as an insult to any readers/subscribers, but these step-by-step instructions provide results far superior to those most restaurants do at this time of year.
This recipe was fantastic. I followed the 48-hour protocol and on the second day, added additional rub (without the salt). Using the link to get the thermometer, I programmed to 180F (our butterball suggested 175F) as a compromise to some skeptics on this method. This produced great results, even in a builders’ quality oven where actual temps seem to very quite a bit with the posted temp. Frankly, I too was shocked at the moistness of all the cuts.
Question: Is there any types of meat you would not recommend to use this recipe?
Keith, I’m so glad to hear that my recipes have given you a lot more confidence in the kitchen, and that you had success with the turkey! 😊
Regarding your question about using the brine on other types of meat, what do you have in mind?
Does it have to be a meat with skin like chicken, duck, other fowl? Or perhaps other wild game which is sometimes very tough (instead of marinade)?
I think this would work well on wild game or any kind of poultry.
Ok, I used the exact mix on a Cornish hen and duck with the thermometer and the resulting flavors for both were amazing. The duck carving, however, was a bit problematic, so the presentation was slightly barbaric. Can you give me any secrets?
So glad to hear it! I’d recommend a video tutorial to help you. This one looks pretty thorough. Hope you find it helpful!
New Thanksgiving Turkey recipe!!! My family couldn’t stop going on about how moist and flavorful the white meat and the bird were overall. It probably brined for about 36 hours (not quite 48). I’m not a big fan of thyme; I cut that back to 1 tsp, added 1 tsp each of tarragon, onion powder, & garlic powder (I don’t think this changed the overall recipe much, just my taste). My bird was a 16lb butterball with solution so I cut the salt back as suggested (to about 1/2). There was plenty of rub and butter for the bigger bird. I forgot to wipe the rub off before the butter BUT it turned out GREAT for the turkey drippings/gravy later. The instructions were fantastic! I used foil at about the same spot the recipe said to check it. My turkey actually looked like a magazine turkey and tasted WONDERFUL overall!
I liked that this recipe used spices/herbs I had in my cabinet rather than fresh herbs (most dry brine recipes-I just don’t grow the ‘Thanksgiving’ herbs and they are hard to find at the store during this holiday). Totally DOABLE! I’ve been doing this dinner for 10 years now and I feel like I FINALLY got the turkey RIGHT, not just good, but REALLY GOOD!
This was astonishingly excellent! I followed the recipe exactly as written, allowing about 36 hours of refrigeration with the dry brine. Combined with a digital thermometer as recommended, this came out PERFECT! (I don’t usually even like turkey, but I loved this, as did my entire family. Thanks, Jen!
This is a great recipe and was so moist and delicious! I did the 48 hour brine and it was easily the best Thanksgiving turkey I’ve made to date. Thanks Jenn, I predominately used your recipes for gravy, cranberry sauce and mashed potatoes and our dinner was a big hit!
Dry brine worked perfectly! Turkey was moist and flavorful. Everyone raved
I used the dry brine recipe for the first time. The turkey came out beautifully brown with extra crispy skin. The meat itself was exceptionally tender. I made, as always, your cranberry relish recipe, which I always add a pinch of clove. I made the most flavorful stock for gravy that I’ve ever had, and the taste was outstanding. I have been cooking for almost 60 years and I am still learning. I love your recipes. I had a friend over and we had a lovely meal, so thanks, Jen.