Crusty Artisan Bread
This post may contain affiliate links. Read my full disclosure policy.
This crusty bread recipe is astonishingly easy—no kneading required—and makes three beautiful loaves, which you can bake as needed.
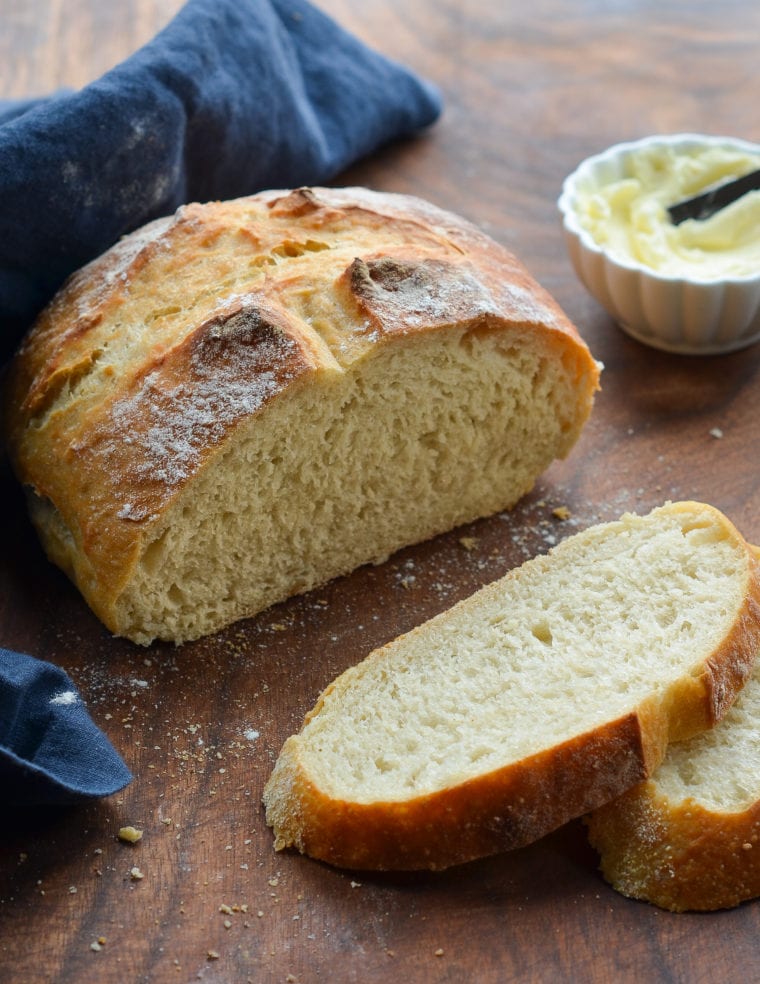
This homemade artisan bread recipe is astonishingly easy, and it makes enough for three delicious loaves, which you can bake as needed. What’s more, the dough takes just five minutes to make, does not require kneading or any special equipment, and can rest in the fridge for up to two weeks (the flavor becomes more complex the longer it sits). The recipe is modestly adapted from one of my favorite baking books, Artisan Bread in 5 Minutes A Day by Jeff Hertzberg M.D. and Zoë François.
Table of Contents
What You’ll Need To Make Crusty Artisan Bread
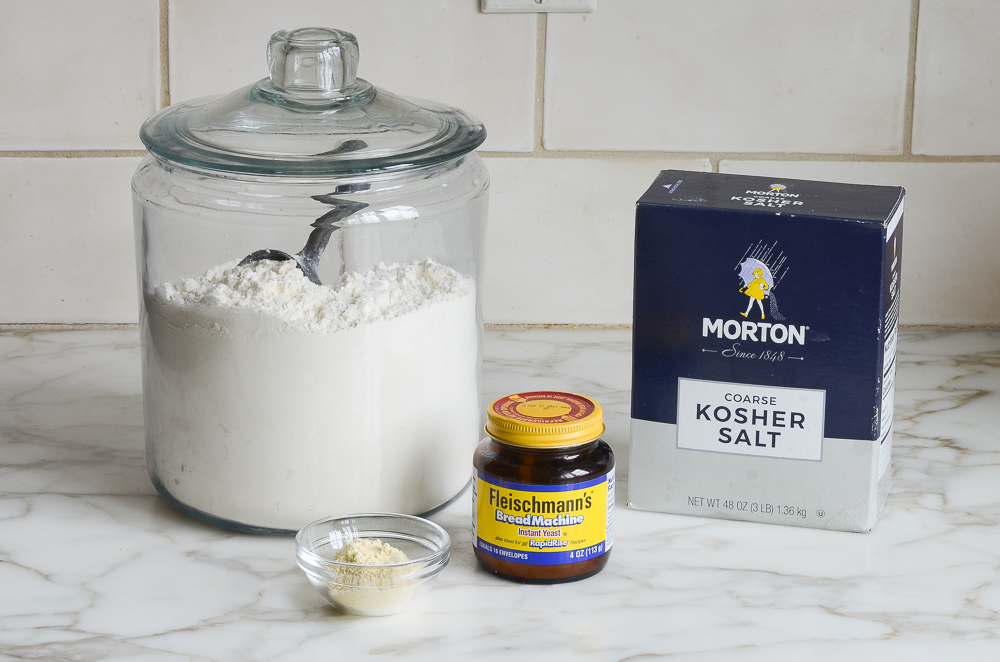
This recipe has just four ingredients: all-purpose flour, instant yeast, kosher salt, and water. (The cornmeal is for dusting the pan.) As you can see, I use instant (or rapid-rise) yeast. Active dry yeast may be used instead of instant yeast, however, the dough will take longer to rise. To give active dry yeast a boost, you can dissolve it in the lukewarm water and let it sit until frothy, about 10 minutes. After that, add it to the flour and proceed with the recipe.
How To Make Crusty Artisan Bread
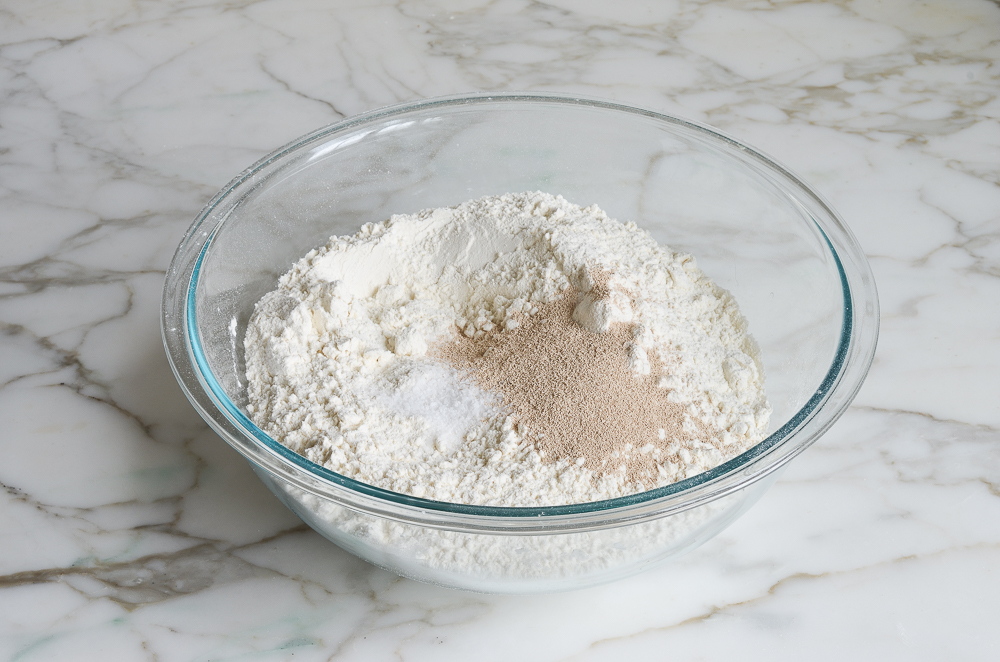
In a very large (6-quart) bowl, combine the flour, salt, and yeast. Mix to combine.
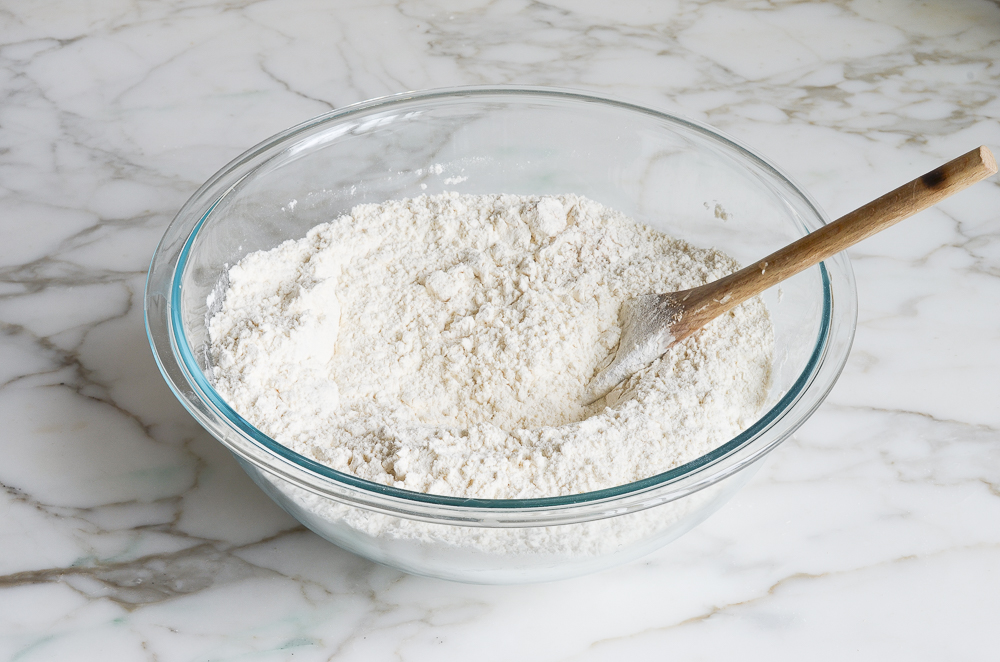
Add 3 cups of lukewarm water (no need to be exact but lukewarm is about 100°F).
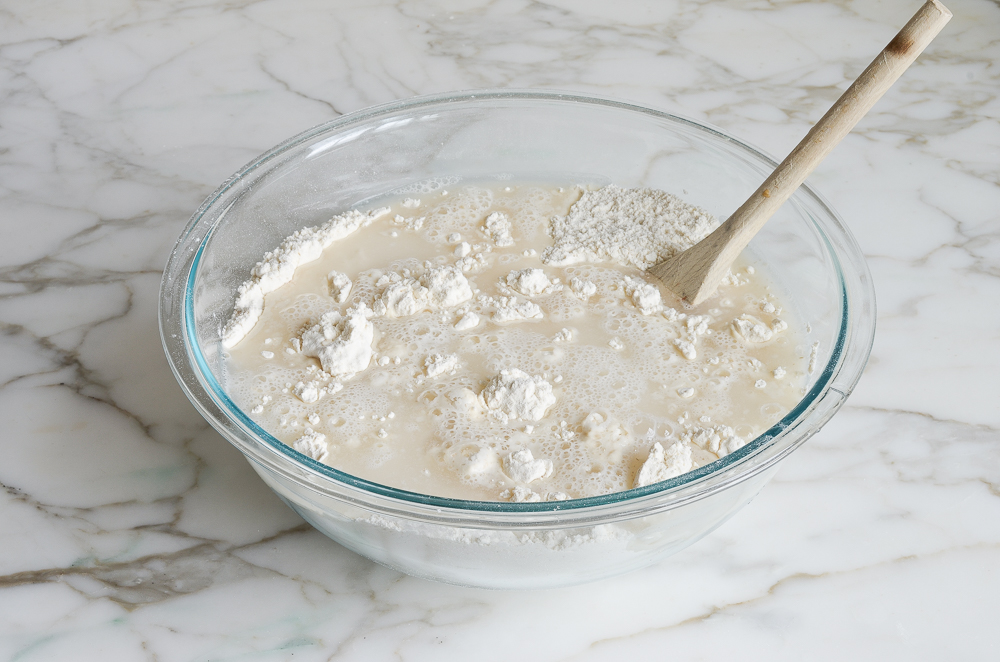
Stir with a wooden spoon until the mixture is uniformly moist, without any patches of flour.
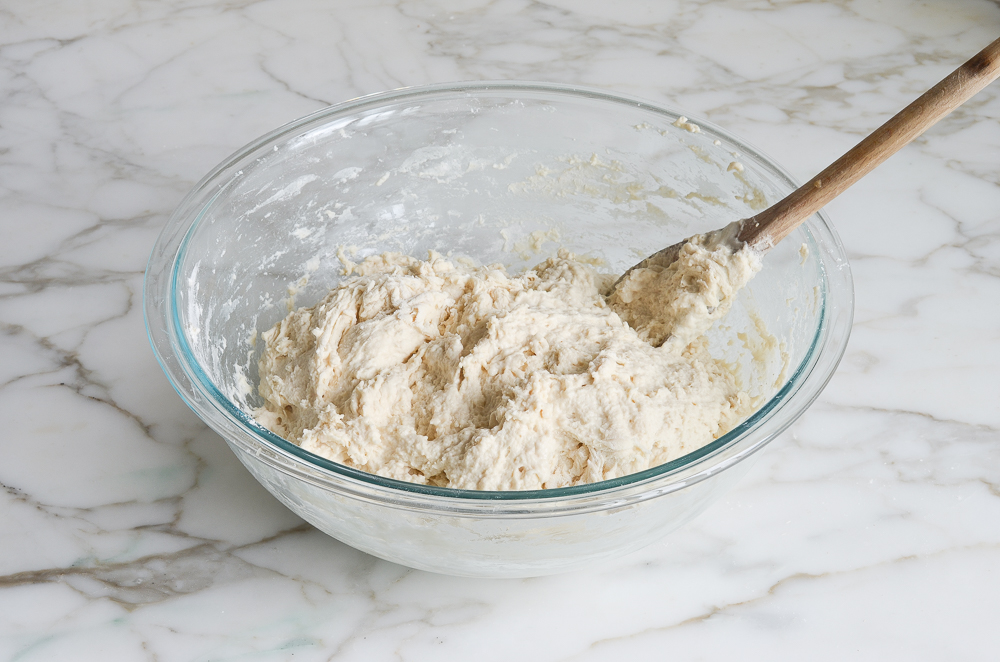
The dough should be sticky and conform to the shape of the bowl. If your dough is too dry, add a few tablespoons more warm water. If it’s too wet, add a few tablespoons of flour. Cover the bowl loosely with plastic wrap and let it sit on the counter in a warm spot for 2 hours. As you can see below, it will rise a lot!
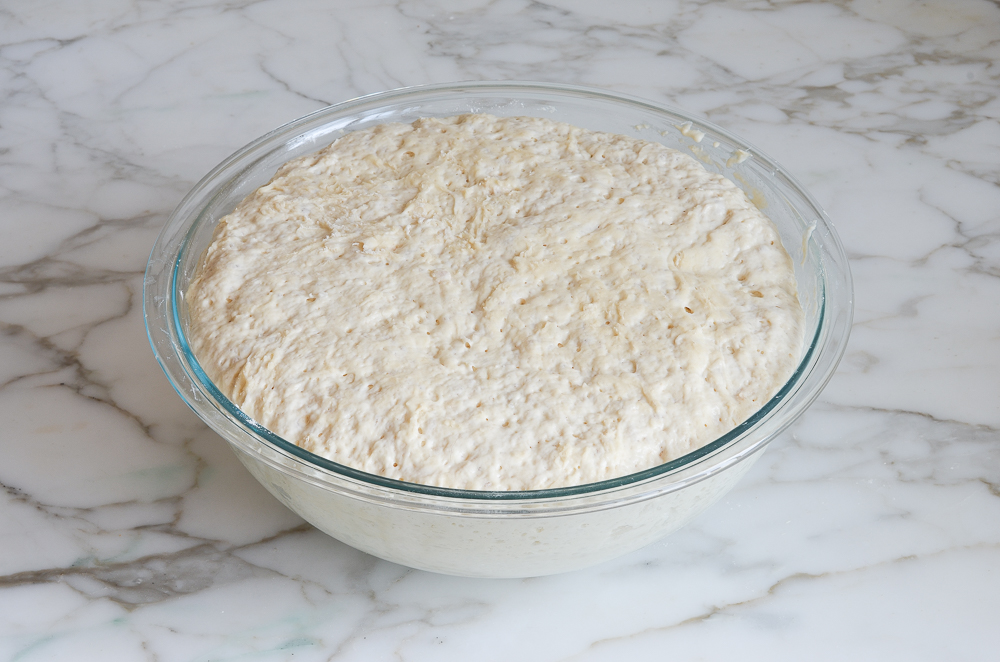
When you’re ready to bake a loaf, pull out one-third of the dough.
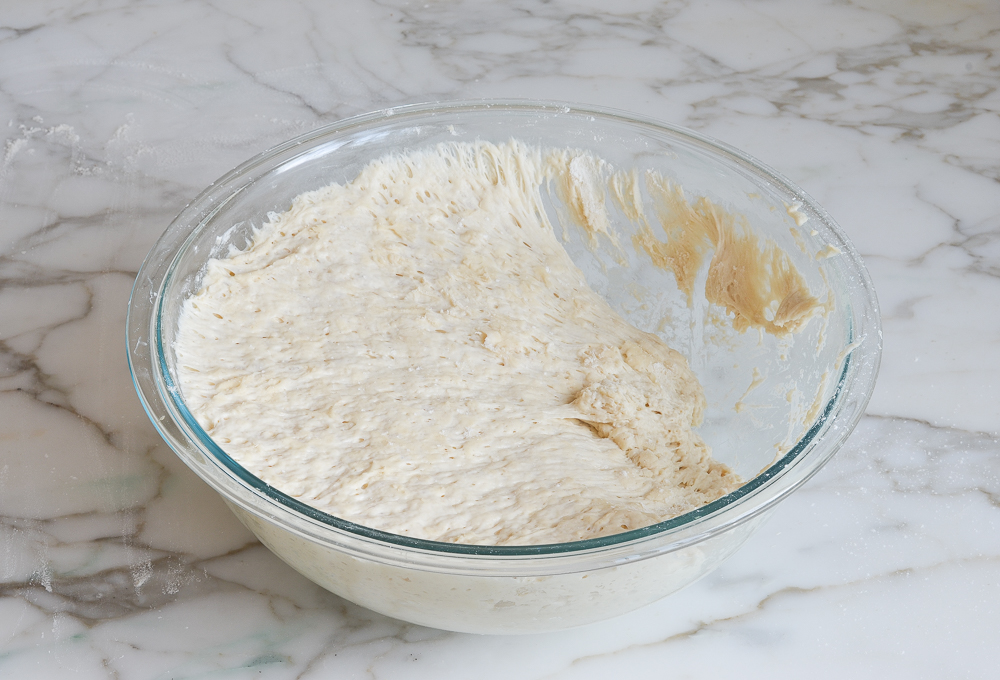
Coat the outside lightly with flour (you don’t want to incorporate more flour into the dough, you just want to be able to handle it). Gently work the dough into a smooth ball, stretching the surface and tucking the ends underneath.
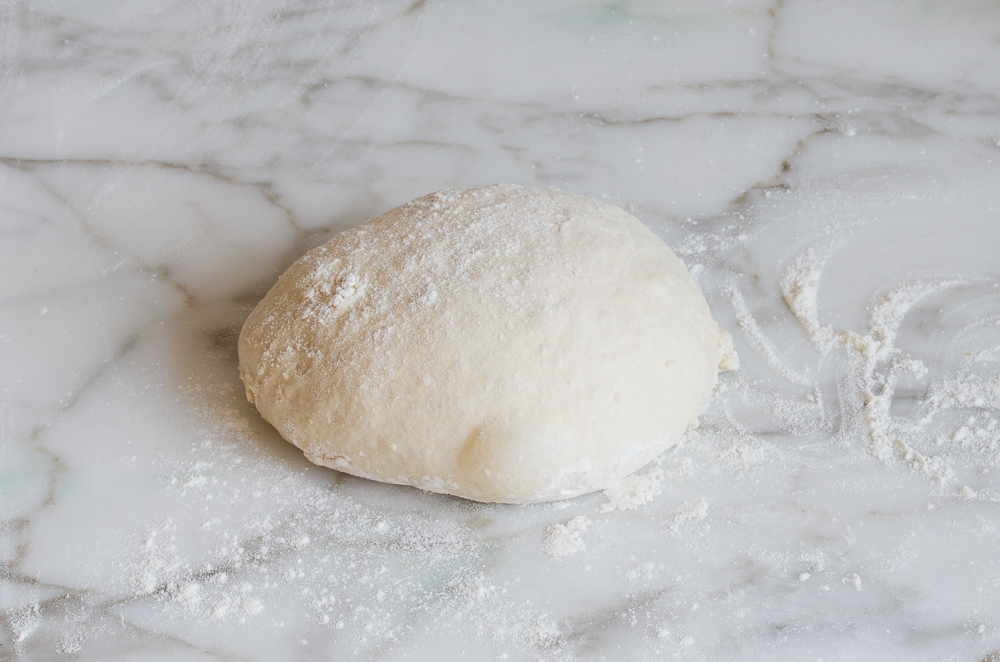
Put the dough ball onto a cornmeal-dusted baking sheet and let rest at room temperature, uncovered, for about 40 minutes. (If the dough has been refrigerated, allow it to rise for 60 minutes, or up to 90 minutes if you want a more open and airy crumb structure.) The dough will rise a bit. It may also spread/flatten a bit; that’s okay.
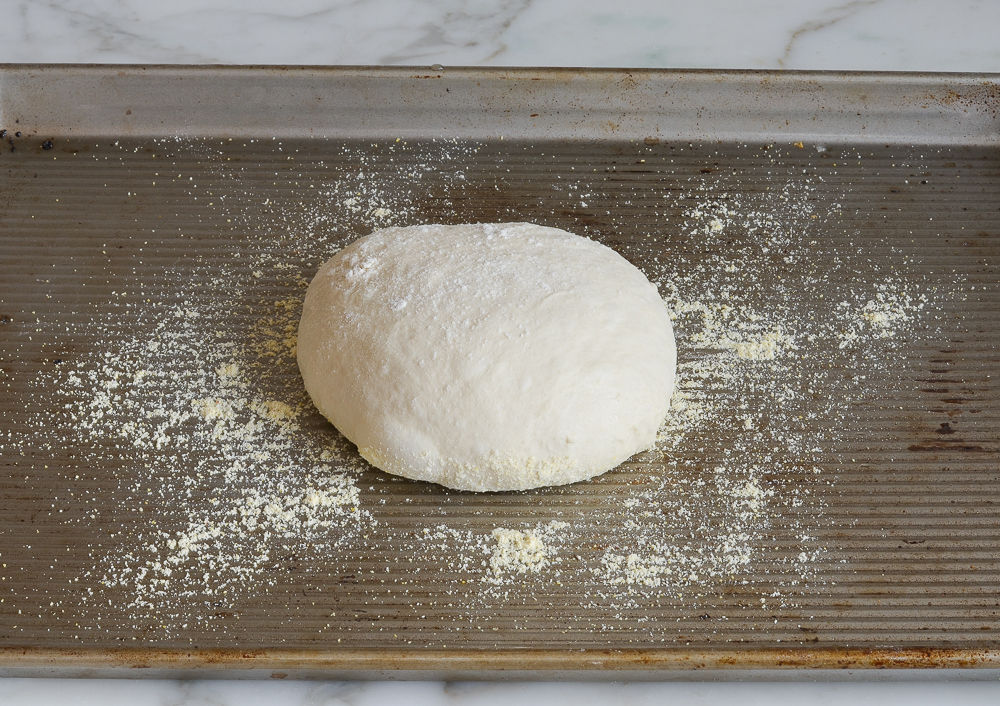
The dough will rise a bit.
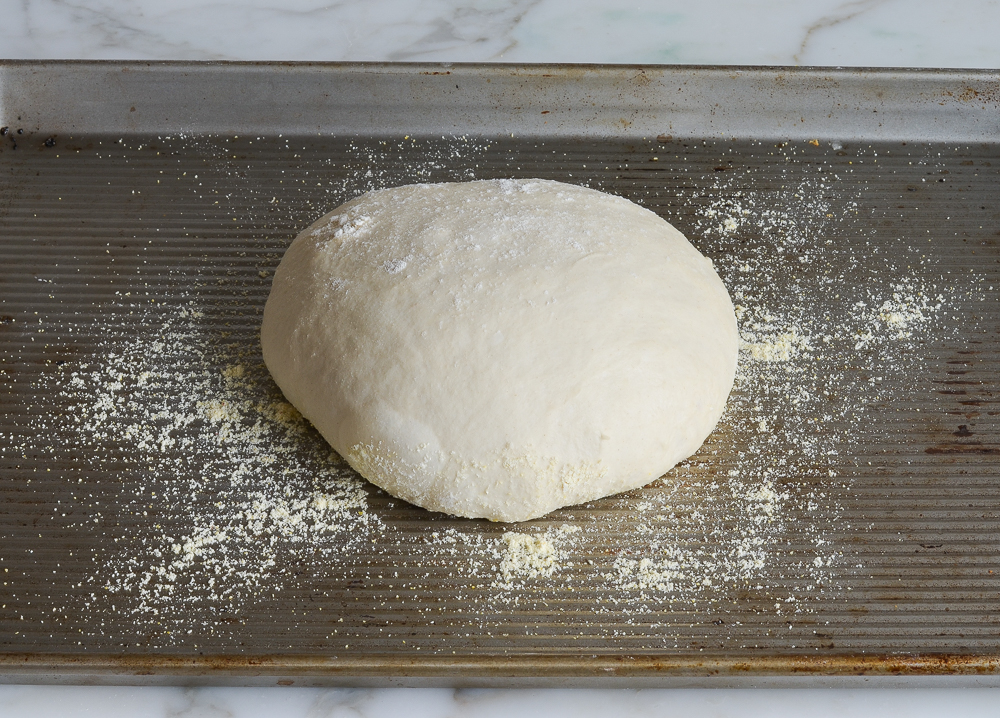
Generously dust the dough with flour. Using a sharp knife, make a few 1/2-inch-deep slashes in the dough — a scallop, cross, or tic tac toe pattern all look nice.
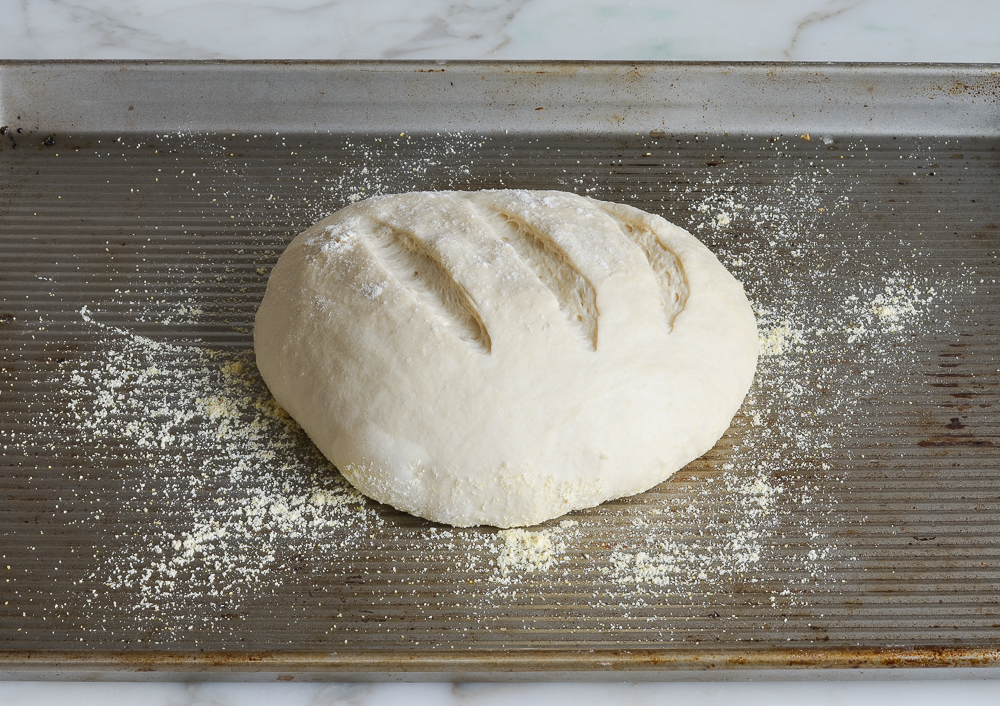
Set a metal pan on the bottom rack of a preheated 450°F-oven. Slide the baking sheet with the dough into the oven, and carefully fill the metal cake pan with one cup of hot tap water. This creates steam in the oven. (Try to do this quickly so as not to let heat out of the oven.) Bake until the loaf is golden brown, about 30 minutes. Cool completely on a wire rack.
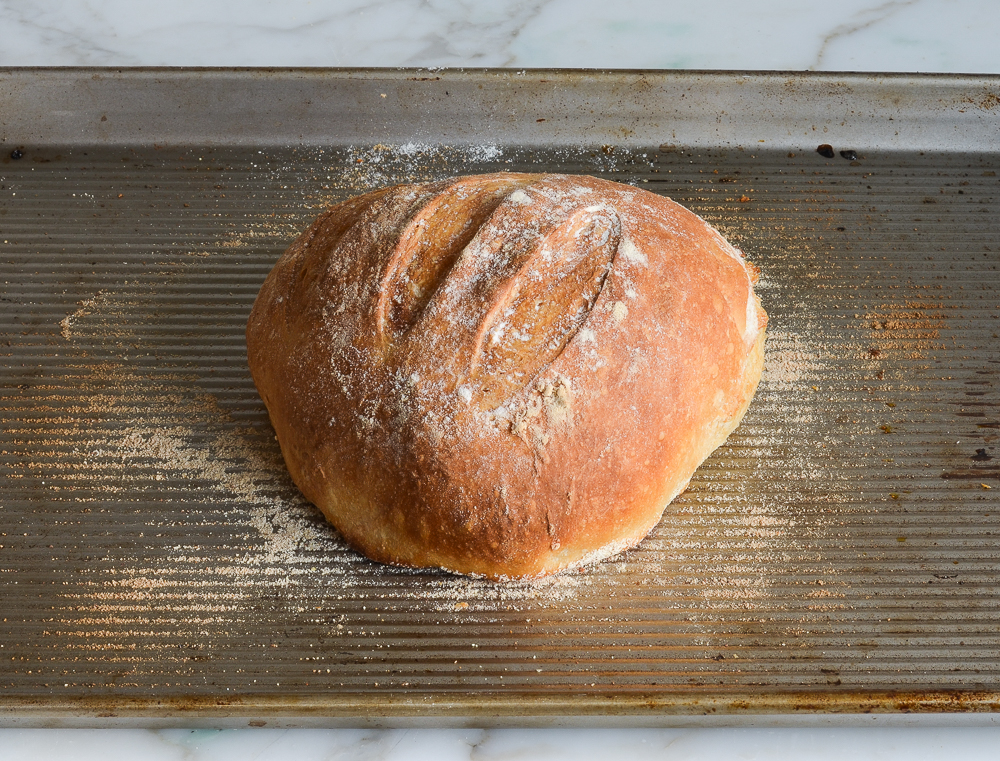
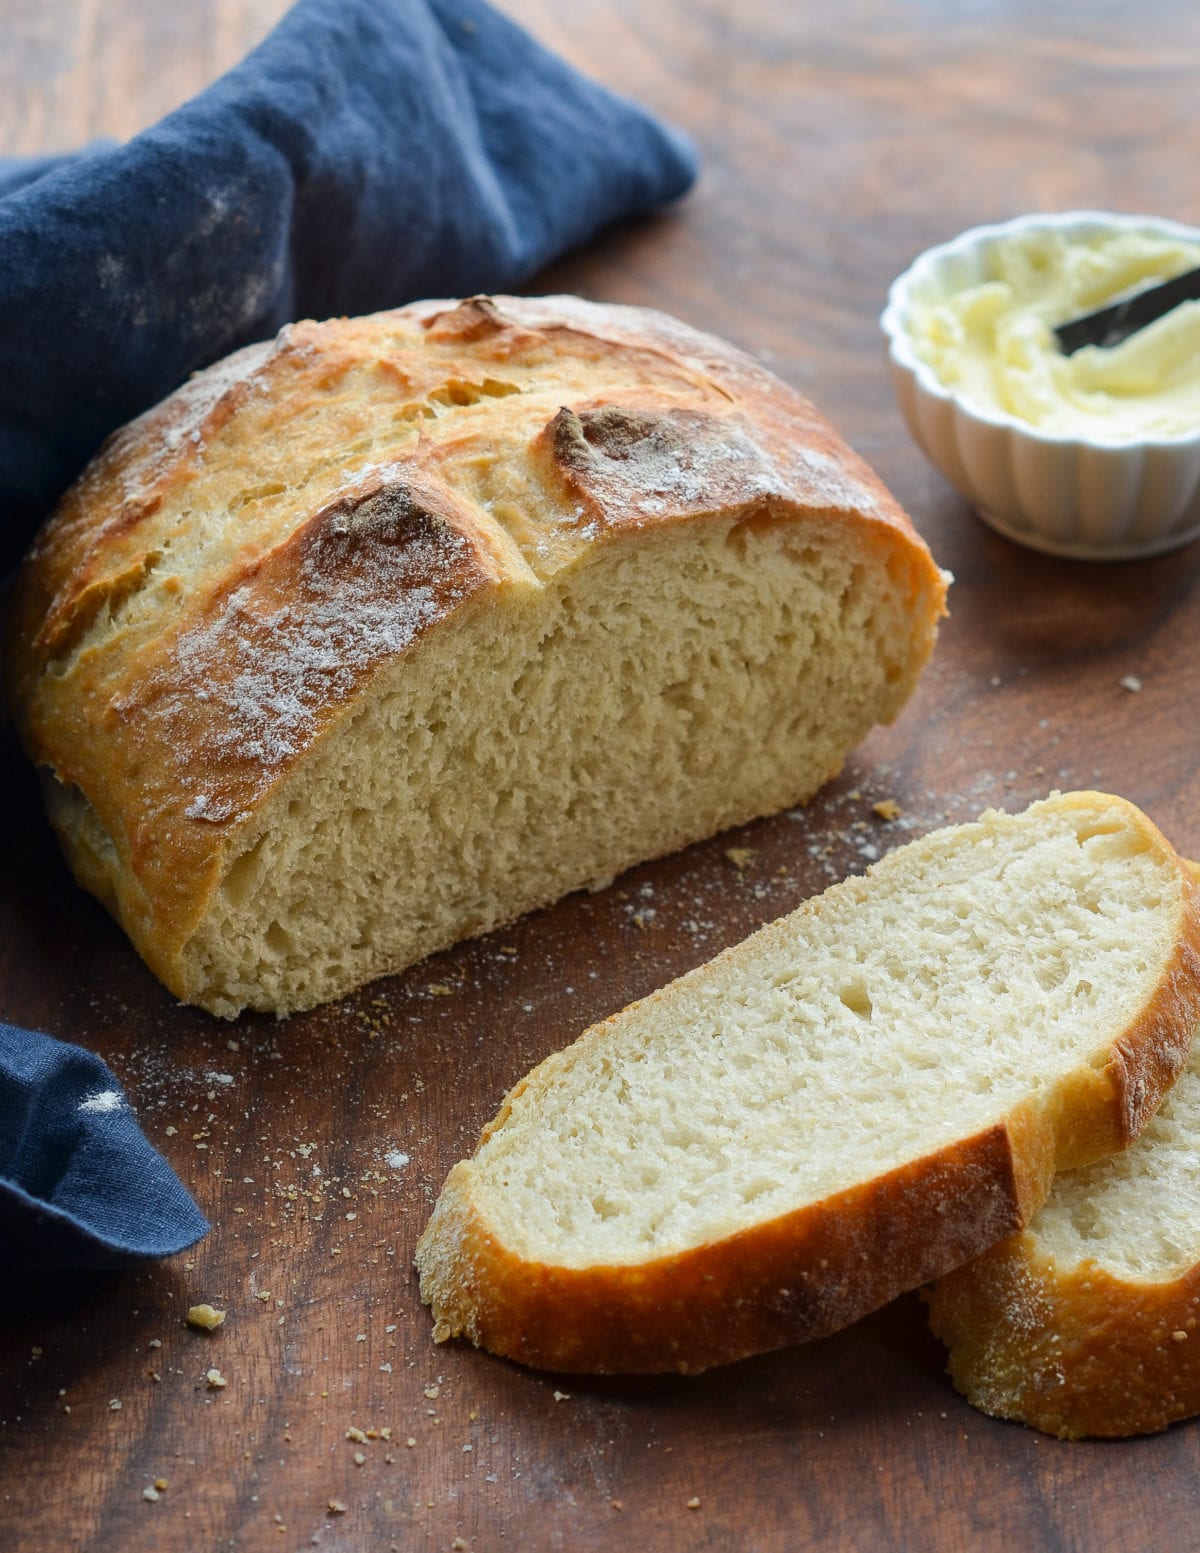
This bread is best enjoyed fresh on the day it is made. Once sliced, place the loaf cut-side down on a cutting board or plate and leave it uncovered.
How To Freeze
The dough can be portioned into thirds and frozen in airtight plastic containers for up to 1 month. Defrost the dough in the refrigerator overnight, then shape, rest and bake as usual. The baked loaves can also be frozen whole or sliced. Wrap in a zip-top freezer bag and freeze for up to 1 month. To thaw, take the bread out of the freezer and let it come to room temperature, about 3 hours. Reheat in a 350°F oven until warmed through, about 10 minutes.
You May Also Like
Crusty Artisan Bread
This crusty bread recipe is astonishingly easy—no kneading required—and makes three beautiful loaves, which you can bake as needed.
Ingredients
- 6½ cups all-purpose flour, spooned into measuring cup and leveled-off (preferably King Arthur; see note)
- 4 teaspoons kosher salt
- 1½ tablespoons instant/rapid-rise yeast (see note)
- 3 cups lukewarm water (no need to be exact but lukewarm is about 100°F)
- Cornmeal, for dusting the pan
Instructions
- In a very large (6-quart) bowl, whisk together the flour, salt, and yeast. Add the water and stir with a wooden spoon until the mixture is uniformly moist, without any patches of flour. The dough should be sticky and conform to the shape of the bowl. If your dough is too dry, add a few tablespoons more warm water. If it's too wet, add a few tablespoons of flour. (See the step-by-step photos for guidance on what the dough should look like.) Cover the bowl loosely with plastic wrap and let it sit on the counter in a warm spot for 2 hours. If you plan to bake a loaf immediately, proceed to the next step. Otherwise, place the bowl of dough in the refrigerator to be used over the next 14 days. (Once refrigerated, the dough will shrink back a bit; that's okay. Do not punch down the dough at any point, and keep it loosely covered with plastic wrap.)
- Dust a sturdy baking sheet with cornmeal.
- Dust the surface of the dough and your hands lightly with flour. Pull out one-third of the dough and coat the outside lightly with flour (you don't want to incorporate more flour into the dough, you just want to be able to handle it). Gently work the dough into a smooth ball, stretching the surface and tucking the ends underneath, adding more flour as needed so it doesn't stick to your hands. (Don't overwork the dough; this process should only take about 30 seconds.) Put the dough ball onto the prepared baking sheet and let it rest at room temperature, uncovered, for about 40 minutes. (If the dough has been refrigerated, allow it to rise for 60 minutes, or up to 90 minutes if you want a more open and airy crumb structure.) The dough will rise a bit. It may also spread/flatten a bit; that's okay.
- Preheat the oven to 450°F. Set one rack in the lowest position of the oven and one rack in the middle position. Place a metal pan (any metal cake pan or broiler pan will work; just don't use glass) on the bottom rack. (You will fill this with water later to create steam in the oven).
- Generously dust the dough with flour. Using a sharp knife, make a few ½-inch-deep slashes in the dough -- a scallop, cross, or tic tac toe pattern all look nice.
- Slide the baking sheet with the dough into the oven, and carefully fill the metal cake pan with one cup of hot tap water. (Try to do this quickly so as not to let heat out of the oven.) Bake until the loaf is golden brown, about 30 minutes. Cool completely on a wire rack.
- This bread is best enjoyed fresh on the day it is made. Once sliced, place the loaf cut-side down on a cutting board or plate and leave it uncovered. (If it lasts beyond a day, I suggest slicing and freezing.)
- Freezer-Friendly Instructions The dough can be portioned into thirds and frozen in airtight plastic containers for up to 1 month. Defrost the dough in the refrigerator overnight, then shape, rest and bake as usual. The baked loaves can also be frozen whole or sliced: Wrap in a zip-top freezer bag and freeze for up to 1 month. (If you plan to use slices one at a time, place pieces of parchment between them so they don't stick.) To thaw, take the bread out of the freezer and let it come to room temperature on the countertop. Reheat in a 350°F oven until warmed through, about 10 minutes.
- Note: Active dry yeast may be used instead of instant/rapid-rise yeast, however, the dough will take longer to rise. To give active dry yeast a boost, you can dissolve it in the lukewarm water and let it sit until frothy, about 10 minutes. After that, add it to the flour and salt, and proceed with the recipe.
- Note: I use King Arthur flour, which is higher in protein than some other all-purpose flours. If using a flour with a lower protein content, such as Gold Medal, you will likely need to add a few more tablespoons of flour.
Nutrition Information
Powered by ![]()
- Serving size: 1 slice
- Calories: 100
- Fat: 0 g
- Saturated fat: 0 g
- Carbohydrates: 21 g
- Sugar: 0 g
- Fiber: 1 g
- Protein: 3 g
- Sodium: 64 mg
- Cholesterol: 0 mg
This website is written and produced for informational purposes only. I am not a certified nutritionist and the nutritional data on this site has not been evaluated or approved by a nutritionist or the Food and Drug Administration. Nutritional information is offered as a courtesy and should not be construed as a guarantee. The data is calculated through an online nutritional calculator, Edamam.com. Although I do my best to provide accurate nutritional information, these figures should be considered estimates only. Varying factors such as product types or brands purchased, natural fluctuations in fresh produce, and the way ingredients are processed change the effective nutritional information in any given recipe. Furthermore, different online calculators provide different results depending on their own nutrition fact sources and algorithms. To obtain the most accurate nutritional information in a given recipe, you should calculate the nutritional information with the actual ingredients used in your recipe, using your preferred nutrition calculator.

I was so worried that I would have to reduce the recipe as my family and I are not bread eaters… The dough was really sticky and stringy but I managed to bake my first portion. The other portions are in the freezer! This is the best bread! Amazing texture and flavor! We ate the loaf in less than 2 days! Was just as moist on the morning after! Amazing to use to dip into olive oil and balsamic vinegar! Glad I finally tried this recipe!
Could oat flour be used?
Hi Ellen, I’ve only made this with all-purpose flour, so I can’t say confidently how it would work with oat flour (but I suspect it won’t translate well). I’m sorry I can’t be more helpful!
Jenn
I have made this bread many times now and its the best. Your suggestion to use parchment paper was right on. No more sticking to the cookie sheet. Question: I have a Kitchen Aid stand mixer. Can I use the dough hook attachment and run it on low until dough cleans the bowl and then just leave it in that metal bowl until it rises? I have been doing it by hand as you have instructed.
HI Ron, So glad you like it! this is really easy to mix by hand, but you can use a mixer if you’d prefer (and just leave it in the bowl to rise).
I have lost count how many times i have made this bread. Last week we went to the kids’ cabin.
I measured exact amounts i would need of all ingredients and took just enough of everything plus a little dusting flour. I was concerned their propane oven at the cabin would not get hot enough for bread so left it in the oven a few extra minutes. It came out of the oven looking better than at home, one side getting a little singed like it came out of an outdoor wood-burning pizza oven. We made two larger loaves (instead of three). They were the best. The grandkids (3.5 and 7) participated and devoured the finished product. I left my baking pan for them at the cabin. So cool to make fresh bread on an Island where there are no stores. There’s more. Before we went away i gave a loaf of this bread to a friend who is a chef, now retired, who does private dinners for folks just to keep active. He loved the bread and asked for the recipe. When I took to his house he had just made a loaf of rye bread. He gave me a slice and invited me to his kitchen to make rye bread, hopefully, this week. What goes around comes around!
When you mention leaving the shaped dough on the baking sheet for 40 mins, do you mean proofing or just room temp.?
Hi Mano, room temperature is fine. Hope you enjoy!
This bread is awesome! thank you!
I just made this recipe for the first time. I used a heritage all purpose flour from a small mill in town. I’ve baked bread for years, almost every other day and the photos of this bread looked so good, that I had to try it. I thought it was unrealistic that it would only require 6 and a half cups of flour for three cups of water, but I followed the directions, adding a few extra tablespoons at the first mixing so that it looked like the one in the picture. I ended up adding almost 2 more cups of flour and I then stopped hoping that it would be okay. After the 2 hour rise, there was no way that I could grab some and put it into a ball with floured hands. It was so sticky, stringy, and everything was a mess. I ended up adding almost three more cups of flour and it was still very wet but I spooned it into a bread pan, and added a couple more cups to what was left in the bowl figuring that all of this was going to be wasted..I might as well just bake all three loaves. Just took them out of the oven. The one in the bread pan looks okay, the other ones that I put on a cookie sheet are flat and wide, and are stuck to the pan. I can’t get them off. I’m letting them cool and maybe that will work. Prior to this recipe I have always greased my bread pan. I haven’t tasted the bread yet…I think it’s going to slice well and taste good, but it has been a pretty traumatic experience! 🙂 everyone else gave it 5 stars so it must be the flour that I used…but I just can’t believe how much flour it took.
I wanted to edit and change to 5 stars because the bread came out deliciously! Perfect texture and taste! Will definitely make again!
All’s well that ends well — so glad it turned out nicely! 🙂
Hi Jen,
I’m trying this loaf for the first time….it’s in the oven as I type this. I’m worried, though, because after getting an amazing first rise after 2 hours, the second rise on the baking pan (same location as the initial rise) never really materialized….I left it for a little over an hour and still nothing much. Is this normal? Thanks in advance for any tips you might have.
Hi Angela, the dough should only rise a bit during that second rise, but it can also spread or flatten a bit; it doesn’t mean you did anything wrong. How did the loaf turn out?
Thank you so much for replying. It actually came out great! My hubby and I at the whole loaf in 2 days!!! I also think these loaves may just be a smaller recipe than others I have made, which is why is looked that way. I have the other two portions of dough in the freezer and looking forward to baking them off shortly!
Glad they came out well — thanks for the follow-up! 🙂
Two days??? It’s like 2 hours at my house. We LOVE this bread.
I made this twice. First time a gooey mess. Tried again but found that when the water evaporates in this oven, the pan burns and both times set off my smoke alarm. My first time trying to bake bread but not a great success😞
Wow. I have FINALLY found the easy artisan bread recipe I’ve been looking for! And even better that it makes several loaves that I can freeze and use later! I love that the loaves are a perfect size for 2 people plus a little extra for an awesome sandwich the next day. Seriously better than any bakery bread Ive ever had! I can’t thank you enough for this recipe Jenn!
Hi! I love this recipe so much! Perfect crust and crumb texture. I am trying not to buy any bread while we are SIP and this recipe makes it so easy! Quick question, if I shape it into baguettes would it yield 3 long baguettes or 2? Also, I have a baguette pan do I need to spray the baguette pan with cooking spray? It has the holes in the bottom so just not sure…maybe place baguette pan on a baking tray so it doesn’t get too hot at the bottom?
So glad you like it! I’d think that you’d get 2 baguettes out of the dough. And, yes, I would spray the baguette pan with cooking spray. Please LMK how they turn out!