Chocolate Peanut Butter Tart

This post may contain affiliate links. Read my full disclosure policy.
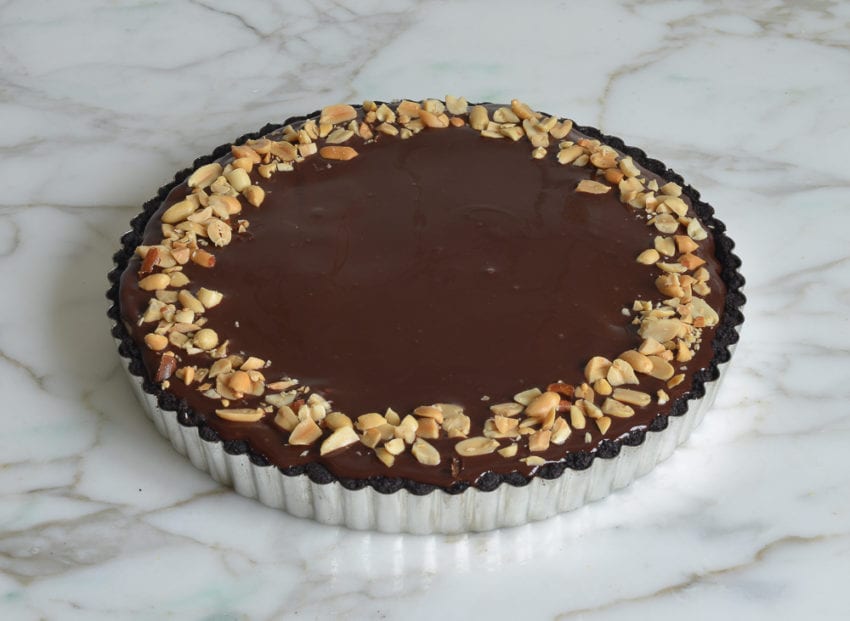
Think of this chocolate peanut butter tart as a grown-up version of a Reese’s Peanut Butter cup.
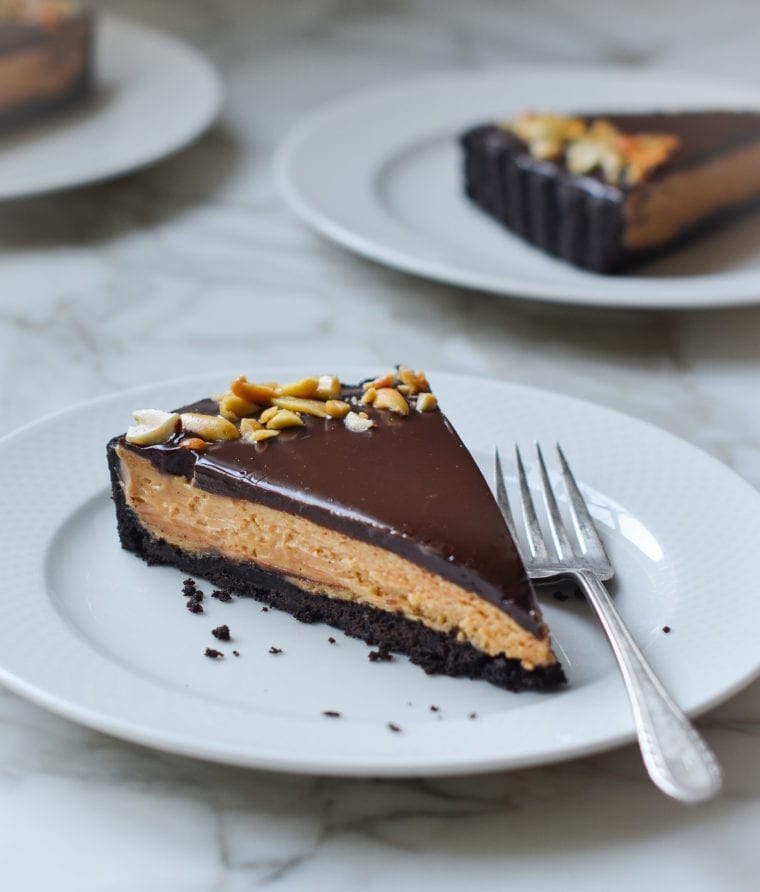
Whenever I’m in need of a decadent “wow” dessert, I make this quick-bake chocolate peanut butter tart modestly adapted from Food & Wine. With a chocolate wafer crust, rich peanut butter filling, and silky chocolate ganache topping, it tastes like a grown-up Reese’s Peanut Butter Cup. To get the pretty fluted edges, you’ll need a tart pan with a removable bottom, which you can find at any kitchen store or online (my local hardware store even sells them). If you don’t have one, you can also use a springform pan.
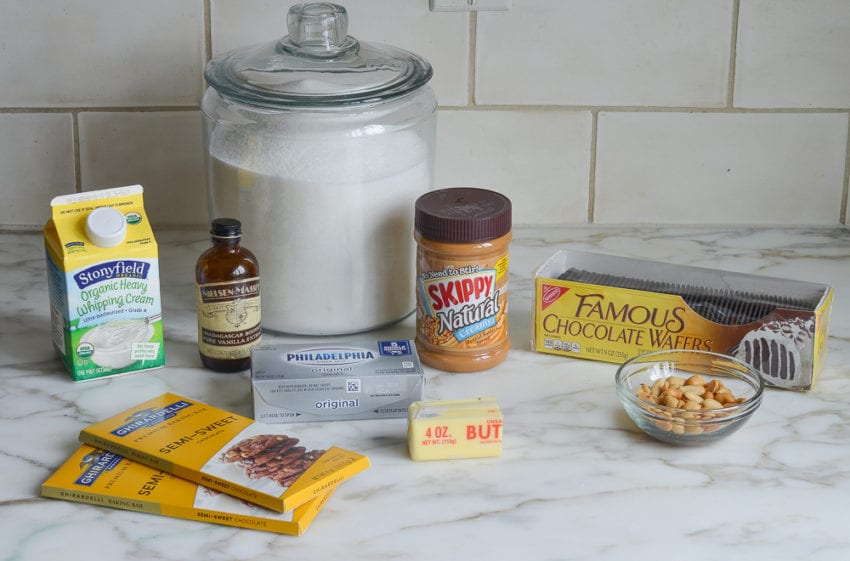
What you’ll need to make a chocolate peanut butter tart
How to make a chocolate peanut butter tart
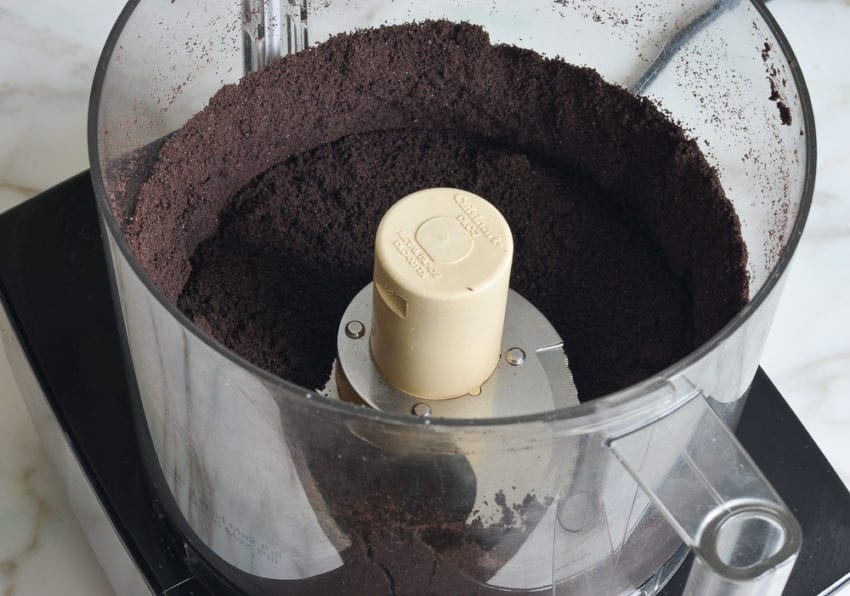
Begin with the crust. Place the chocolate wafers in a food processor fitted with the steel blade.
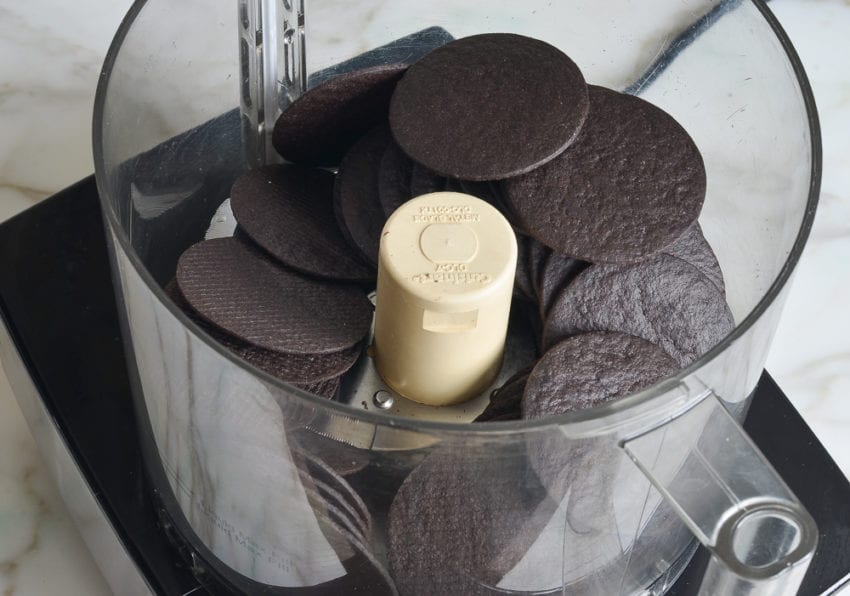
Process until the cookies are finely ground and set aside.
In a medium microwave-safe bowl, melt the butter. Add the chocolate pieces.
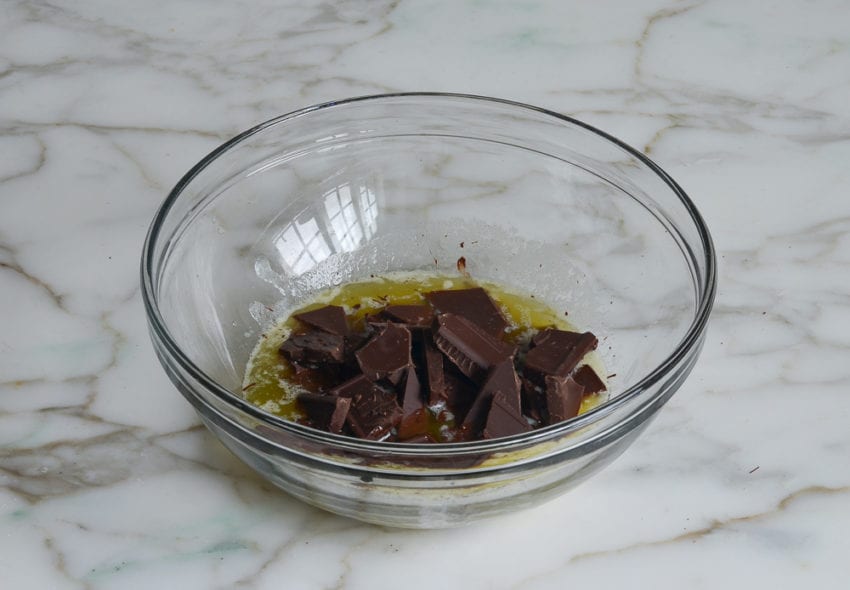
Stir until melted. (If necessary, place the bowl back in the microwave for 20 to 30 seconds.)
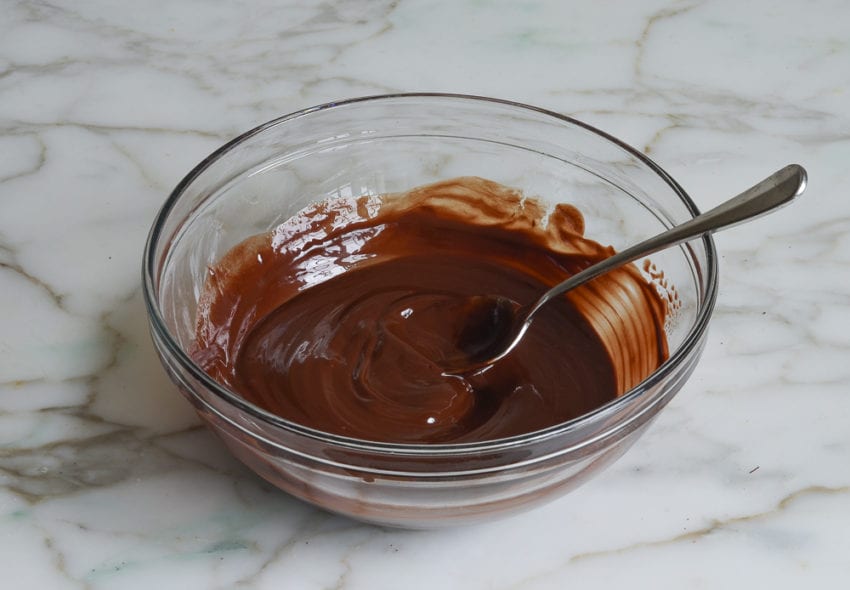
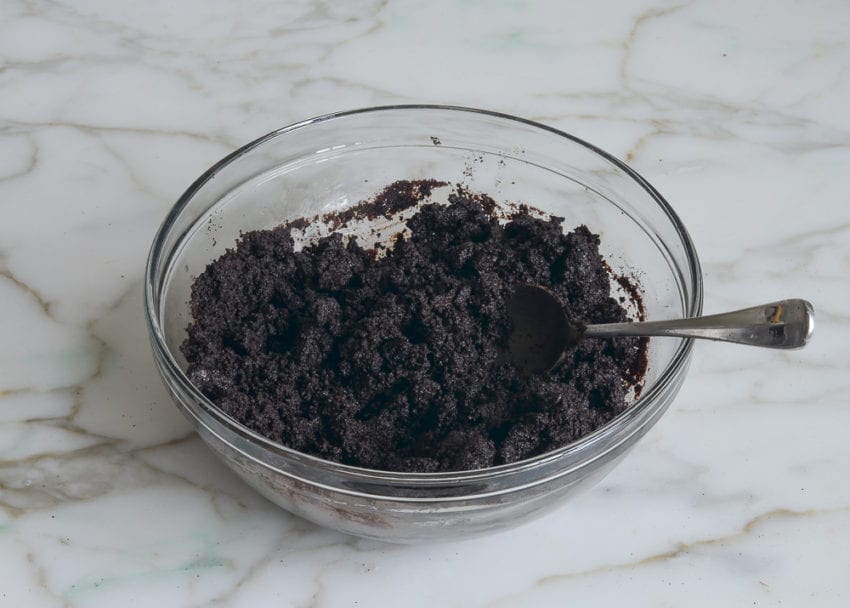
Add the cookie crumbs and stir until evenly combined.
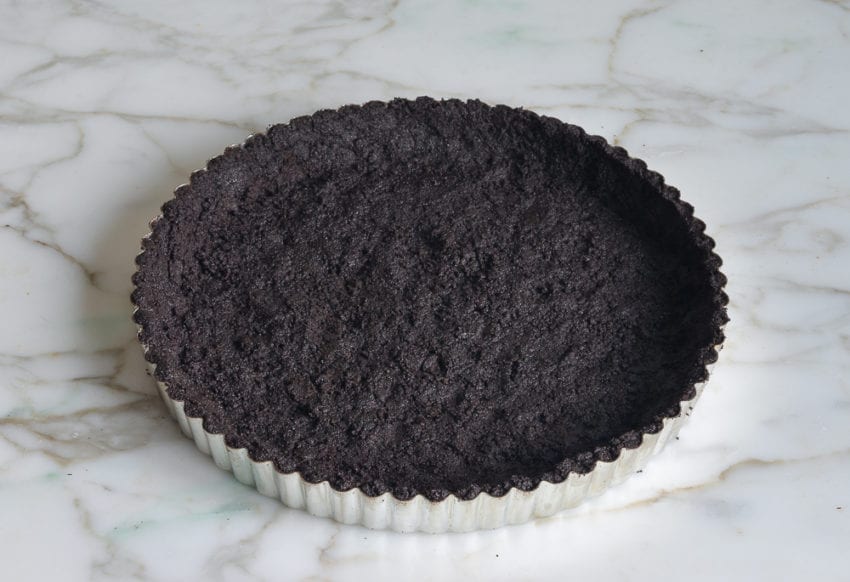
Press the cookie crumbs evenly over the bottom and up the rim of a 10-inch tart pan with a removable bottom. Bake the crust for 10 minutes, then cool on a rack.
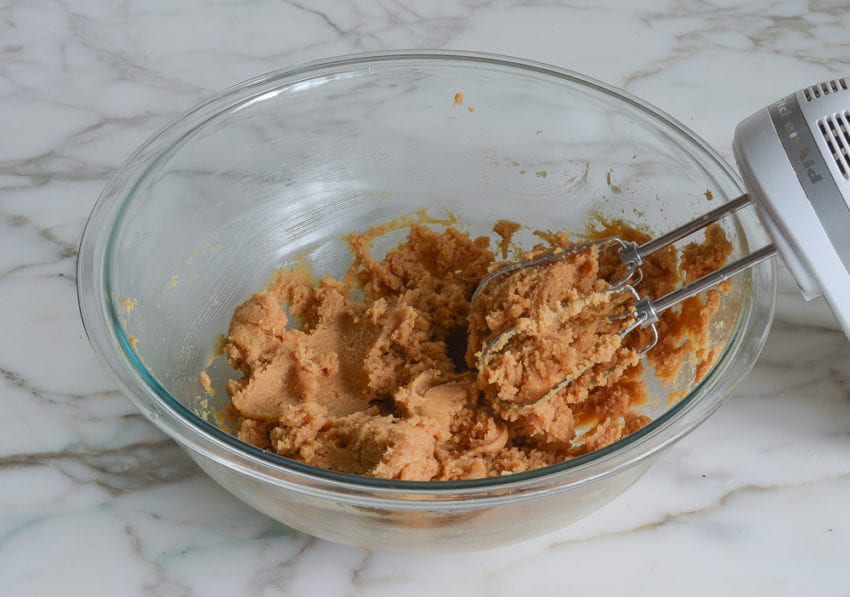
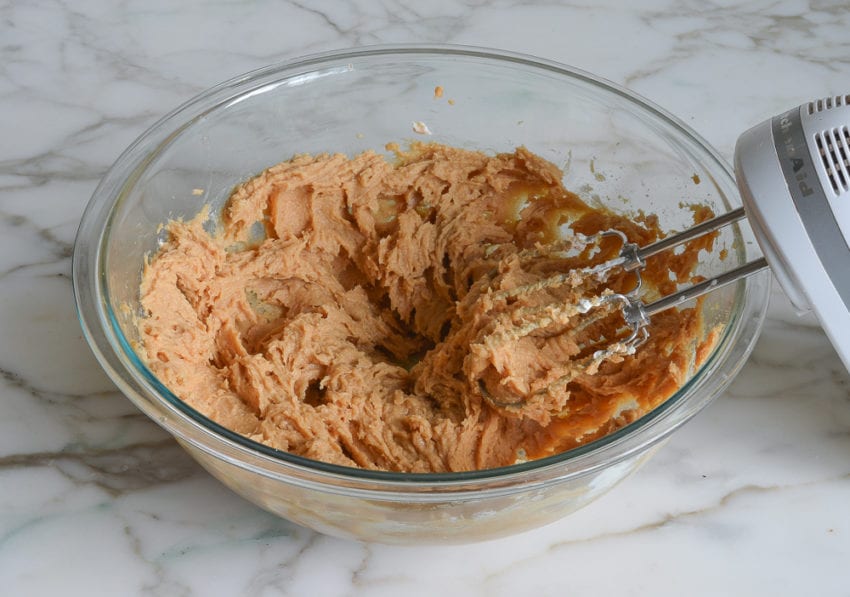
Meanwhile, make the peanut butter filling: In a large bowl of an electric mixer, combine the the cream cheese with the peanut butter, sugar and vanilla extract.
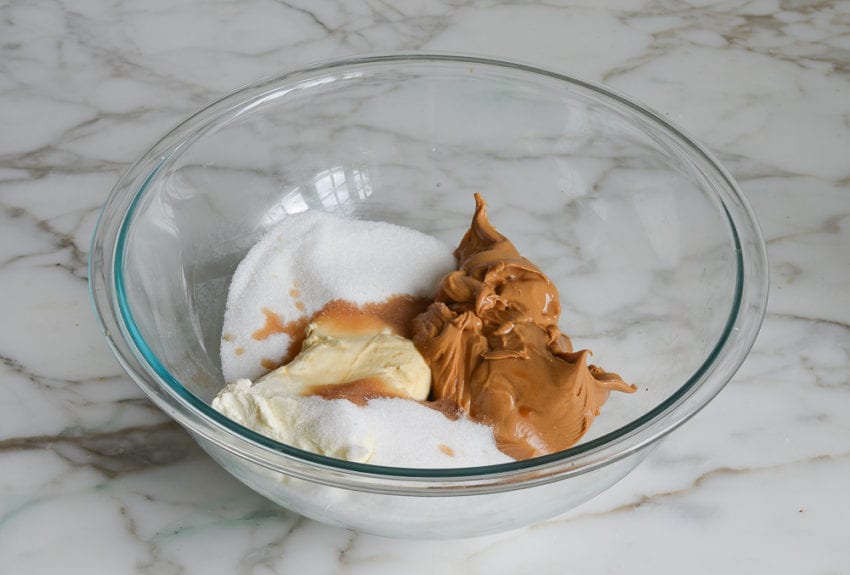
Beat on medium speed until well-blended, a few minutes.
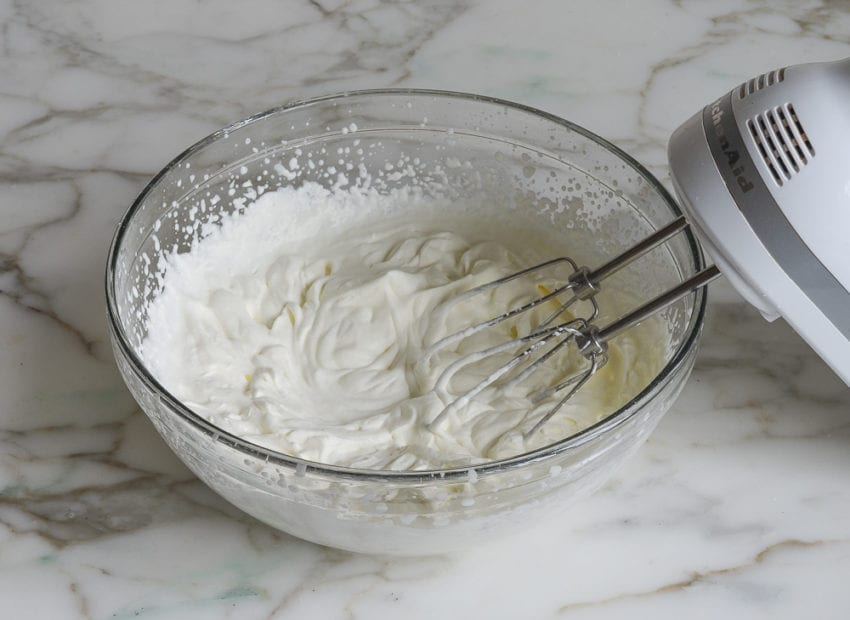
In another large bowl, using an electric mixer, whip the cream until stiff peaks form.
Add one-third of the whipped cream to the peanut butter mixture.
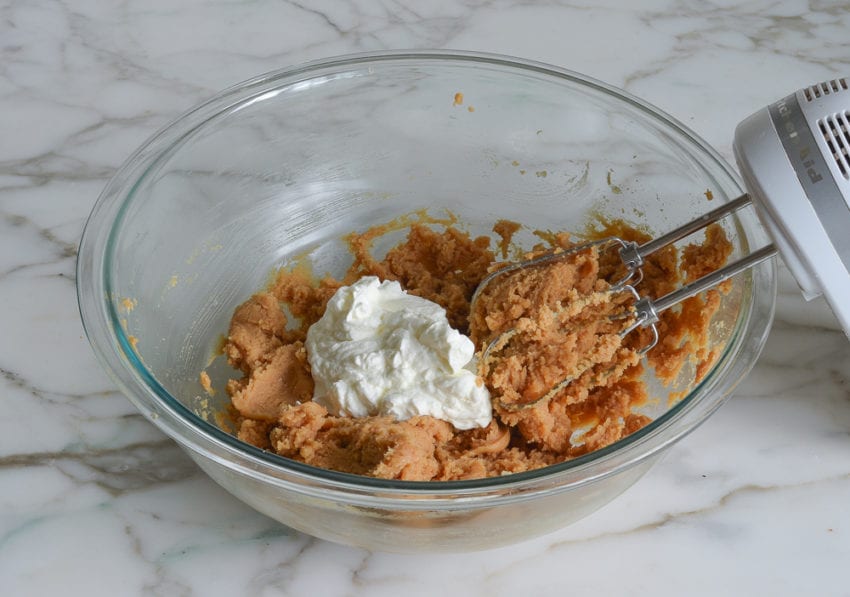
Beat on low speed to combine.
Add the remaining cream.

Using a large rubber spatula, fold until evenly combined.
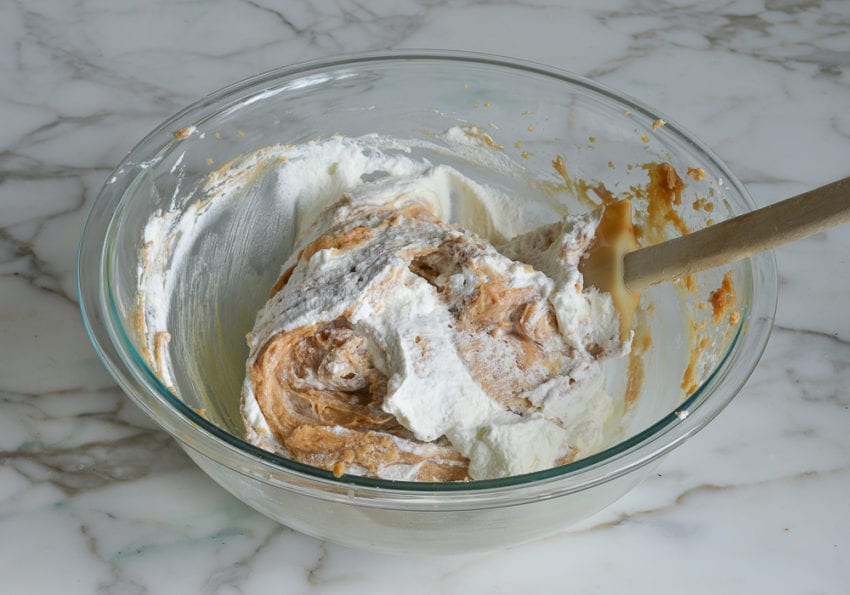
The filling should be nice and light.
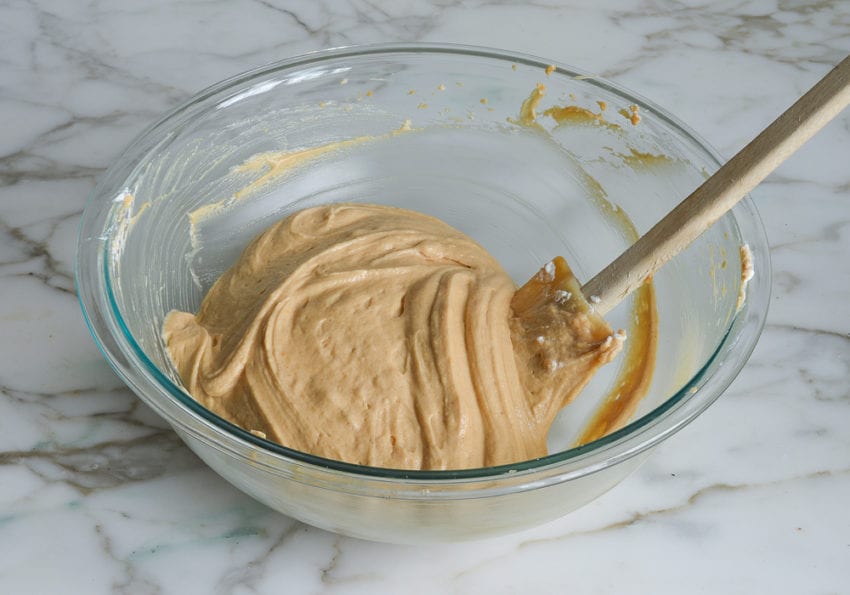
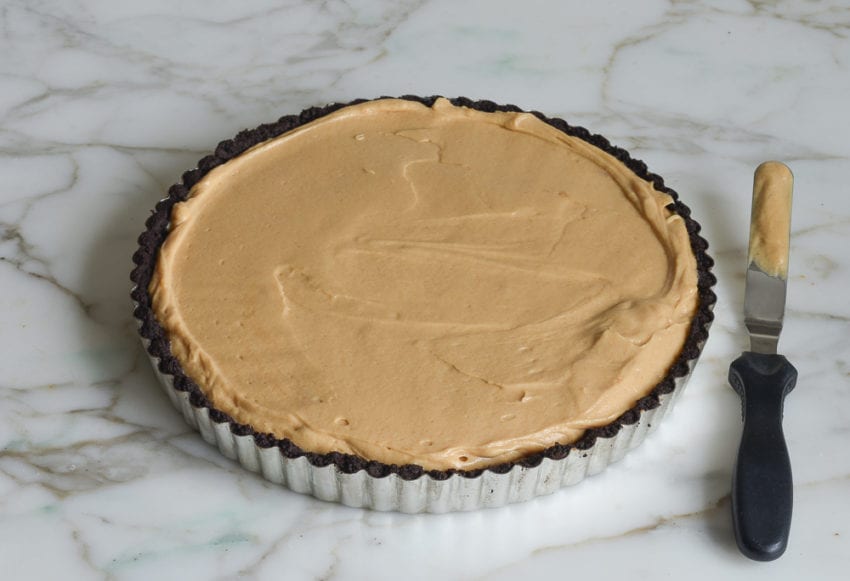
Spoon the filling into the crust.
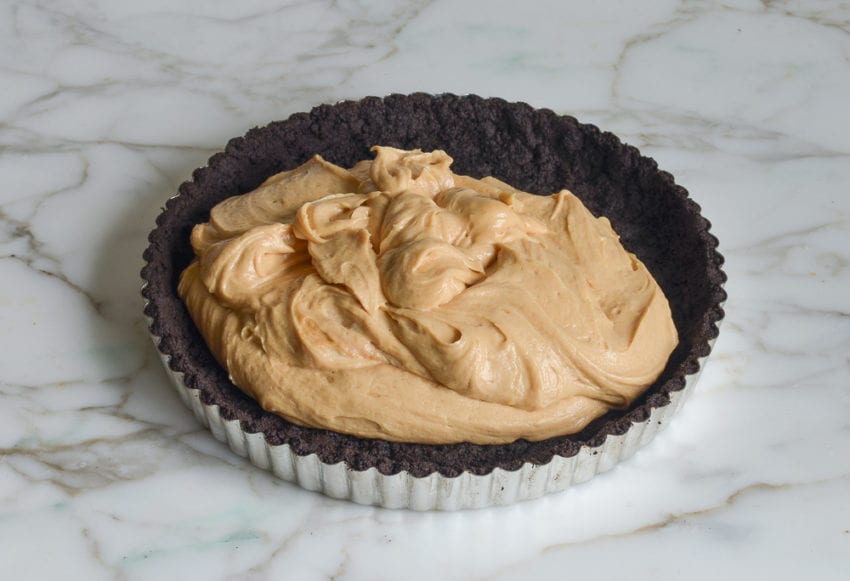
Smooth the surface and refrigerate, uncovered, for about 1 hour.
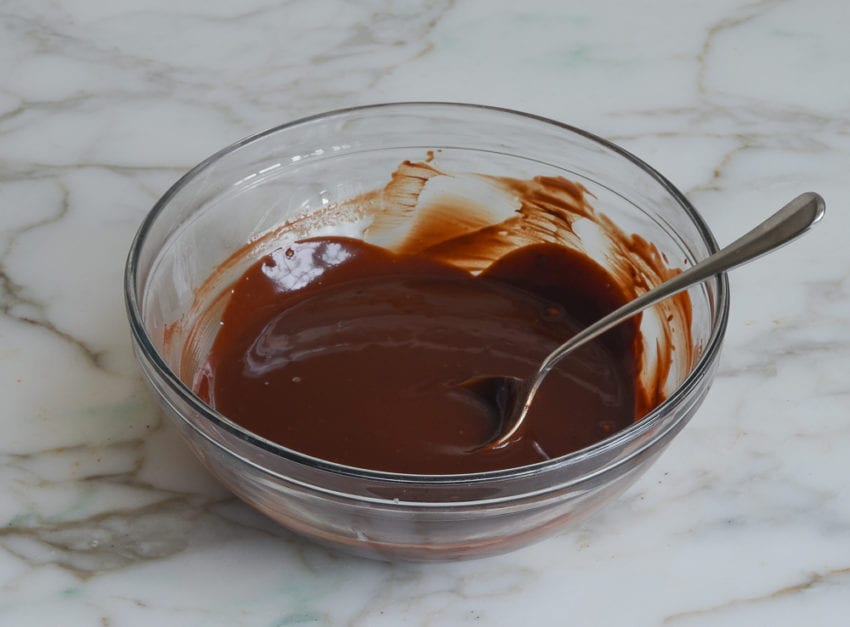
Once the pie has cooled, make the chocolate topping. In a medium microwave-safe bowl, combine the chocolate with the heavy cream.
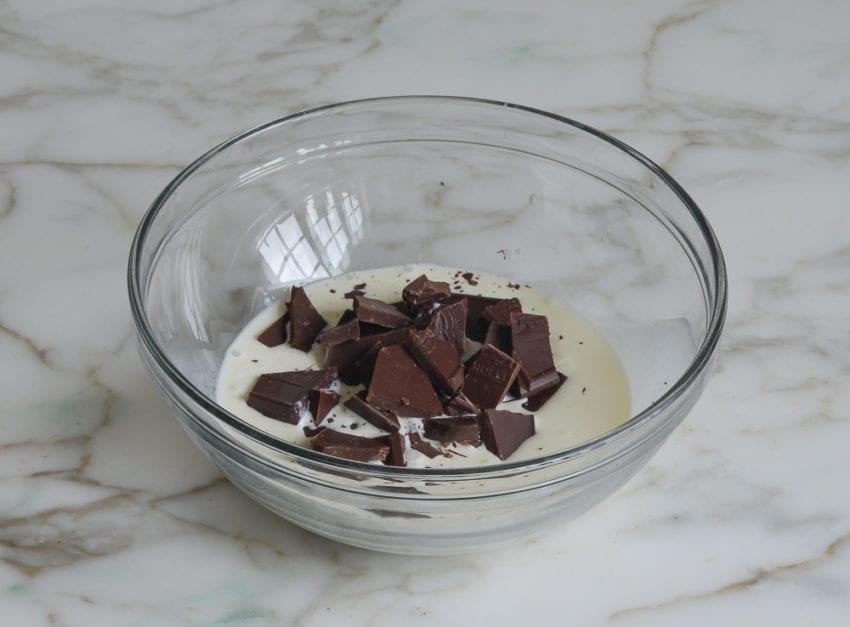
Microwave at high power in 20-second intervals until the chocolate is just melted and the cream is hot. Stir until well blended, then let cool until barely warm, stirring occasionally.
Spread the chocolate topping over the chilled peanut butter filling.
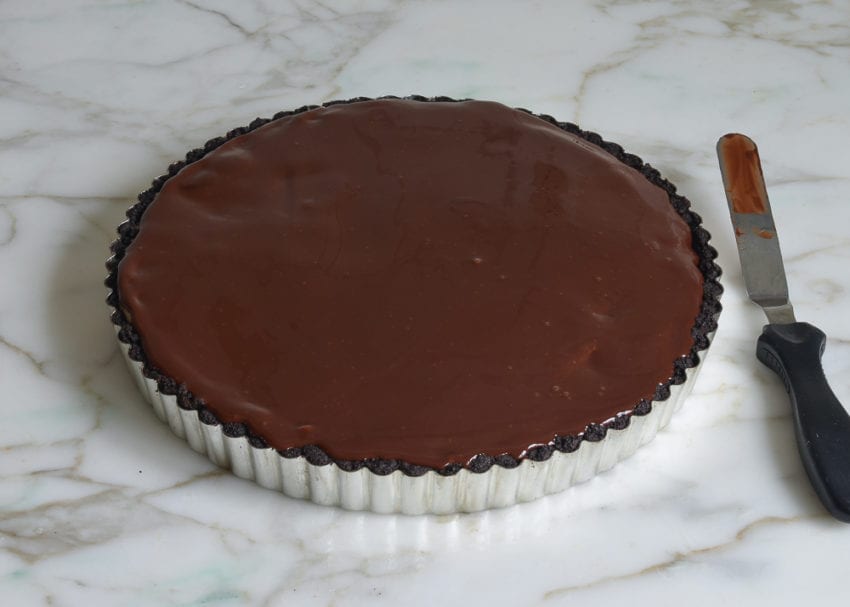
Sprinkle the chopped peanuts around the edges of the pie.
Chill, uncovered, in the refrigerator for 3 more hours.
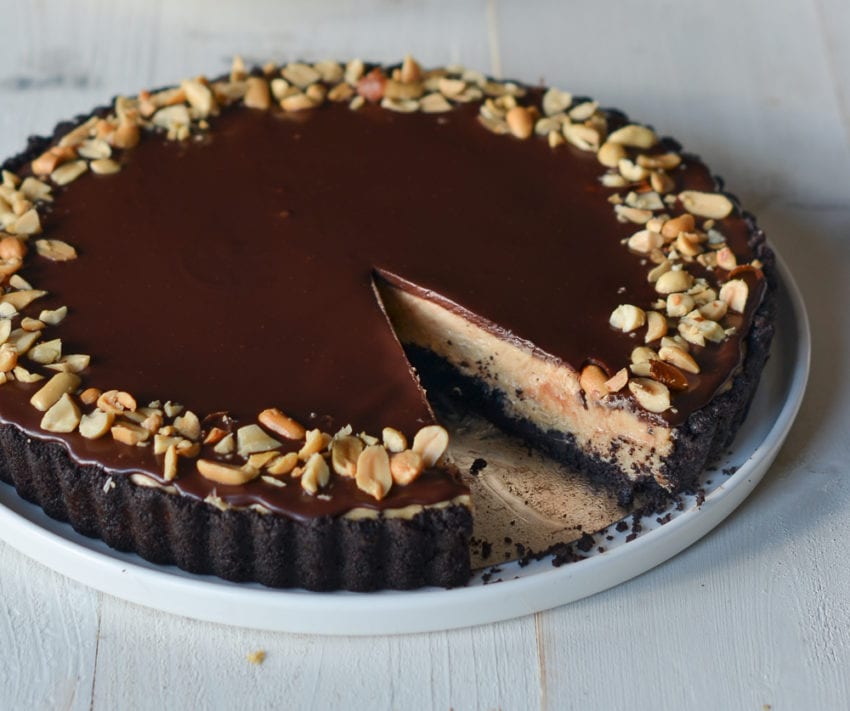
To serve, carefully remove the rim from the pan by gently pressing upwards on the bottom while holding the rim in place. (If using a springform pan, run a thin knife around the crust to loosen it, then remove the springform ring.) Use a sharp knife to cut the pie into wedges. Wipe the knifer clean between each cut. Serve chilled.

You may also like
- Chocolate Peanut Butter Squares
- Chocolate Peanut Butter Icebox Cake
- Chocolate Tart
- Buckeyes
- Peanut Butter Pie
Chocolate Peanut Butter Tart
Think of this chocolate peanut butter tart as a grown-up version of a Reese’s Peanut Butter cup.
Ingredients
For the Crust
- 4 oz semisweet chocolate, chopped (best quality, such as Ghirardelli)
- 4 tablespoons unsalted butter, cut into tablespoons
- 2 cups cookie crumbs from Oreo baking crumbs, Dewey’s Brownie Crisp Cookies, Oreo Thins (no need to remove the cream), or Nabisco Chocolate Wafers
For the Peanut Butter Filling
- 8 oz cream cheese, at room temperature
- 1 cup smooth peanut butter (I use Skippy Natural)
- 1 cup sugar
- 2 teaspoons vanilla extract
- 1 cup cold heavy cream
For the Topping
- 4 oz semisweet chocolate, chopped (best quality, such as Ghirardelli)
- ½ cup heavy cream
- ¼ cup salted roasted peanuts, chopped
Instructions
- Make the chocolate crust: Preheat the oven to 375°F. In a medium microwave-safe bowl, melt the butter. Add the chocolate and stir until melted. (If necessary, place the bowl back in the microwave for 20 to 30 seconds.) Add the cookie crumbs and stir until evenly combined. Press the cookie crumbs evenly over the bottom and up the rim of a 10-inch tart pan with a removable bottom (see note below). Bake the crust for 10 minutes, then cool on a rack.
- Meanwhile, make the peanut butter filling: In a large bowl of an electric mixer, beat the cream cheese with the peanut butter, sugar and vanilla extract on medium speed until well-blended, a few minutes. In another large bowl, using an electric mixer, whip the cream until stiff peaks form. Add one-third of the whipped cream to the peanut butter mixture and beat on low speed to combine. Add the remaining cream and, using a large rubber spatula, fold until evenly combined. Spoon the filling into the crust, smoothing the surface. Refrigerate, uncovered, for about 1 hour.
- Make the chocolate topping: In a medium microwave-safe bowl, combine the chocolate with the heavy cream and microwave at high power in 20-second intervals until the chocolate is just melted and the cream is hot. Stir until well blended, then let cool to barely warm, stirring occasionally. Spread the chocolate topping over the chilled peanut butter filling and sprinkle the chopped peanuts around the edges of the pie. Chill, uncovered, in the refrigerator for 3 more hours.
- To serve: Carefully remove the rim from the pan by gently pressing upwards on the bottom while holding the rim in place. (If using a springform pan, run a thin knife around the crust to loosen it, then remove the springform ring.) Use a sharp knife to cut the pie into wedges. Wipe the knife clean between each cut. Serve chilled.
- Make-Ahead Instructions: This pie can be made a day ahead, then covered and refrigerated until ready to serve.
- Note: You can find a tart pan with a removable bottom at any kitchen shop or online. However, if you can’t your hands on one, you can also use a 10-inch springform pan and bring the crust about 1 inch up the rim (or for a 9-inch springform pan, bring the crust about 1-½ inches up the rim).
Nutrition Information
Powered by ![]()
- Per serving (10 servings)
- Calories: 703
- Fat: 50 g
- Saturated fat: 24 g
- Carbohydrates: 60 g
- Sugar: 46 g
- Fiber: 4 g
- Protein: 12 g
- Sodium: 221 mg
- Cholesterol: 76 mg
This website is written and produced for informational purposes only. I am not a certified nutritionist and the nutritional data on this site has not been evaluated or approved by a nutritionist or the Food and Drug Administration. Nutritional information is offered as a courtesy and should not be construed as a guarantee. The data is calculated through an online nutritional calculator, Edamam.com. Although I do my best to provide accurate nutritional information, these figures should be considered estimates only. Varying factors such as product types or brands purchased, natural fluctuations in fresh produce, and the way ingredients are processed change the effective nutritional information in any given recipe. Furthermore, different online calculators provide different results depending on their own nutrition fact sources and algorithms. To obtain the most accurate nutritional information in a given recipe, you should calculate the nutritional information with the actual ingredients used in your recipe, using your preferred nutrition calculator.
I made this and WOW!! One of my favorite tart recipes. Easy to follow and came out delicious!
I bake and cook from scratch daily and this dessert is in my “Top 5” for all time favorite desserts. Amazing and everyone loves it.
AWESOME! I’ve been meaning to review recipes on this site as they are great. I’ve been making this recipe for a couple of years now and everyone raves about it. It doesn’t hurt that looks great but tastes even better and very creamy, not heavy at all. Looks like it came from a high end bakery!
Literally perfect.
I love to cook and bake and am always trying new recipes I find online but I rarely comment/review but I made an exception for this recipe. It was one of the best thing’s I’ve ever made! My son who is somewhat of a foodie and does not like pie proclaimed this was one of the best desserts he ever had and I agree! It was perfect. Can’t wait to make it again. Thank you!
This recipe was insanely good! I cheated and used store bought Oreo cookie crust because I was making your Beef Stew and couldn’t put it in at the same time to bake the crust because the temps are different and I didn’t want to mess anything up. Next time I will bake the crust the NIGHT before and refrigerate overnight. That’s the only advice I have to make this recipe work better—serve it right out of the fridge because it cuts so nicely on day 2. Otherwise it’s perfect! Every one of the recipes I’ve made from your site and your book have knocked it out of the park! Thank you Jen for making me finally start to enjoy cooking and hosting parties because I am always confident when I am making one of your recipes.
I’d love to make this for my in-laws Christmas but my sister-in-law is allergic to wheat. Any suggestions for a gluten free chocolate wafer to use in the crust?
Hi Bethanie, I’ve never made a gluten-free version of this, but one reader commented that she used Pamela’s chocolate cookies for a gluten-free option. Hope you enjoy if you make it!
U can also use gluten free Oreos (with cream scraped out), which r pretty easy to find, and delicious!
Sure!
Looking for something different for Thanksgiving I made this recipe and it was beyond delicious. Rich chocolate ganache, light peanut butter middle, crunchy chocolate crumb crust, completely indulgent and heavenly. Thank you!!! I did add a bunch of chocolate to the topping to make it thicker, mine was milky thin til I doubled the chocolate.
Is the whipped cream more for texture than taste? I was thinking of using almond milk whipped cream. 2 family members can’t have dairy and another can’t have coconut. My family’s dietary restrictions have made family dinners much more complicated. :/
Hi Cassie, I’ve never tried this with something like almond milk whipped cream but I suspect it should work. And yes, it’s primarily for the texture, not the taste (just to add some lightness). Please LMK how it turns out if you try it!
This is out of this world good and the presentation makes it look pretty fancy. One of my favorites to make and serve as it looks impressive but is so easy to make.